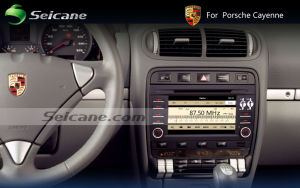
How to upgrade 2005 2006-2010 Nissan PATHFINDER Radio to touch screen bluetooth DVD player

Before the installation, first show you the Seicane 2005-2010 Nissan PATHFINDER Radio.
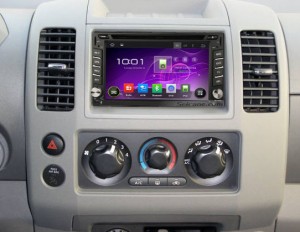
2005-2010 Nissan PATHFINDER Radio after installation

Nissan PATHFINDER is absolutely good. In order to improve the in-car environment, most owners of Nissan PATHFINDER upgrade their factory radio. If you want to get a new aftermarket radio and replace your factory radio, you’d better read this essay patiently. Some of you may think it’s too hard to remove the factory radio, or some of you have already tried and failed. To be honest, This Nissan PATHFINDER Radio is easy remove. The new aftermarket radio in waving to you. And what are you waiting for? Here is professional instruction.


Some safety notes

1)Please apply the parking brake before the upgrade.

2)Please disconnect the negative cable on the vehicle battery to ensure security.

3)Please prepare tools for the upgrade. A lever and a screwdriver are needed.

4)Please protect the front seats and trim panel during upgrade.

2005-2010 Nissan PATHFINDER Radio installation

1)Disconnect the cable running to the negative battery terminal by loosening the nut on the cable clamp and pulling the cable off the negative terminal.

2)Remove the two screws above the Nissan PATHFINDER Radio opening with the head screwdriver.

2005-2010 Nissan PATHFINDER Radio installation step 1

3)Pull the radio trim panel off. You may need to wedge a flat tip screwdriver under the trim and pry up on it to remove the trim. Use a clean rag to protect the trim from being accidentally scratched while prying up on the trim.

2005-2010 Nissan PATHFINDER Radio installation step 2

4)Remove the four screws holding the radio in place using a head screwdriver and pull the radio out.

2005-2010 Nissan PATHFINDER Radio installation step 3

5)Disconnect the radio antenna in the back of the radio and unplug the electrical plugs running to the back of the radio.

2005-2010 Nissan PATHFINDER Radio installation step 4


Of course,there may have other situations.You’d better ask some professionals for help at the first time.If the steps of radio ramoval are too difficult to you,you should go to a car radio shop to remove your factory radio.


Some of you may haven’t got a suitable aftermarket radio for your Nissan PATHFINDER.Here is a good aftermarket car radio I want to share with you.It has many useful functions,such as bluetooth,3D navigation,car DVR and so on.More about this unit:

http://www.seicane.com/android-hd-1024-600-touch-screen-radio-gps-navigation-system-for-2005-2010-nissan-pathfinder-with-bluetooth-dvd-player-mirror-link-obd2-rearview-camera-dvr-tv-3g-wifi-usb-sd-ipod-1080p-video-s166226

You can dial, answer, reject and mute calls without taking your hands off the steering wheel. And you can perform Google search on the road with quick search box, play online games, watch videos, download online data and check emails by connecting to any WiFi hotspot in range or 3g internet, download any applications in the android market for access to games, Skype, MSN, YouTube, twitter, E-Book, Gmail etc and so on. So, have fun with your new Nissan PATHFINDER Radio.

Guides of 2006 2007-2010 Toyota Terios Radio installation

Look at this image, this is Seicane 2006-2010 Toyota Terios Radio after installation.

2006-2010 TOYOTA Terios Radio after installation

Install a new aftermarket radio on your car is a good choice. And now, it becomes a popular trend among most people. Have a better in-car environment, start by install a new aftermarket radio. Here are some professional instructions of Toyota Terios Radio installation. But if you didn’t install a radio before, you’d better do it with the help of a professional technician in case of some irreparable damage is being made.


If you have the same dashboard with the picture shows, you can follow the instructions below.


Precautions before installation:

1.Before you begin any work, remember to disconnect negative power cable to avoid danger

2.Please turn off your car series include the radio unit and park your car well.

3.Before connecting, please make sure the ignition is off to avoid short circuit and connect the yellow and res cable at last.


2006-2010 Toyota Terios Radio installation

1)First remove two trim panels at each side of center console and set it aside.

2006-2010 TOYOTA Terios Radio installation step 1

2)Remove the top panel and set it aside.

2006-2010 TOYOTA Terios Radio installation step 2

3)Remove 4 screws holding the unit with a Phillips screwdriver.

2006-2010 TOYOTA Terios Radio installation step 3

4)Gently take out the panel on the radio interface.

2006-2010 TOYOTA Terios Radio installation step 4

5)Then take out the radio and disconnect cables at back of it.

2006-2010 TOYOTA Terios Radio installation step 5

6)Connect the cables on the new head unit as the user manual shows and place them well.

7)Put the new head unit into the dash.

8)Turn on the new head unit and have a comprehensive check if it works well.

9)Install 4 screws back to their original position.

10)Check whether the unit is working without problem.

11)If everything is OK, make trim panel back on your new Seicane radio.


By the way, you should make sure whether the aftermarket radio fits your car before installation, and here is a good aftermarket radio of Seicane which fits Toyota Terios well:

http://www.seicane.com/seicane-s126002-all-in-one-android-4-4-4-radio-gps-navigation-system-for-2006-2010-toyota-terios-with-800-480-touch-screen-bluetooth-3g-wifi-dvd-player-steering-wheel-control-aux-mirror-link-obd2

This Toyota Terios Radio GPS Navigation System For 2006 2007 2008 2009 2010 TOYOTA Terios is equipped with the most advanced Android 4.4.4 version and 1.6 GHz Cortex A9 Quad-core CPU to process the database and information with smoother performance. The unit comes with worldwide real-time navigation function of high accuracy and digital touch screen is ideal for the navigation system and other operation. Besides, you will keep enjoyable all the way with a variety of entertainment options supported by this unit, such as DVD, CD, VCD, MP3, MP4, radio, Ipod, etc.If you are uncertain if it works with your car, please send a picture of your dashboard and the year and the model of your car to [email protected].

How to install a 2003-2011 Porsche Cayenne car stereo with GPS navigation DVD player

When you find your factory radio can’t be compatible with quite a few up-to-date features which are used in a car stereo, it’s a good idea to replace it with a modern aftermarket car stereo with a number of practical and entertainment capabilities. If you own a 2003-2011 Porsche Cayenne, to install a new 2003-2011 Porsche Cayenne car stereo with comprehensive features will definitely bring you an extraordinary driving experience.

2003-2011 Porsche Cayenne car stereo after installation

Installing a new 2003-2011 Porsche Cayenne car stereo into your vehicle is actually a quite easy job for some car owners. You can finish it in half an hour if you have some related experience. However, if you don’t know how to do, you can take the following guide as the reference or ask a professional for help.


Precautions before the removal and the installation:

1) Please park your car well and disconnect the negative cable of the battery for your safety.

2) Please prepare a lever and a screwdriver before the removal and the installation.


The step-by-step instruction on how to remove and install a 2003-2011 Porsche Cayenne car stereo is as follows.


  1. Pry out the trim piece along the perimeter of the center dashboard with a lever.

    2003-2011 Porsche Cayenne car stereo installaion step 1
    2003-2011 Porsche Cayenne car stereo installaion step 1
  2. Remove 2 screws holding the stereo in the dashboard frame (green arrows). Please note that there will be four screws in the cars with navigation.

    2003-2011 Porsche Cayenne car stereo installation step 2
    2003-2011 Porsche Cayenne car stereo installation step 2
  1. Carefully take the factory stereo out of the dash. When removing the factory radio, please note that there are two locking tabs on the lower tray that can break easily.

    2003-2011 Porsche Cayenne car stereo installation step 3
    2003-2011 Porsche Cayenne car stereo installation step 3
  2. Here is a close-up of the underside of the stereo. These two plastic fingers (green arrows) fit into the tabs on the top edge of the lower tray.

    2003-2011 Porsche Cayenne car stereo installation step 4
    2003-2011 Porsche Cayenne car stereo installation step 4
  3. Press the tab (green arrow) on the antenna lead and pull it out of the stereo.

    2003-2011 Porsche Cayenne car stereo installation step 5
    2003-2011 Porsche Cayenne car stereo installation step 5
  4. Pull out the connectors at the back of the stereo (green arrows). Note that some cars may have different setups based on the vehicle’s different years.

    2003-2011 Porsche Cayenne car stereo installation step 6
    2003-2011 Porsche Cayenne car stereo installation step 6
  5. Connect the cables of the new Seicane car stereo according to the guidance of the user manual.
  6. Connect the connectors and the antenna at the back of the new radio.
  7. Put the new Seicane car stereo back into the dash.
  8. Install two screws and trim piece.
  9. Turn on the new radio and have a comprehensive test.


The above is the detailed instruction of the removal and the installation of a 2003-2011 Porsche Cayenne car stereo. Wish you can get help from it. If you still have any problem, you can turn to your dealer for help.


To upgrade your car radio with success, the most important thing is that you buy a right car stereo which can perfectly fit your car. Here I’d like to share an amazing 2003-2011 Porsche Cayenne car stereo from Seicane for you as a reference.


http://www.seicane.com/car-dvd-player-for-porsche-cayenne-with-gps-radio-tv-bluetooth-srd-8816


This intelligent car stereo specially for 2003-2011 Porsche Cayenne is running on the WINCE 6.0 CORE operation system to provide a stable and smooth performance. One of its stunning highlights is that it can support the optic fiber decoder. If your car comes with optic fiber Bose and the year is 2005-2011, this decoder can be installed into your car to support your original car’s optic fiber Bose system, and the sound is in high quality. The installation of the decoder is very easy and is just plug and play. On the other hand, if your car comes without optic fiber Bose system, then this unit is plug and play and is very easy to install.


With a large 7 inch multi-touch screen, you can easily operate the navigation on the unit to get to your desired destination. You won’t get lost any more with the intelligent route planning and the text-to-speech guidance. To ensure safety, you can simply pair with your compatible mobile phone for hands-free calls. Bluetooth audio streaming is desirable for you to relax on the way. Just take this amazing 2003-2011 Porsche Cayenne car stereo to have a brand new driving experience right now!

How to install a 2005 2006-2011 KIA rio Radio with navigation dvd touch screen

Go back to your home with new KIA rio is so exciting. After few months’ driving, you can find out factory radio of KIA rio can not meet all your needs. If you want to use more great functions, the best solution is install a new aftermarket raio. Now you can read this essay patiently. Here are some professional instructions of KIA rio Radio installation. But if you didn’t install a radio before, you’d better do it with the help of a professional technician in case of some irreparable damage is being made.

Before installation, look at the picture of Seicane 2005-2011 KIA rio Radio after installation.

2005-2011 Kia rio Radio after installation

If you have the same dashboard with the picture shows, you can follow the instructions below.


Precautions before installation:

1.Before you begin any work, remember to disconnect negative power cable to avoid danger.

2.Please turn off your car series include the radio unit and park your car well.

3.Before connecting, please make sure the ignition is off to avoid short circuit and connect the yellow and res cable at last.


2005-2011 KIA rio Radio installation

1)Pry off the trim panel with a pry tool.

2005-2011 Kia rio Radio installation step 1

2)Remove the trim panel and disconnect cables at the back of it.

2005-2011 Kia rio Radio installation step 2

3)Remove 4 screws holding the unit with a Phillips screwdriver.

2005-2011 Kia rio Radio installation step 3

4)Gently take out factory radio.

2005-2011 Kia rio Radio installation step 4

5)Then disconnect cables at back of the radio.

2005-2011 Kia rio Radio installation step 5

6)Connect the cables on the new head unit as the user manual shows and place them well.

7)Put the new head unit into the dash.

8)Turn on the new head unit and have a comprehensive check if it works well.

9)Install 4 screws back to their original position.

10)Check whether the unit is working without problem.

11)If everything is OK, firm removed screws that are put aside, then make trim panel back on your new Seicane radio.


By the way, you should make sure whether the aftermarket radio fits your car before installation, and here is a good aftermarket radio of Seicane which fits KIA rio well:

http://www.seicane.com/seicane-s127678-hot-selling-android-4-4-4-2005-2011-kia-rio-gps-navigation-car-audio-system-touch-screen-am-fm-radio-bluetooth-music-3g-wifi-obd2-mirror-link-aux-backup-camera-usb-sd-1080p-video

This Seicane KIA rio Radio can be a good choice for you. It has intelligent pure android 4.4.4 operation system and 6.2 inch HD 800*480 multi-touch screen.

You can perform Google search on the road with quick search box, play online games, watch videos, download online data and check emails by connecting to any WiFi hotspot in range or 3g internet, download any applications in the android market for access to games, Skype, MSN, YouTube, twitter, E-Book, Gmail etc. And it’s your perfect road companion. What’s more, this multimedia player has a touch screen display that can be used with reverse cameras to make parking easier.


Equip your new aftermarket KIA rio Radio, and start your new journey with KIA rio!

13 steps to install a 2002 2003 2004 Range Rover Radio

Look at this picture, this is Seicane 2009-2014 Range Rover Radio after installation.

2002-2004 Range Rover Radio after installation

Do you think it’s awesome? And want to install it on your Range Rover? Range Rover is more and more popular now. If you are owners of Range Rover, and you want to upgrade your factory radio. You can read this essay patiently. I will tell you the instructions of Range Rover Radio installation. If you have the same dashboard with the picture shows, you can follow the instructions below.


2002-2004 Range Rover Radio installation

1·First pry off the top panel with flat screwdriver and set it aside.

2002-2004 Range Rover Radio installation step 1

2·Next remove two screws under the top panel with a Phillips screwdriver as the picture shows.

2002-2004 Range Rover Radio installation step 2

3·Remove all screw holding the panel above the radio.

2002-2004 Range Rover Radio installation step 3

4·Pull out the panel as the picture shows.

2002-2004 Range Rover Radio installation step 4

5·Then remove screws holding the radio in dashboard with a Phillips screwdriver as the picture shows.

2002-2004 Range Rover Radio installation step 5

6·Pull out the whole console with radio slowly.

2002-2004 Range Rover Radio installation step 6

7·Disconnect the original harness.

2002-2004 Range Rover Radio installation step 7

8·Pry off the control panel.

2002-2004 Range Rover Radio installation step 8

9·Remove the screws and remove the radio frame.

2002-2004 Range Rover Radio installation step 9

10·Make antennas and cables connected step by step as installation instructions show, and you should be very careful when you are doing this for it will affect whole procedure.

11·Connect the new radio to your Range Rover, you should check whether your connections are correct, the new unit is in right position, and you’d better have a tidy for the cables.

12·Check whether the unit is working without problem.

13·If everything is OK, firm removed screws that are put aside, then make trim panel back on your new Seicane Range Rover Radio.


By the way, you should make sure whether the aftermarket radio fits your car before installation, and here is a good aftermarket radio of Seicane which fits Range Rover well:

http://www.seicane.com/seicane-s127018l-16g-android-4-4-4-car-stereo-dvd-gps-system-for-2002-2003-2004-range-rover-with-bluetooth-radio-tuner-3g-wifi-mirror-link-obd2-quad-core-cpu-rearview-camera-dvr-s127018l


This Seicane Range Rover Radio can be a good choice for you. It has intelligent pure android 4.4.4 operation system and 7 inch HD 1024*600 multi-touch screen.

You can perform Google search on the road with quick search box, play online games, watch videos, download online data and check emails by connecting to any WiFi hotspot in range or 3g internet, download any applications in the android market for access to games, Skype, MSN, YouTube, twitter, E-Book, Gmail etc. And it is your perfect road companion.


And now, can you install new aftermarket Range Rover Radio by yourself? Good luck to you!