Nowadays, more and more car owners who spend a lot of time in cars are trying to replace the factory radio with a new aftermarket car stereo for they want to create a more convenient, comfortable and relaxing car environment as well as a more wonderful driving experience. If you are one of them, you can try to install the new stereo under the guidance of a correct instruction. Today I’d like to share a 2009 2010 2011 2012-2013 SUBARU OUTBACK car radio installation instruction with you. If you have the same dashboard, you might refer to it when you are going to have the car radio replacement.

Before and during installation, you should notice:
1. Before connecting, please make sure the ignition is off to avoid short circuit.
2. Ensure connect the yellow and red power cable at last.
3. Ensure that all loose wires are isolated with electrical tape
4. Ensure don’t tangle the wire when tighten the moving parts(Such as seat rails).
5. Ensure that all ground is connected to the same place.
6. Using the improper fuse may cause damage of fire, so when replace the fuse, please consult the professional.
7. For your convenience, here’s the recommended tools for removal and installation from Seicane, please check for more details: http://www.seicane.com/car-dvd-dismantling-device-srd-400
2009 2010 2011 2012-2013 SUBARU OUTBACK car radio installation instruction
1. The original car radio.

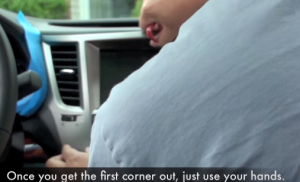
2. Remove the original panel with a plastic knife, pry gently along the gap and pick up the panel, then remove it and then set it aside.


3. Remove six screws that fixed the radio on the dashboard.


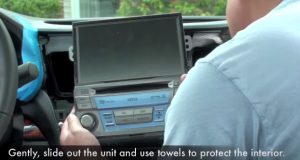
4. Gently pull the factory radio out of the dash.

5. Then unplug the connectors at the back of the factory radio.

6. Check all the accessories for the new Seicane car radio.

7. Connect the harnesses to the back of the new Seicane car radio.

8. Connect the Seicane car radio to your original radio’s plugs.
9. Turn on the new Seicane car radio to have a careful check if everything works well. If it doesn’t, please check whether all the cables are connected correctly.
10. Put the new Seicane car radio into the dash.
11. Put everything into their original place. All the installation is done.
Don’t be over worried if you encounter any problems during the installation. To solve these problems, you can contact your dealer, communicate with someone experienced or turn to a professional for help. Or you can directly arrange a professional technician to help you install the new car radio. Anyway, before installation, it is essential for you to select an ideal car radio. If you have no ideas, you can refer to the following link which is a remarkable 2009 2010 2011 2012-2013 SUBARU OUTBACK car radio from Seicane.
This amazing car radio is upgraded to the most stable and latest Android 8.0 operation system and a strong 8-core Cortex A53 CPU processor to enhance its higher configuration and better performance.
Thanks to the built-in Bluetooth module, you can easily make this car radio sync with your Bluetooth-enabled mobile phone, so you can freely dial, receive, reject and mute Bluetooth hands-free phone calls as well as enjoy Bluetooth streaming music from phone play lists.
Additionally, under the guidance of the turn-by-turn direction and voice prompts provided by the 3DGPS navigation system of high accuracy, you are able to easily know your current locations and find the right way to reach your desired destinations. And this unit comes with dual zone function, which enables you to listen to your favorite music while navigating.
Wish you like this unit and good luck to you!


I was wondering if you could give me a hand possibly I have a 2009 Subaru Legacy stock radio I just recently came across a 2010 Subaru Legacy navigation from the scrap yard I was wondering if possible you might have a diagram that you can send me and I possibly can try to make a harness to go from my stock wiring to the
2010 nav model# 86271AJ60A
Thank you for your time
“Dear,
so sorry for the inconvenience.
In order to give you a fast solution,we suggest you asked our after sales staff for help.
The email is Sales1@seicane.
Have a good day!”