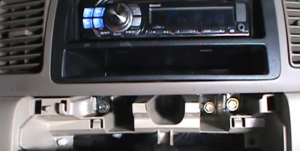
Do you yearn for upgrading your factory radio with a new multi-functional car stereo on your own? If you would like to have a try, you just need to remove your original car radio and install a new car radio under the correct installation guide. The following is a 2003 2004 2005 2006 2007 Toyota Corolla E120 BYD F3 car radio installation guide from Seicane. If you have the same or similar dashboard, you can refer to this guide carefully.

Before and during installation, you should notice:
1.Before connecting, please make sure the ignition is off to avoid short circuit.
2.Ensure connect the yellow and red power cable at last.
3.Ensure that all loose wires are isolated with electrical tape
4.Ensure don’t tangle the wire when tighten the moving parts(Such as seat rails).
5.Ensure that all ground is connected to the same place.
6.Using the improper fuse may cause damage of fire, so when replace the fuse, please consult the professional.
7. For your convenience, here’s the recommended tools for removal and installation from Seicane, please check for more details: http://www.seicane.com/car-dvd-dismantling-devicesrd-400
2003 2004 2005 2006 2007 Toyota Corolla E120 BYD F3 Bluetooth GPS Car Stereo Installation Guide
1. The original car radio.

2. Start from the bottom shifter. Remove the shifter and disconnect the connector at the back of it.


3. Remove the center button for the heater control panel.


4. Gently remove the heater control panel.

5. Disconnect the connectors at the back of the heater control panel.

6. Underneath the original car radio, there are four screws, just remove them so as to take out the original car radio.


7. Make the new car stereo clip into the original air vent.

8. Make sure that all connectors and cables are plugged to each other correctly.

For the further confirmation of the right connecting of all connectors and cables, you can refer to the following wiring diagram.

9. Well put the new car stereo into the dashboard.

10. Plug the connectors to the heater control panel’s interfaces.

11. Place the panel to the original place and fix the screw. And put the shifter back, make sure the connector is connected back as well.


Wish the above installation guide can do some help for you. If you come across any problems, you can seek help from your dealer, communicate with someone experienced or turn to a professional for help. Additionally, if you are afraid of making damage to either your car radio or your car, you can also directly go to a car radio upgrade center and arrange a professional technician to help you install the new car radio. While for the selection of an ideal car radio, if you have no ideas, here I would like to share an amazing 2003 2004 2005 2006 2007 Toyota Corolla E120 BYD F3 car stereo from Seicane with you. For more details, please click:
This amazing car stereo can be regarded as one of the best road companions for you since it comes with both practical and entertainment features.
With the guidance of the high-end 3D GPS navigation system, you are able to easily know your current locations and find the best route t o reach your ideal destinations through turn-by-turn directions and voice prompts. Besides, this unit comes with dual zone function which enables you to listen to your favorite music while navigating.
Additionally, under the wireless Bluetooth technology, you are able to get access to Bluetooth hands-free phone calls and Bluetooth streaming music from your mobile phone as long as you connect your Bluetooth-enabled mobile phone to this unit. Therefore, you can gain both convenience and enjoyment thanks to this car stereo.
Don’t hesitate to take this unit right now if you like it.

