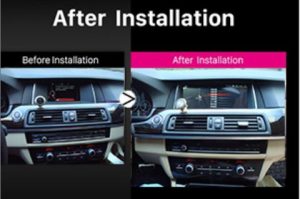
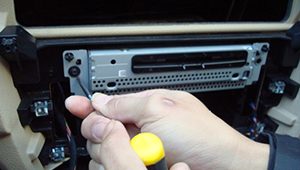
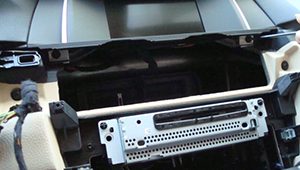
How to Install or Replace 2011 2012 BMW 5 Series F10/F11 CIC GPS Navigation Radio


car gps navigation radio for 2011 2012 BMW 5 Series
Car GPS Navigation radio for 2011 2012 BMW 5 Series

Nowadays, car are playing very important roles in our daily life and it seems that the factory radio can not meet most people’s needs.The GPS Navigation Radio can not only guide your way ,but also entertain your dull trip. The dual zone function makes it possible to listen to radio/USB/SD music while navigating. In demand of good driving experiences, people would like to choose the GPS Navigation Radio to replace the original radio.  However, most people don’t know how to install a GRS Navigation Radio by themselves. Here, our Seicane will lead your way to know how to install or replace 2011 2012 BMW 5 Series F10/F11 CIC GPS Navigation Radio.


Precaution for Installation:

1. Cut off the power before installation to avoid any danger.

2. Please prepare professional car radio dismantling tools, screwdriver, 3M electronic tape, 3M double side tape, sleeve, cotton cloth.

3. Please keep all the separate parts from the car.

4. For your convenience, here’s the recommended tools for removal and installation from Seicane, please check for more details: http://www.seicane.com/car-dvd-dismantling-device-srd-400


Before installation, please check your car firstly. If it is similar to this type, then you can refer to this video to install or replace 2011 2012 BMW 5 Series F10/F11 CIC GPS Navigation Radio.


If you still have no idea of how to install or replace this kind of GPS Navigation Radio after watching the video, you can consult us or ask professional people around for help. And if you don’t know how to choose a GPS Navigation Radio, I would like to share you a remarkable 2011 2012 BMW 5 Series F10/F11 CIC GPS Navigation Radio for you. For more detailed information, you can go to the following website:

https://www.seicane.com/android-2011-2012-bmw-5-series-f10-f11-cic-hd-touchscreen-car-stereo-radio-head-unit-gps-navigation-bluetooth-phone-mp3-steering-wheel-control-wifi-backup-camera-s028208

With 8.8 /10.25 inch IPS screen, this unit looks very exquisite. Its screen feels very smooth and flawless. Just enjoy a visual feast on this 1280*480 resolution unit. It can support the original car’s all functions, such as radio or Bluetooth function, or the users can utilize this unit’s built-in radio or music function. Besides, its customized wallpaper allows you to set your own photo as background of the main menu.

If you have any question, please feel free to let us know!

How to Simply Install and Upgrade a 2013 2014 2015 2016 2017 2018 BMW 6 Series F06/F12 NBT GPS Navigation Radio

Many cars are equipped with a factory navigation system built into the dashboard. Maps are stored as software, so once new roads and intersections are developed or changed, the map will be out of date. More and more people are getting tired of the old one, and they are seeking for new GPS navigation system to satisfy their increasing demand. But installing it by themselves is a big problem. Don’t worry, here are some installation tips on 2013 2014 2015 2016 2017 2018 BMW 6 Series F06/F12 NBT GPS Navigation Radio, if you have a similar one, you can take it as a reference.

2013 2014 2015 2016 2017 2018 BMW 6 Series F06/F12 NBT GPS navigation radio after installation

Friendly reminder:

1. Please disconnect the power before the installation.

2. Please prepare a lever and a screwdriver before the removal and the installation.

3. Please keep all the separate parts from the car. Please take great care of the dashboard to avoid scratching it during its detachment and installation. Please keep handy any parts from the car and make use of all the original screws from the car as much as possible. so each related part of the unit can be fixed securely.

4. For your convenience, here’s the recommended tools for removal and installation from Seicane, please check for more details: http://www.seicane.com/car-dvd-dismantling-device-srd-400

2013 2014 2015 2016 2017 2018 BMW 6 Series F06/F12 NBT GPS navigation radio installation guidance

1. Original dashboard.

Original dashboard.

2. Pry loose the right side air outlet.

Pry loose the right side air outlet.

3. Pry loose the left side air outlet.

Pry loose the left side air outlet.

4. Take out the air-conditioning decorated plate.

take out the air-conditioning decorated plate.

5. Take out the decorated strip.

Take out the decorated strip.

6. Remove four fixed screws.

Remove four fixed screws.

7. Pry loose and take out the panel.

Pry loose and take out the panel.

8. Remove four screws of original host.

Remove four screws of original host.

9. Remove two screws of the monitor.

Remove two screws of the monitor.

10. Take out the original monitor.

Take out the original monitor.

11. Connect the original power harness with Android cable.

Connect the original power harness with Android cable.

12. Fixed the plastic cover of Android unit to original dashboard.

Fixed the plastic cover of Android unit to original dashboard.

13. Full test.

Full test.

14. Please put everything into their original place.

By now, do you have a general knowledge about the 2013 2014 2015 2016 2017 2018 BMW 6 Series F06/F12 NBT car radio installation? If you still have any questions that you don’t know how to solve, you can call your supplier to talk with skilled people or ask a professional technician for valuable help. Also, you can directly go to the car radio upgrade center and arrange a professional technician to get your new car radio installed. Anyway, you must choose the best way to install you car radio, so that you can avoid unnecessary damage to your car and car radio. If you are thinking about how to choose an ideal car radio for you beloved car, here I would like to share with you the excellent 2013 2014 2015 2016 2017 2018 BMW 6 Series F06/F12 NBT GPS Navigation Radio from Seicane. Please click for more information:

https://www.seicane.com/hd-touchscreen-gps-navigation-radio-for-2013-2014-2018-bmw-6-series-f06-f12-nbt-android-stereo-usb-bluetooth-support-mirror-link-dvr-s028256k

Designed for the 2013 2014 2015 2016 2017 2018 BMW 6 Series F06 / F12 NBT, this outstanding car radio has a variety of features and can help you enjoy a better driving experience, including 5 point touch screen, 6-core Rockchip PX CPU, GPS, video output, Carplay, etc. Since the unit designed with these entertainment features and practical functions, this remarkable radio can meet almost all your needs. Take the Carplay function as an example. This Carplay USB dongle can support the CARPLAY USB product. Support all Android car DVD products, the original car voice control, the original car screen touch.

Such a fascinating unit, why not buy now?

How to Quickly Install and Upgrade a 2011 2012 BMW 6 Series F06/F12 CIC GPS Navigation Radio

The Global Positioning System (GPS) Navigation Kit guides you through alternative routes in an unfamiliar area and maps and times your journey to a specific destination. GPS navigators can access a network of approximately 30 Earth orbit satellites to pinpoint your latitude and longitude. Then The GPS receiver overwrites the information onto a series of preloaded maps to correctly calculate route information, speed and direction.But now, your factory radio navigator can not satisfy you anymore. More and more people are looking for a new unit and replace it by themselves. But how to replace it by yourself, the following is an instruction on 2011 2012 BMW 6 Series F06/F12 CIC GPS Navigation Radio from Seicane, you can take it as a reference if you have a car which is similar to 2011 2012 BMW 6 Series F06/F12 CIC.

2011 2012 BMW 6 Series F06/F12 CIC GPS Navigation Radio after installation

Something you should know:

1. Please disconnect the power before the installation.

2. Please prepare a lever and a screwdriver before the removal and the installation.

3. Please keep all the separate parts from the car. Please take great care of the dashboard to avoid scratching it during its detachment and installation. Please keep handy any parts from the car and make use of all the original screws from the car as much as possible. so each related part of the unit can be fixed securely.

4. For your convenience, here’s the recommended tools for removal and installation from Seicane, please check for more details: http://www.seicane.com/car-dvd-dismantling-device-srd-400

2011 2012 BMW 6 Series F06/F12 CIC GPS navigation radio installation guidance

1. Original dashboard.

2. Pry loose the right side air outlet.

3. Pry loose the left side air outlet.

4. Take out the air-conditioning decorated plate.

5. Take out the decorated strip.

6. Remove four fixed screws.

7. Pry loose and take out the panel.

8. Remove four screws of original host.

9. Remove two screws of the monitor.

10. Take out the original monitor.

11. Remove the protection panel in the right side of armrest box.

12. Remove two screws.

13. Remove the cover of the gear knob.

14. Remove original IDRIVE screws and take out the panel.

15. Remove IDRIVE cable, and connect it to Android power harness.

16. Connect the original power harness with Android cable.

17. Fixed the plastic cover of Android unit to original dashboard.

18. Full test.

By now, do you understand each of the detailed steps in the above installation tips? If you are still not clear, please ask your dealer, skilled friend or professional for help. If you are afraid of any damage to your car or car radio, you can go to the car radio center and get your new car radio installed by a professional technician from your dealer. You must know car radios play an essential role in installation, it is wise to choose the ideal car radio. If you have no idea, i would like to share a remarkable 2011-2012 BMW 6 Series F06/F12 CIC GPS Navigation Radio from Seicane with you, see more details by click the following link:

https://www.seicane.com/polegadas-touchscreen-androide-2011-2012-bmw-6-series-f06-f12-cic-gps-radio-navegac-o-com-usb-wifi-suporte-bluetooth-tpms-dvr-televis-o-digital-s028236k

This powerful car radio has a large 10.25 inch digital multi-touch screen with a resolution of 1280 x 480, allowing you to enjoy the smooth display of movies, video, TV shows, and also a clear view on road.
Also, with wireless Bluetooth function, you have free access to Bluetooth hands-free calling and Bluetooth streaming music while keeping you safe and fun.

The advanced GPS module is specially designed for this device, it allows you to quickly find your location and navigate to any destination you want. What’s more, because of the strong dual zone function of this car radio, you can enjoy live music while navigating.

Why not add this unit into you shopping cart?

How to Easily Install and Upgrade a 2004 2005 2006 2007 2008 AUDI A4 Aftermarket Radio GPS Entertainment System

With the rapid development of technology, people are becoming more and more productive, which means that the demand and popularity of portable and mobile solutions continue to increase. People like the ability to do what they want when they leave home. For example, when you are driving back home, you might want to install a GPS entertainment system in your car to end you dull trips. And how to install and upgrade it in a right way, the following is an installation instruction from Seicane for 2004 2005 2006 2007 2008 AUDI A4 Aftermarket Radio GPS Entertainment System. You can refer to it if you have a similar vehicle and you decide to replace it by yourself.

2004 2005 2006 2007 2008 AUDI A4 aftermarket radio GPS entertainment system after installation

Precaution for Installation:

1. Before you start up any work, park your car well and unplug the negative power cable to avoid any danger.

2. Please make sure that all fastened wires are isolated with electrical tape.

3. Please make sure the ignition is off to avoid short circuit.

4. Please prepare professional car radio dismantling tools, screwdriver, 3M electronic tape, 3M double side tape, sleeve, cotton cloth.

5. For your convenience, here’s therecommended tools for removal and installation from Seicane, please check for more details: http://www.seicane.com/car-dvd-dismantling-device-srd-400

Quick Upgrade Instruction for a 2004 2005 2006 2007 2008 AUDI A4 Aftermarket Radio GPS Entertainment System

1. Original car radio dash.

2. Insert in 4PCS dismantled keys.

3. Take the original host.

4. Remove the wire from original power harness.

5. Take out the air outlet.

6. Put the paper well in position.

7. Cut along red line.

8. Effect picture after cutting.

9. Take out control panel.

10. Take out gear decorated cover.

11. Take out cigar lighter.

12. Dismantle the cigar light (metal and plastic).

13. Install well the cigar lighter into Android IDRIVE.


14. Let IDRIVE cable go through original lighter hole.

15. Plug on lighter cable and put the IDRIVE cable into IDRIVE cable.

16. Remove gasket. locked the IDRIVE button well with PW3.5X8 screw.


17. Put well IDRIVE button.

18. Pry loose, take out the decoration strop and screws.

19. Plug well all Android cables and original power harness plug into Android adaptor.

20. Locked back original screws, then the holder can be fixed well.

21. Check all the wiring and power on to test.

22. Press button “CD” twice, switching to “TRACK02”, then Android will have sound.

23. Full test the fucntions and IDRIVE button.

24. Installation is done.

Above are tips on how to install and upgrade a car radio GPS system, i really hope that is helpful. But there are many different cars with very different structures and different functions. For safety consideration, if you have any problems during installation, you can call your dealer for a professional technician to install it, so that you can avoid damage to your car and car radio GPS system. If you want to buy a new unit, here i would like to commend a great 2004 2005 2006 2007 2008 AUDI A4 Aftermarket Radio GPS Entertainment System from Seicane to you, more details, please click:

https://www.seicane.com/android-2004-2008-audi-a4-car-radio-stereo-head-unit-gps-navigation-system-bluetooth-support-usb-wifi-rearview-camera-steering-wheel-control-s028102

This excellent 2004 2005 2006 2007 2008 AUDI A4 Aftermarket Radio GPS Entertainment System comes with a large 10.25 inch 5 point touch screen, which is ideal for you to enjoy the smooth operation and visual feast in your beloved car. Besides, rear seat passengers can watch DVD disc video from the Headrest Monitor while the driver using navigation on the front main unit. Go with this excellent car radio and enjoy your driving.

Good luck to you!

How to Upgrade and Install a 2004 2005 2006 2007 2008 2009 BMW 7 Series E65/E66 Aftermarket Radio GPS Entertainment System

Music is the main source of entertainment for most drivers. Over the years, the way people listen to music has changed a lot. For this reason, standard vehicle equipment is not always comparable to the latest media technology. Don’t worry if you find yourself unable to play music through the stereo. You can upgrade your stereo technology relatively easily. In order to ensure the safety and usage of the product, you may need professional guidance, here is a upgrade instruction from Seicane on 2004 2005 2006 2007 2008 2009 BMW 7 Series E65/E66 Aftermarket Radio GPS Entertainment System, you can take it as a reference if you have a car like this and decide to upgrade it yourself.

2004 2005 2006 2007 2008 2009 BMW 7 Series E65/E66 aftermarket radio GPS entertainment system after installation

Requirement of installation:

1. Please disconnect the power before the installation.

2. Please prepare professional car radio dismantling tools, screwdriver, 3M electronic tape, 3M double-side tape, sleeve and cotton cloth before the removal and the installation.

3. Please keep all the separate parts from the car. Please take great care of the dashboard to avoid scratching it during its detachment and installation. Please keep handy any parts from the car and make use of all the original screws from the car as much as possible. so each related part of the unit can be fixed securely.

4. For your convenience, here’s the recommended tools for removal and installation from Seicane, please check for more details: http://www.seicane.com/car-dvd-dismantling-device-srd-400

Upgrade Guidance on a 2004 2005 2006 2007 2008 2009 BMW 7 Series E65/E66 Aftermarket Radio GPS Entertainment System

1. Original car radio dash.

Original car radio dash.

2. Pry loose air outlet from screen and take it out.

Pry loose air outlet from screen and take it out.

3. Pry loose air outlet and take it out.

Pry loose air outlet and take it out.

4. Remove the screws.

Remove the screws.

5. Remove two screws and take out the decoration strip.

Remove two screws and take out the decoration strip.

6. Take out the air outlet.

Take out the air outlet.

7. Pry loose and take out the decoration strip.

Pry loose and take out the decoration strip.

8. Remove the screws.

Remove the screws.

9. Pull out the original power harness.

Pull out the original power harness.

10. Remove the screws of the original monitor.

Remove the screws of the original monitor.

11. Remove the original screen socket.

Remove the original screen socket.

12. Pry loose the plastic cover with a flat screwdriver.

Pry loose the plastic cover with a flat screwdriver.

13. Take out the aluminum back cover from original screen carefully.

Take out the aluminum back cover from original screen carefully.

14. Take out the socket from the screen.

Take out the socket from the screen.

15. Attached is original PC board and back cover.

Attached is original PC board and back cover.

16. Attached is Android device.

Attached is Android device.

17. Connect the socket from Android device with aluminum back cover.

Connect the socket from Android device with aluminum back cover.

18. Assemble well Android screen and back cover.

Assemble well Android screen and back cover.

19. Remove the optic fiber from screen socket and connect the socket without adapter.

Remove the optic fiber from screen socket and connect the socket without adapter.

20. Connect the optic fiber cable into our adapter.

Connect the optic fiber cable into our adapter.

21. Take out the optic fiber cable and plug it into factory harness.

Take out the optic fiber cable and plug it into factory harness.

22. Insert Android power harness in to original host.

Insert Android power harness in to original host.

23. Connect the original power harness with Android power harness.

Connect the original power harness with Android power harness.

24. Full test.

Full test.

I hope it can be helpful when you upgrade a car radio stereo on your own, if you encounter any problems during the process, to avoid damage and accident, you can call your dealer, they will arrange professional technicians to help you install the head unit. If you are looking for a new car radio stereo, here i would like to commend a remarkable 2004-2009 BMW 7 Series E65/E66 GPS Radio Head Unit from Seicane to you, to see more details, please click:

https://www.seicane.com/android-hd-touchscreen-2004-2009-bmw-7-series-e65-e66-gps-radio-head-unit-bluetooth-music-support-wifi-rearview-camera-steering-wheel-control-usb-obd2-s028207

It is really a necessary device in your car, such a rare good unit, integrating music, navigation, radio and Bluetooth functions. Advanced powerful Android 8.1 HD touch screen with 1280 x 480 resolution for smooth operation.Dual zone function made it possible to listening to radio/USB/SD music playback while navigating, which notch your car a high level.

What are you waiting for? It is better to act right now.

How to Easily Upgrade and Install a 1998 1999 2000 2001 2002 2003 2004 2005 2006 2007 2008 BMW E53 X5 Aftermarket Radio GPS Entertainment System

For some people, stereo in the car is enough. For others, only the best is enough. If the factory radio in your car is old, out-of-date,  with simple functions, or just not working correctly, you may want to buy new after-sales stereo, which outperforms the stereo in your car. These can be professionally installed or you can just do the work yourself. Here is a upgrade guidance on 1998 1999 2000 2001 2002 2003 2004 2005 2006 BMW E53 X5 Car Stereo Radio Head Unit  from Seicane, it can be used as a reference if you have a same car.

1998 1999 2000 2001 2002 2003 2004 2005 2006 BMW E53 X5 car stereo radio head unit after installation

Requirement of upgrade:

1. Please disconnect the power before the installation.

2. Please prepareprofessional car radio dismantling tools, screwdriver, 3M electronic tape, 3M double-side tape, sleeve and cotton cloth before the removal and the installation.

3. Please keep all the separate parts from the car. Please take great care of the dashboard to avoid scratching it during its detachment and installation. Please keep handy any parts from the car and make use of all the original screws from the car as much as possible. so each related part of the unit can be fixed securely.

4. For your convenience, here’s the recommended tools for removal and installation from Seicane, please check for more details: http://www.seicane.com/car-dvd-dismantling-device-srd-400

1998 1999 2000 2001 2002 2003 2004 2005 2006 2007 2008 BMW E53 X5 Aftermarket Radio GPS Entertainment System Upgrade Instruction

1. Original car radio dash.

Original car radio dash.

2. Remove the CD decorative frame with a tool.

Remove the CD decorative frame with a tool.

3. Remove the four screws with screwdrivers.

Remove the four screws with screwdrivers.

4. Withstand the bottom (arrows) with a tool.

Withstand the bottom (arrows) with a tool.

5. Remove the conditioning air outlet.

Remove the conditioning air outlet.

6. Stick the paper well.

Stick the paper well.

7. Cut the Red line.

Cut the Red line.

8. After cutting.

After cutting.

9. Remove the original blue plug and white plug.

Remove the original blue plug and white plug.

10. Find out the AUX jack (3Pins).

Find out the AUX jack (3Pins).

11. Take out the device and lock well the holder in the base with a PA2.6*8 screw.

Take out the device and lock well the holder in the base with a PA2.6*8 screw.

12. Plug well the power harness/USB cable/GPS antenna.

Plug well the power harness/USB cable/GPS antenna.

13. Install well the monitor in the dashboard and locked well.

Install well the monitor in the dashboard and locked well.

14. Fixed well the holder in the bottom of the air conditioning with TM 5.0x14mm screws.

Fixed well the holder in the bottom of the air conditioning with TM 5.0x14mm screws.

15. Plug the original AUX with Android AUX jack.

Plug the original AUX with Android AUX jack.

16. Connect Android black plug into original blue socket.

Connect Android black plug into original blue socket.

17. Connect original blueplug into Android black socket.

Connect original blueplug into Android black socket.

18. Full test all the functions.

Full test all the functions.

19. Switch to “AUX MODE”, Android will have sound from original speakers.

Switch to “AUX MODE”, Android will have sound from original speakers.

20. Installation effect.

Installation effect.

Hope above tips can help you solve the problems you may meet during installation, if you still have problems, you can turn to your dealer for more detail advice for safety consideration,if you are searching for an ideal car radio for your beloved car and have no idea, here i would like to share a excellent 10.25 Inch Android 8.1 1998-2006 BMW E53 X5 Car Stereo Radio Head Unit from Seicane with you, just click here to see more details:

https://www.seicane.com/android-1998-2006-bmw-e53-x5-car-stereo-radio-head-unit-gps-navigation-system-bluetooth-support-usb-wifi-rearview-camera-steering-wheel-control-s028205

This car radio is designed with the advanced and stable Android 8.1 operation system with 5 point touch screen as well as a powerful 6-core CPU processor, so that you can enjoy a much smoother, faster and easier operation experience.

Thanks to integrated BC6 Bluetooth module, it supports phone book sync, hands-free call, and music streaming from your phone.

Besides, with built-in WiFi module, it supports to connect WiFi hotspots to surf internet. Such a good campanion, you deserve it.

Enjoy your driving!

How to Simply Install a 2013 2014 2015 2016 BMW 5 Series F10 Bluetooth GPS Navigation System

Navigator, the product of modern technology, is mostly used in cars for positioning, navigation and entertainment. With the popularity of cars and the construction of roads, inter-city economic exchanges are more frequent. The positioning, navigation and entertainment functions are all integrated to meet the needs of the owner and become the basic equipment on the car.But install a navigator by yourself is not a easy job, here is an instruction on 2013 2014 2015 2016 BMW 5 Series F10 Bluetooth GPS Navigation System from Seicane. It can be a reference if you have a similar car and decide to replace it by yourself.

2013 2014 2015 2016 BMW 5 Series F10 Bluetooth GPS navigation system after installation

Tips about the installation:

1. Please disconnect the power before the installation.

2. Please prepare a lever and a screwdriver before the removal and the installation.

3. Please keep all the separate parts from the car. Please take great care of the dashboard to avoid scratching it during its detachment and installation. Please keep handy any parts from the car and make use of all the original screws from the car as much as possible. so each related part of the unit can be fixed securely.

4. For your convenience, here’s the recommended tools for removal and installation from Seicane, please check for more details: http://www.seicane.com/car-dvd-dismantling-device-srd-400

Installation Guidance on 2013 2014 2015 2016 BMW 5 Series F10 Bluetooth GPS Navigation System

1.The dashboard of the original car.

2. Please pry out the decorative strip of the original car and take it out.


3. Undo the two retaining screws of the hosting control center and take out the hosting from dashboard.

4. Similarly, remove the retaining screw from the control center.

5. Remove the retaining screws from the original display screen and take the screen out.

6. Then pull out the plug topthe original car and connect it to the adapter power cables from this unit.

7. Lastly plug in the connection plugs of the GPS navigation and the hosting machine.

8. The effect after installation.

9. Turn on the new Seicane car radio to have a careful check if everything works well. If it doesn’t, please check whether all the cables are connected correctly.

10. Put everything into their original place. All the installation is finished.

Wish above installation guidance would be helpful. If you meet any problems when you install it by yourself, please keep in touch with dealer to get professional help, or turn to your skilled friends, which can avoid unnecessary damage to your car and navigation device. If you are going to buy a new navigation system, here i would like to share a remarkable 2013 2014 2015 2016 BMW 5 Series F10 Bluetooth GPS Navigation System from Seicane with you, please click to see more details:

https://www.seicane.com/hd-touchscreen-android-aftermarket-radio-head-unit-for-2013-2014-2015-2016-bmw-5-series-f10-f11-nbt-car-stereo-gps-navigation-system-bluetooth-phone-wifi-support-obdii-dvr-1080p-video-steering-wheel-control-s028218

Strong and stable Android 8.1 operation system, it has way more support for sophisticated technology and features, including 64-bit system architecture to keep things bang up-to-date. It’s also equipped with 5 point touch screen, multiple point high-sensitive touchscreen brings smooth operation, lets you enjoy visual feast on the 10.25 inch 1280 x 480 resolution display. This excellent Bluetooth GPS navigation system can bring you amazing using experience.

Hope you like this device, please don’t hesitate to contact us if you have any problem.

How to Quickly Install a 2013 2014 2015 2016 BMW 3 Series F30 Car Bluetooth Stereo GPS System

The number of GPS systems is growing rapidly. The larger devices of yesterday are now leaner and more accurate, which offer a variety of features from basic navigation to traffic alerts and entertainment. By now, your long tedious trips with families or friends are no longer boring and dull. If you decide to install a car radio head unit on your own, the following is a 2013 2014 2015 2016 BMW 3 Series F30 Car Bluetooth Stereo GPS System installation guide from Seicane. It can be a helpful reference if you have a similar vehicle.

2013 2014 2015 2016 BMW 3 Series F30 Car Bluetooth Stereo GPS System after installation

Before and during installation, you should know:

1. Please disconnect the power before the installation.

2. Please prepare a lever and a screwdriver before the removal and the installation.

3. Please keep all the separate parts from the car. Please take great care of the dashboard to avoid scratching it during its detachment and installation. Please keep handy any parts from the car and make use of all the original screws from the car as much as possible. so each related part of the unit can be fixed securely.

4. For your convenience, here’s the recommended tools for removal and installation from Seicane, please check for more details: http://www.seicane.com/car-dvd-dismantling-device-srd-400

2013 2014 2015 2016 BMW 3 Series F30 Car Bluetooth Stereo GPS System installation guidance

1. The dashboard of the original car.

1. The dashboard of the original car.

2. Please pry the decorative strip out and take it out.

2. Please pry the decorative strip out and take it out.

3. Then pull out the plug of the flashing lights.

3. Then pull out the plug of the flashing lights.

4. For the next step, pry the decorative cover out and take it out.

4. For the next step, pry the decorative cover out and take it out.

5. Undo four retaining screws from the control center, meanwhile take out the cover on the control center.

5. Undo four retaining screws from the control center, meanwhile take out the cover on the control center.

6. Please undo two retaining screws of the hosting control center.

6. Please undo two retaining screws of the hosting control center.

7. Then pull out the plug of the original car and connect it to the switching power line.

7. Then pull out the plug of the original car and connect it to the switching power line.

8. Remove the retaining screw from the original display scree and take it out.

8. Remove the retaining screw from the original display scree and take it out.

9. Lastly plug in the connection plug of the Android touch screen.

9. Lastly plug in the connection plug of the Android touch screen.

10. The effect after installation.

10. The effect after installation.

11. Turn on the new Seicane car radio to have a careful check if everything works well. If it doesn’t, please check whether all the cables are connected correctly.

12. Put everything into their original place. All the installation is finished.

During the installation process, you’ll need to make sure you get the right parts, remove your old unit, and connect the new unit to your car. If there is something you are not clear, please consult your dealer for professional and valuable help. If you are going to buy an impressive car navigation system unit, here i would like to share a premium Android 8.1 2013-2016 BMW 3 Series F30 Radio Head Unit Car Stereo GPS Navigation System  from Seicane with you, please click here to see more details:

https://www.seicane.com/aftermarket-radio-android-hd-touchscreen-head-unit-for-2013-2014-2015-2016-bmw-3-series-f30-f31-f34-car-stereo-gps-navigation-system-bluetooth-phone-wifi-support-1080p-video-steering-wheel-control-s028213

There is no doubt that you will get a great enjoyment if you install this car radio navigation system in your car. With a GPS navigation system, you can know your current location at a glance and you can navigate to any place you want. Also, dual zone function made it possible to listen to radio/USB/SD music playback while navigation. Apart from this, it integrates dial, answer, reject phone call together, you don’t have to pick up your mobile phone anymore, time-saving and safe.

If you have any problem with this product, please contact us. Wish you have an impressive driving experience.

How to Easily Install a 2011 2012 2013 2014 2015 2016 BMW 1 Series F20/F21 (LHD) Car Stereo Radio GPS Navigation System

Installing a new car stereo radio GPS unit is usually very simple and you can do it yourself, please keep in mind that some cars and systems are more complex than other cars and systems, and each car and stereo system will be different, so some details may vary. Be sure to read any instructions that came with your new car stereo before installation. But how to install it in a quick way, the following are installation tips from Seicane on a 2011 2012 2013 2014 2015 2016 BMW 1 Series F20/F21 (LHD) Car Stereo Radio GPS Navigation System, here is just a reference if you possess a similar car and looking for tips to replace it by yourself.

2011 2012 2013 2014 2015 2016 BMW 1 Series F20/F21 (LHD) car radio after installation

What you should know:

1. Please disconnect the power before the installation.

2. Please prepare a lever and a screwdriver before the removal and the installation.

3. Please keep all the separate parts from the car. Please take goodcare of the dashboard to avoid scratching it during its detachment and installation. Please keep handy any parts from the car and make use of all the original screws from the car as much as possible. so each related part of the unit can be fixed securely.

4. For your convenience, here’s the recommended tools for removal and installation from Seicane, please check for more details: http://www.seicane.com/car-dvd-dismantling-device-srd-400

2011 2012 2013 2014 2015 2016 BMW 1 Series F20/F21 (LHD) Car Stereo Radio GPS Navigation System Installation Instruction

1. The dashboard of the original car.

1. The dashboard of the original car.

2. Please pry the air vent out from the dashboard and take it out.

2. Please pry the air vent out from the dashboard and take it out.

3. Remove the retaining screw from the original display screen and take the screen out.

3. Remove the retaining screw from the original display screen and take the screen out.

4. Undo the retaining screw from the control center, meanwhile take out the dashboard.

4. Undo the retaining screw from the control center, meanwhile take out the dashboard.

5. Similarly, remove the retaining screw from the dashboard.

5. Similarly, remove the retaining screw from the dashboard.

6. Then pull out the plug of the original car and connect it to the adapter power cables from this unit.

6. Then pull out the plug of the original car and connect it to the adapter power cables from this unit.

7. Lastly plug in the connection plug of the Android touch screen.

7. Lastly plug in the connection plug of the Android touch screen.

8. The effect after installation.

8. The effect after installation.

9. Turn on the new Seicane car radio to have a careful check if everything works well. If it doesn’t, please check whether all the cables are connected correctly.

10. Put everything into their original place. All the installation is finished.

I hope you can learn something useful from the above installation tips. If you encounter any difficulties during the installation process and do not know how to overcome them, you can contact the dealer and they will give you professional advice. If you want to buy an ideal car radio for you beloved car, I recommend Seicane Android 8.1 Head Unit for 2011-2016 BMW 1 Series F20/F21 (LHD) Car Stereo Radio GPS Navigation System  to you here.To see more details, please click:

https://www.seicane.com/hd-touchscreen-radio-android-head-unit-for-2011-2016-bmw-1-series-f20-f21-car-stereo-gps-navigation-system-bluetooth-phone-wifi-support-mirror-link-1080p-video-obdii-dvr-steering-wheel-control-usb-s028211

After installing car radio navigation system, you can freely use a variety of practical and entertainment functions, it integrates GPS navigation, FM / AM radio, Bluetooth hands-free calling, Bluetooth streaming music, AUX function, this product from Seicane can be one of the most suitable alternatives to your original one.

In addition, cars and mobile phones can be connected via Bluetooth, so that you can enjoy Bluetooth hands-free call and streaming music for great convenience and fun.

Please don’t wait, this device is the most suitable one.

How to Install 2018 BMW X1 F48 Car Navigation System Support Bluetooth WIFI

There is nothing more important than stereo navigation system when you have a car, it gathers music, WIFI, GPS and so on together. When we go to a strange place, we will also habitually open the navigation to guide us. Because of its importance, it will now be installed in the car. But how to install in a correct way, the following is an installation guide for 2018 BMW X1 F48 Car Navigation System from Seicane. Here is a reference if you owe the same vehicle type and you are going to replace it on your own.

2018 BMW X1 F48 Car Navigation System after installation

Tips about the installation:

1. Please disconnect the power before the installation.

2. Please prepare a lever and a screwdriver before the removal and the installation.

3. Please keep all the separate parts from the car. Please take great care of the dashboard to avoid scratching it during its detachment and installation. Please keep handy any parts from the car and make use of all the original screws from the car as much as possible. so each related part of the unit can be fixed securely.

4. For your convenience, here’s the recommended tools for removal and installation from Seicane, please check for more details: http://www.seicane.com/car-dvd-dismantling-device-srd-400

2018 BMW X1 F48 car navigation system installation guidance

1. The dashboard of the original car.

1. The dashboard of the original car.

2. Please pry it loose, then take out the hosting from dashboard.

2. Please pry it loose, then take out the hosting from dashboard.

3. Then pry the decorative strip out and take it out.

3. Then pry the decorative strip out and take it out.

4. Undo the retaining screw and display screen.

4. Undo the retaining screw and display screen.

5. Pry the screen base of the original car, then replace it with a standard screen.

5. Pry the screen base of the original car, then replace it with a standard screen.

6. Undo the retaining screw from the hosting machine.

6. Undo the retaining screw from the hosting machine.

7. Then remove the plug in the hosting machine and connect it to the adapter power cables from this unit.

7. Then remove the plug in the hosting machine and connect it to the adapter power cables from this unit.

8. Plug in all the connection lines and install the Android Touch Screen.

8. Plug in all the connection lines and install the Android Touch Screen.

9. The effect picture after installation.

10. Turn on the new Seicane car radio to have a careful check if everything works well. If it doesn’t, please check whether all the cables are connected correctly.

11. Put everything into their original place. All the installation is finished.

Truly hope that above installation guidance may help you, if you still have any problems during installation process, please contact dealer without any hesitation, so that you can get a professional guidance. In addition, you can also turn to the dealer for professional technician, which can avoid damages to your stereo navigation system and car. If you are considering to buy a new car radio, here i would like to share a marvelous Car Navigation System for 2018 BMW X1 F48 with you, more details, please click:

https://www.seicane.com/android-hd-touchscreen-2018-bmw-x1-f48-car-stereo-radio-head-unit-gps-navigation-system-bluetooth-phone-wifi-support-dvr-usb-dab-obdii-steering-wheel-control-backup-camera-s028509

Powerful 10.25 inch large screen GPS navigation system can give amazing experience, dual zone function made it possible to listen to radio/USB/SD music playback while navigating, equipped with Android 8.1 operation system, which is stable and smooth and multicore CPU integrated rewards you when you multitask or the more scientific your work. What’s more, this unit can support the original car’s radio or Bluetooth function, or the users can utilize this unit’s built-in radio or Bluetooth function. It will give you a wonderful driving trip.

Wish you would like it, if you are confused, please connect us.