The Complete Tutorial on a 2013 2014 2015 Honda Accord 9 2.0L Car Stereo Upgrade with Sound System Audio Stereo Speaker GPS Navigation

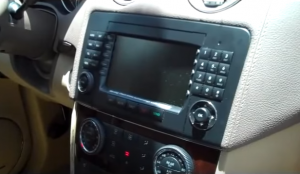
2013 2014 2015 Honda Accord 9 2.0L Car Stereo after installation

Nowadays, ideal car stereos are becoming more available for car owners. But you still need to pay extra money for its installation if you don’t know how to install it. However, if you have a correct guide as well as some related experience, you can finish the installation on your own which can save you a lot of money. This passage is about the installation for a multifunctional Seicane 2013 2014 2015 Honda Accord 9 2.0L Car Stereo. If you own the same dashboard, you can refer to the following detailed instruction.

2013 2014 2015 Honda Accord 9 2.0L Car Stereo after installation

Before and during installation, you should notice:

1.Before connecting, please make sure the ignition is off to avoid short circuit.

2.Ensure connect the yellow and red power cable at last.

3.Ensure that all loose wires are isolated with electrical tape

4.Ensure don’t tangle the wire when tighten the moving parts(Such as seat rails).

5.Ensure that all ground is connected to the same place.

6.Using the improper fuse may cause damage of fire, so when replace the fuse, please consult the professional.

7.For your convenience, here’s the recommended tools for removal and installation from Seicane, please check for more details: http://www.seicane.com/car-dvd-dismantling-devicesrd-400


2013 2014 2015 Honda Accord 9 2.0L Car Stereo installation instruction

1. Use a plastic removal tool to remove the side panels.

Use a plastic removal tool to remove the side panels

2. Remove two screws that fix the pocket.

Remove two screws that fix the pocket

3. Remove the pocket.

Remove the pocket
Remove the pocket

4. Use a plastic removal tool to release the panel to the left of the radio.

Use a plastic removal tool to release the panel to the left of the radio

5. Use the plastic removal tool to pry the top tray and remove it.

Use the plastic removal tool to pry the top tray and remove it

6. There are two top screws and two bottom screws that are holding the radio, remove them with a screwdriver.

There are two top screws and two bottom screws that are holding the radio, remove them with a screwdriver
6-1
6-1

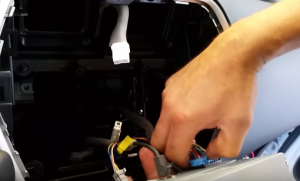
7. Pull out the original radio and disconnect connectors at the back of it.

Pull out the original radio and disconnect connectors at the back of it

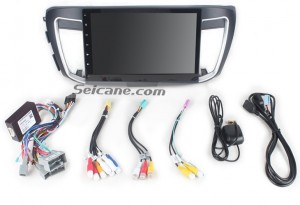
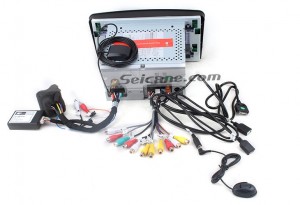
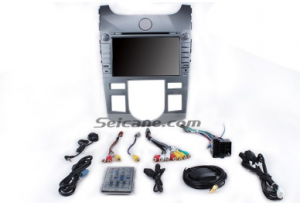
8. Check all the accessories for the new Seicane car stereo.

Check all the accessories for the new Seicane car stereo

9. Connect the harnesses to the back of the new Seicane car stereo.

Connect the harnesses to the back of the new Seicane car stereo

10. Connect the Seicane car stereo to your original stereo’s plugs.

11. Turn on the new Seicane car stereo to have a careful check if everything works well. If it doesn’t, please check whether all the cables are connected correctly.

12. Put the new Seicane car stereo into the dash.

13. Put everything into their original place. All the installation is done.


Now can you finish your car stereo installation with the help of the 2013 2014 2015 Honda Accord 9 2.0L Car Stereo installation guide? If you have any questions, you can consult your dealer for advice or turn to a professional for help. Besides, before the installation, it is especially important for you to check the compatibility between your new car stereo and your car. If you don’t have any ideas, you may check out the link below which is about a 2013 2014 2015 Honda Accord 9 2.0L gps bluetooth car stereo from Seicane. Please click:

http://www.seicane.com/2013-2014-2015-honda-accord-9-2-0l-10-2-inch-1024-600-touchscreen-radio-gps-navigation-system-with-bluetooth-obd2-tpms-backup-camera-steering-wheel-control-digital-tv-dvr-4g-wifi-android-s301091

This remarkable 2013 2014 2015 Honda Accord 9 2.0L Car Stereo is powerful enough to become your best road companion. With it installed in your beloved car, you can easily get access to hands-free calls and Bluetooth music when you wirelessly connect your enabled mobile phone with this stereo through the Bluetooth module. And you can easily reach any destinations when you press the “GPS” button and make full use of turn-by-turn direction and voice prompts. Besides, thanks to its function as a multimedia player, you are able to freely enjoy music, FM/AM stereo, TV programs, movies, etc. Wish you like it.

The Best Tips on a 2005-2010 Toyota Fortuner Car Radio Replacement with Head Unit GPS Navigation Bluetooth Music System Backup Camera

2005-2010 Toyota Fortuner Car Radio after installation

With the rapid development of science and technology, you may have a lot of things used to be in fashion but now is out of date. So as a car owner of   , you may have found your car radio is becoming incompatible with many modern features, therefore you need to upgrade your factory radio in time to catch up with trend. This article mainly introduces detailed replacement instructions of a new car radio for 2005-2010 Toyota Fortuner. If you have interest in it, just read it carefully.

2005-2010 Toyota Fortuner Car Radio after installation

Tips about the installation:

1.Please disconnect the power before the installation.

2.Please prepare a lever and a screwdriver before the removal and the installation.

3.Please keep all the separate parts from the car. Please take great care of the dashboard to avoid scratching it during its detachment and installation. Please keep handy any parts from the car and make use of all the original screws from the car as much as possible. so each related part of the unit can be fixed securely.

4.For your convenience, here’s the recommended tools for removal and installation from Seicane, please check for more details: http://www.seicane.com/car-dvd-dismantling-devicesrd-400


2005-2010 Toyota Fortuner car radio installation steps

1. The original car radio.

The original car radio

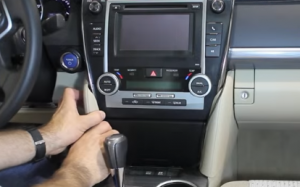
2. Adjust the shifter lever.

Adjust the shifter lever

3. Use the plastic removal tool to remove the panel and unplug the connector behind.

Use the plastic removal tool to remove the panel and unplug the connector behind
3-1
3-1

4. Grab the center nob, remove it and use a screwdriver to unscrew the hidden screw.

Grab the center nob, remove it and use a screwdriver to unscrew the hidden screw
4-1
4-1

5. Remove the panel with a plastic removal tool, then unplug the connectors at the back of it.

Remove the panel with a plastic removal tool, then unplug the connectors at the back of it
5-1
5-1
5-2
5-2

6. Remove screws that are holding the radio.

Remove screws that are holding the radio

7. Release the clips and take out the original car radio.

Release the clips and take out the original car radio
7-1
7-1

8. Disconnect connectors and cables at the back of the radio.

Disconnect connectors and cables at the back of the radio

9. Check all the accessories for the new Seicane car radio.

Check all the accessories for the new Seicane car radio

10. Connect the harnesses to the back of the new Seicane car radio.

Connect the harnesses to the back of the new Seicane car radio

11. Connect the Seicane car radio to your original radio’s plugs.

12. Turn on the new Seicane car radio to have a careful check if everything works well. If it doesn’t, please check whether all the cables are connected correctly.

13. Put the new Seicane car radio into the dash.

14. Put everything into their original place. All the installation is done.


That’s all about the installation instruction on a 2005-2010 Toyota Fortuner car radio. Wish you can learn something from it. If you have any question, you can turn to your dealer or a technician for further help. But if you haven’t got your car radio yet, I’d like to share a great 2005-2010 Toyota Fortuner car radio from Seicane. For more details, please click:

http://www.seicane.com/full-touchscreen-1024-600-2005-2010-toyota-fortuner-android-radio-gps-bluetooth-mirror-link-tpms-obd2-dvr-rearview-camera-tv-usb-4g-wifi-16g-flash-quad-core-s30702

You are able to embrace a super fluent and fast operation experience as this car radio is based on the advanced Android 5.0.1 operation system and with a powerful configuration of 1.8GHz Quad-core CPU processor. With the worldwide real-time GPS navigation system, you are able to have the best route option to arrive at your destinations accurately. And the application of the built-in Bluetooth module makes you have hands-free calls and music streaming to keep you safer and happier when your car is in motion. Besides, this car radio is compatible with various audio and video formats like CD, VCD, DVD, DIVX, MP3, etc, which can offer you a lot of fun. Wish you like it!

How to Upgrade a 2012 2013 Toyota CAMRY Bluetooth DVD Car Radio with HD Touch Screen USB Speakers CD Player GPS Navigation Quickly

2012 2013 Toyota CAMRY Bluetooth DVD Car Radio after installation

What measures can you take to create a more comfortable and convenient car interior environment as well as upgrade a better driving experience? In my opinion, it will be a wise choice for you if you choose to replace your factory radio with a brand new car radio with not only practical but also entertainment features. And you can try to finish the installation by yourself. To help with your installation, I would like to share an installation instruction on a 2012 2013 Toyota CAMRY car radio. If you have the same dashboard, you can refer to it.

2012 2013 Toyota CAMRY Bluetooth DVD Car Radio after installation

Here are some tips about the installation:

1.Please disconnect the power before the installation.

2.Please prepare a lever and a screwdriver before the removal and the installation.

3.Please keep all the separate parts from the car. Please take great care of the dashboard to avoid scratching it during its detachment and installation. Please keep handy any parts from the car and make use of all the original screws from the car as much as possible. so each related part of the unit can be fixed securely.

4.For your convenience, here’s the recommended tools for removal and installation from Seicane, please check for more details: http://www.seicane.com/car-dvd-dismantling-device-srd- 400


2012 2013 Toyota CAMRY car radio installation instruction

1. Unclip and remove trim panels from each side of the pocket below the radio or climate control assembly.

Unclip and remove trim panels from each side of the pocket below the radio or climate control assembly

2. Unclip and remove the AC vent.

Unclip and remove the AC vent

3. Gently pry the upper dashboard housing from the radio’s trim bezel with a plastic removal tool.

Gently pry the upper dashboard housing from the radio's trim bezel with a plastic removal tool
Gently pry the upper dashboard housing from the radio’s trim bezel with a plastic removal tool

4. Remove the two upper and two lower radio mounting screws from the dashboard.

Remove the two upper and two lower radio mounting screws from the dashboard
4-1
4-1

5. Gently remove the original radio from the dashboard and unplug connectors at the back of the radio.

Gently remove the original radio from the dashboard and unplug connectors at the back of the radio

6. Check all the accessories for the new Seicane car radio.

7. Connect the harnesses to the back of the new Seicane car radio.

8. Connect the Seicane car radio to your original stereo’s plugs.

9. Turn on the new Seicane car radio to have a careful check if everything works well. If it doesn’t, please check whether all the cables are connected correctly.

10. Put the new Seicane car radio into the dash.

11. Put everything into their original place. All the installation is done.


Now do you have a general understanding about the 2012 2013 Toyota CAMRY car radio installation? If you have any question, you’re welcome to seek advice from your dealer or ask a professional for help. But first of all, you should check whether your new car radio can work well in your car or not. If not, you can refer to the link below which is about a remarkable 2012 2013 Toyota CAMRY Bluetooth dvd car radio from Seicane. Please click:

http://www.seicane.com/10-1-inch-full-touchscreen-2012-2013-toyota-camry-android-gps-navigation-system-with-radio-rearview-camera-4g-wifi-bluetooth-mirror-link-obd2-dvr-steering-wheel-control-s301043

With a lot of modern capabilities, this intelligent 2012 2013 Toyota CAMRY Bluetooth dvd car radio can become the best replacement for your factory radio. When you turn on the 3D GPS navigation system, you are able to find the most suitable route to reach your destinations accurately through turn-by-turn direction and voice prompt. Besides, keeping your hands on the steering wheel, the built-in Bluetooth module of this radio enables you to get access to hands-free calls as well as Bluetooth music through the connection between your Bluetooth-enabled mobile phone, which guarantees your safe driving to a large extent. If you like this 2012 2013 Toyota CAMRY car radio, just install it and enjoy your happy time brought by it from now on!

Quick Steps on a 2003-2013 VW VolksWagen PASSAT Seat Skoda GPS Bluetooth Car Radio Upgrade With Stereo Sound System Backup Camera USB Connection

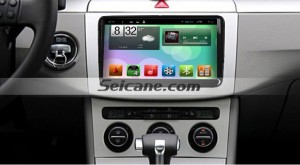
2003-2013 VW VolksWagen PASSAT Seat Skoda GPS Bluetooth Car Radio after installation

You may realize that although your factory radio can play CD disks and radio to relax you sometimes, it cannot be compatible with some advanced features so that it cannot meet your most needs. Under this circumstance, it is wise for you to replace the factory radio with a new aftermarket car radio. Look at the picture below which is a Seicane 2003-2013 VW VolksWagen PASSAT Seat Skoda GPS Bluetooth Car Radio after installation. You can refer to the following installation guide if you have a same or similar dashboard in your car.

2003-2013 VW VolksWagen PASSAT Seat Skoda GPS Bluetooth Car Radio after installation

Precautions for this installation:

1.Before you start up any work, park your car well and unplug the negative power cable to avoid any danger.

2.Please make sure that all fastened wires are isolated with electrical tape.

3.Please make sure the ignition is off to avoid short circuit.

4. For your convenience, here’s the recommended tools for removal and installation from Seicane, please check for more details: http://www.seicane.com/car-dvd-dismantling-device-srd-400


2003-2013 VW VolksWagen PASSAT Seat Skoda car radio installation guide

1. The original car radio.

The original car radio

2. Remove the radio frame.

Remove the radio frame

3. Remove screws that are holding the original car radio.

Remove screws that are holding the original car radio

4. Gently take out the original car radio.

Gently take out the original car radio

5. Unplug connectors and cables at the back of the radio.

6. Check all the accessories for the new Seicane car radio.

Check all the accessories for the new Seicane car radio

7. Connect the harnesses to the back of the new Seicane car radio.

Connect the harnesses to the back of the new Seicane car radio

8. Connect the Seicane car radio to your original stereo’s plugs.

9. Turn on the new Seicane car radio to have a careful check if everything works well. If it doesn’t, please check whether all the cables are connected correctly.

10. Put the new Seicane car radio into the dash.

11. Put everything into their original place. All the installation is done.


Wish you can gain valuable information from the above installation guide. If there is any question you cannot deal with independently, you can turn to your dealer or a professional for help. If you still think it too hard for you to install the car radio, you can just arrange a professional to install it directly. But before the installation, please confirm that you already have a suitable car radio. If not, you are recommended to click the link below which is about a 2003-2013 VW VolksWagen PASSAT Seat Skoda GPS Bluetooth Car Radio from Seicane.

http://www.seicane.com/9-inch-hd-touchscreen-2003-2013-vw-volkswagen-passat-seat-skoda-gps-navigation-system-android-3d-gps-navigation-radio-tuner-bluetooth-music-backup-camera-usb-obd2-s30901

This Seicane car radio is advanced enough to be an ideal replacement to upgrade your factory radio of 2003-2013 VW VolksWagen PASSAT Seat Skoda. When you turn on the GPS navigation function, you can be guided to find the best route to get to your desired destinations accurately through turn-by-turn direction and voice prompt. Under the Bluetooth technology, you can easily realize the connection between your enabled cell phone and this car radio so as to dial, receive or reject hands-free phone calls as well as enjoy streaming music from your phone music playlists, which promise you not only a safer but happier driving experience. Wish you like this fantastic car radio from Seicane. Good luck to you!

The Best Way to Upgrade a 2004-2010 CITROEN C4 navigation system head unit with Mirror Link Bluetooth Music OBD2 Backup Camera

2004-2010 CITROEN C4 navigation system head unit after installation

First of all, please look at the following image. It is a 2004-2010 CITROEN C4 navigation system head unit after installation. It looks very wonderful, doesn’t it? Here I would like to introduce that how the car stereo installation is achieved. If you are interested in it or you also have a plan to replace your factory radio, you may read this article carefully. Perhaps you are able to learn something from it.

2004-2010 CITROEN C4 navigation system head unit after installation

Before and during installation, you should notice:

1.Before connecting, please make sure the ignition is off to avoid short circuit.

2.Ensure connect the yellow and red power cable at last.

3.Ensure that all loose wires are isolated with electrical tape

4.Ensure don’t tangle the wire when tighten the moving parts(Such as seat rails).

5.Ensure that all ground is connected to the same place.

6.Using the improper fuse may cause damage of fire, so when replace the fuse, please consult the professional.

7.For your convenience, here’s the recommended tools for removal and installation from Seicane, please check for more details: http://www.seicane.com/car-dvd-dismantling-devicesrd-400


2004-2010 CITROEN C4 car stereo installation guide

1. The original car radio.

The original car radio

2. Remove the storage box; please use a removal tool if necessary.

3. Lift up the panel around the shift lever.

Lift up the panel around the shift lever

4. Remove the surrounding frame.

Remove the surrounding frame

5. Unscrew the screws that fixed the AC control panel and then unplug the cables behind.

Unscrew the screws that fixed the AC control panel and then unplug the cables behind
5-1
5-1

6. Plug the professional car dismantle tool into the CD player, take it out and unplug the connectors.

Plug the professional car dismantle tool into the CD player, take it out and unplug the connectors

7. Remove the trim panel cover and unplug the connectors behind.

Remove the trim panel cover and unplug the connectors behind

8. Check all the accessories for the new Seicane car stereo.

9. Connect the harnesses to the back of the new Seicane car stereo.

10. Connect the Seicane car stereo to your original stereo’s plugs.

11. Turn on the new Seicane car stereo to have a careful check if everything works well. If it doesn’t, please check whether all the cables are connected correctly.

12. Put the new Seicane car stereo into the dash.

13. Put everything into their original place. All the installation is done.


With the above installation instruction, can you finish the 2004-2010 CITROEN C4 navigation system head unit installation? If there is any question, you can seek good advice from your dealer or someone experienced. If it is the first time for you to start your installation, you’d better ask a professional for help. Anyway, before the installation, please confirm that your new car stereo can fit well with your car. If it cannot work well in your car, you’d better make a better replacement. I would like to recommend a marvelous 2004-2010 CITROEN C4 navigation system head unit from Seicane. For more details, please click:

http://www.seicane.com/hd-touchscreen-2004-2010-citroen-c4-android-radio-dvd-player-gps-navigation-system-with-bluetooth-music-wifi-dab-mirror-link-obd2-backup-camera-s32691

With a large 7inch 1024*600 multi-touch screen, this intelligent car stereo can show you the best display of videos and view effect of navigation. Besides, there are also many practical and entertainment features which can improve your car interior environment and promise you a wonderful driving experience, including 3D GPS navigation system, Bluetooth music, DVD, FM/AM radio, Wi-Fi, etc. If you like this car stereo, just take it and have a ton of fun with it.

How to skillfully upgrade a 1998-2005 BMW E46 gps dvd Bluetooth stereo supports OBD2 DVR Radio

1998-2005 BMW E46 gps dvd Bluetooth stereo after installation

When it comes to the installation of a car radio, some of you may think it can only be achieved by professionals with expertise especially for those who have tried before but failed. In fact, to install a car radio doesn’t require much expertise. If you have correct installation guide and some related experience, you can also succeed in such a job. Of course, you should make clear every step of the installation before you start it. The following comes a 1998-2005 BMW E46 gps dvd Bluetooth stereo installation instruction for you as a reference.

1998-2005 BMW E46 gps dvd Bluetooth stereo after installation

Before and during installation, you should notice:

1.Before connecting, please make sure the ignition is off to avoid short circuit.

2.Ensure connect the yellow and red power cable at last.

3.Ensure that all loose wires are isolated with electrical tape

4.Ensure don’t tangle the wire when tighten the moving parts(Such as seat rails).

5.Ensure that all ground is connected to the same place.

6.Using the improper fuse may cause damage of fire, so when replace the fuse, please consult the professional.

7.For your convenience, here’s the recommended tools for removal and installation from Seicane, please check for more details: http://www.seicane.com/car-dvd-dismantling-devicesrd-400


1998-2005 BMW E46 car radio installation instruction

1.The original car radio.

The original car radio

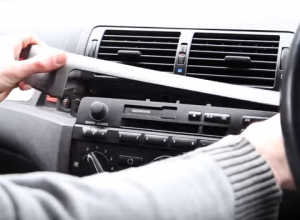
2.Remove the decoration strip, pry from the gap by using a flathead screwdriver.

Remove the decoration strip, pry from the gap by using a flathead screwdriver
2-1
2-1

3.Remove the two fixed screws from the original car radio.

Remove the two fixed screws from the original car radio

4.Gently remove the original car radio.

Gently remove the original car radio

5.Unplug the power speaker cable(by using a flathead screwdriver) and radio antenna.

Unplug the power speaker cable(by using a flathead screwdriver) and radio antenna
5-1
5-1

6.Remove the air conditioning control panel. By putting two hands on the air conditioning control panel, and pull it out toward to your own direction.

Remove the air conditioning control panel. By putting two hands on the air conditioning control panel, and pull it out toward to your own direction

7.Pull out the related wires.

Pull out the related wires

8.Remove the air-conditioning vents. The vent is firmly fixed, press it by 2 thumbs and remove it when the vent come out.

Remove the air-conditioning vents. The vent is firmly fixed, press it by 2 thumbs and remove it when the vent come out

9.Remove the final two screws from the frame, so as to take out the whole unit frame.

Remove the final two screws from the frame, so as to take out the whole unit frame

10. Take out the storage box inside, where to install with air conditioning control panel.

11. Check all the accessories for the new Seicane car radio.

12. Connect the harnesses to the back of the new Seicane car radio.

13. Connect the Seicane car radio to your original stereo’s plugs.

14. Turn on the new Seicane car radio to have a careful check if everything works well. If it doesn’t, please check whether all the cables are connected correctly.

15. Put the new Seicane car radio into the dash.

16. Put everything into their original place. All the installation is done.


Is it easy enough for you to understand the above installation instruction for a 1998-2005 BMW E46 gps dvd Bluetooth stereo? Before you start your work, if you have any questions, you can consult your dealer for helpful advice. If you don’t have related experience before and still think it impossible for you to finish the installation, you’d better go to a car stereo upgrade centre to arrange a technician to install the new car radio for your car. To help you find a suitable car radio, I would like to recommend a 1998-2005 BMW E46 gps dvd Bluetooth stereo from Seicane to you. For more details, please click:

http://www.seicane.com/oem-dvd-player-radio-gps-navigation-system-for-1998-2005-bmw-e46-with-bluetooth-hd-1024-600-touch-screen-obd2-dvr-rearview-camera-tv-1080p-video-usb-sd-3g-wifi-steering-wheel-control-mirror-link-s167212

With this excellent 1998-2005 BMW E46 gps dvd Bluetooth stereo in your car, your driving experience will be taken up a notch in a large extent. The built-in 3D GPS navigation system enables you to go anywhere you’d like to through its text-to-speech. The large 8 inch HD 1024*600 multi-touch screen will bring you the best viewing effect when you turn on the DVD player to play movies or videos. The Bluetooth module allows you to make, receive or reject calls and enjoy streaming music without keeping your hands off the steering wheel. If you like it, don’t forget to add it to your cart. Good luck to you!

13 Steps to remove and install a 2005-2012 Mercedes Benz GL Class X164 gps car stereo with OBD2 DVR Rearview camera TV 1080P Video

2005-2012 Mercedes Benz GL Class X164 gps car stereo after installation

With the rapid development and prevailing of online shopping, it is fairly easy to get an advanced car stereo with intelligent features. If you are being tired of your single-functional factory radio, it is wise of you to buy a brand new online and install it on your own which will save you a lot. This passage is about a step-by-step 2005-2012 Mercedes Benz GL Class X164 gps car stereo installation instruction from Seicane. If you own a 2005-2012 Mercedes Benz GL Class X164 gps car stereo, it suggests you to read it carefully.

2005-2012 Mercedes Benz GL Class X164 gps car stereo after installation


Before and during installation, you should notice:

1.Before connecting, please make sure the ignition is off to avoid short circuit.

2.Ensure connect the yellow and red power cable at last.

3.Ensure that all loose wires are isolated with electrical tape

4.Ensure don’t tangle the wire when tighten the moving parts(Such as seat rails).

5.Ensure that all ground is connected to the same place.

6.Using the improper fuse may cause damage of fire, so when replace the fuse, please consult the professional.

7.For your convenience, here’s the recommended tools for removal and installation from Seicane, please check for more details: http://www.seicane.com/car-dvd-dismantling-devicesrd-400


2005-2012 Mercedes Benz GL Class X164 gps car stereo installation instruction

1. The original car stereo.

The original car stereo

2.Pry the bottoming panel out of the dash with a plastic knife.

Pry the bottoming panel out of the dash with a plastic knife
2-1
2-1

3.Pry the air conditioner panel out and remove it.

Pry the air conditioner panel out and remove it

4.Remove two screws that fixed the radio on the dashboard with a screwdriver.

Remove two screws that fixed the radio on the dashboard with a screwdriver

5. Use your finger to pull the buckles down.

Use your finger to pull the buckles down
5-1
5-1

6.Gently pull the factory radio out of the dash.

Gently pull the factory radio out of the dash

7. Then unplug the connectors at the back of the factory radio.

Then unplug the connectors at the back of the factory radio

8. Check all the accessories for the new Seicane car stereo.

Check all the accessories for the new Seicane car stereo

9. Connect the harnesses to the back of the new Seicane car stereo.

Connect the harnesses to the back of the new Seicane car stereo

10. Connect the Seicane car stereo to your original stereo’s plugs.

11. Turn on the new Seicane car stereo to have a careful check if everything works well. If it doesn’t, please check whether all the cables are connected correctly.

12. Put the new Seicane car stereo into the dash.

13. Put everything into their original place. All the installation is done.


To have a successful installation, please make sure you are clear about every step before your installation. If you have any question, you can consult your dealer for suggestions. But if you don’t have some experience before and you think it too hard for you to achieve the whole installation, you’d better go to a car stereo upgrade centre and ask a technician to help you install it directly. If you are searching for a suitable car stereo online, you may check the link below which is about a remarkable 2005-2012 Mercedes Benz GL Class X164 gps car stereo from Seicane.

http://www.seicane.com/oem-gps-dvd-player-android-navigation-system-for-2005-2012-mercedes-benz-gl-class-x164-gl300-gl350-gl420-with-mirror-link-radio-hd-1024-600-touch-screen-obd2-dvr-rearview-camera-tv-1080p-video-3g-wifi-steering-wheel-control-usb-sd-s167219

This car stereo with the latest Android 5.1.1 operating system and a RK3188 1.6 GHz Cortex A9 Quad-core processor will be your best choice to upgrade your in-car environment. The accurate text-to-speech guidance of the GPS system makes it possible for you to find the best route to your ideal destination. With the aid of Bluetooth technology, you can have hands-free calls to keep safer and stream music to have fun. To please both you and your passenger, this unit allow you to play region-free DVDs, TV programs, FM/AM radio, etc, all the way. Just install this marvelous 2005-2012 Mercedes Benz GL Class X164 gps car stereo in your beloved car and enjoy your long journey from now on!

How to upgrade a 2013 2014 Suzuki S Cross android radio dvd gps with Bluetooth Rearview camera

2013 2014 Suzuki S Cross android radio dvd gps after installation.

Are you annoyed at your factory radio that cannot be compatible with a range of new features? If your answer is yes, then it’s high time for you to replace your factory radio with an advanced car stereo. An up-to-date car stereo can improve your in-car environment and driving experience. And it is easy for you to install a car stereo on your own under a detailed installation guide. This passage mainly introduces how to upgrade a 2013 2014 Suzuki S Cross car stereo, if you have the same dashboard as followings, you may refer to it.

2013 2014 Suzuki S Cross android radio dvd gps after installation.

Precautions for this installation:

1.Before you start up any work, park your car well and unplug the negative power cable to avoid any danger.

2.Please make sure that all fastened wires are isolated with electrical tape.

3.Please make sure the ignition is off to avoid short circuit.

4.Please prepare a lever and a screwdriver before the removal and the installation.

5.For your convenience, here’s the recommended tools for removal and installation from Seicane, please check for more details: http://www.seicane.com/car-dvd-dismantling-device-srd- 400


2013 2014 Suzuki S Cross car stereo installation steps

1. The original car radio.

The original car radio

2. Remove the light with a plastic knife and unplug the connector at the back of the indicator light.

Remove the light with a plastic knife and unplug the connector at the back of the indicator light
2-1
2-1
2-2
2-2

3. Remove the original panel with a plastic knife, pry gently along the gap and pick up the panel, then remove it and then set it aside.

Remove the original panel with a plastic knife, pry gently along the gap and pick up the panel, then remove it and then set it aside

4. Remove screws that fixed the radio on the dashboard.

Remove screws that fixed the radio on the dashboard
4-1
4-1

5. Gently pull the factory radio out of the dash. Pull it with medium force, as the wires are connected to the radio.

Gently pull the factory radio out of the dash. Pull it with medium force, as the wires are connected to the radio

6. Unplug the connectors at the back of the factory radio. Use a plastic knife if it is necessary.

Unplug the connectors at the back of the factory radio. Use a plastic knife if it is necessary
6-1
6-1

7. Check all the accessories for the new Seicane head unit.

Check all the accessories for the new Seicane head unit

8. Connect the harnesses to the back of the new Seicane head unit.

Connect the harnesses to the back of the new Seicane head unit

9. Connect the Seicane head unit to your original head unit ‘s plugs.

10. Turn on the new Seicane head unit to have a careful check if everything works well. If it doesn’t, please check whether all the cables are connected correctly.

11. Put the new Seicane head unit into the dash.

12. Put everything into their original place. All the installation is done.


The above is the whole installation processing for a 2013 2014 Suzuki S Cross car stereo, it is not complicated, isn’t it? During the installation, if you meet with difficulties, you can ask your dealer or a professional for help. But if you don’t have an ideal car radio for your beloved car, I’d like to recommend a 2013 2014 Suzuki S Cross car stereo from Seicane to you, please click for more details.

http://www.seicane.com/8-inch-2013-2014-suzuki-s-cross-android-radio-dvd-gps-navigation-system-with-hd-1024-600-touch-screen-bluetooth-obd2-dvr-rearview-camera-tv-1080p-video-usb-sd-3g-wifi-ipod-steering-wheel-control-mirror-link-s168073

This car radio for 2013 2014 Suzuki S Cross comes with a digital HD 1024*600 multi-touch screen which provides you with not only sensitive operation but also best visual effects. It will guide you to any unfamiliar destinations with its powerful 3D GPS Navigation of high accuracy.

As for the entertaining options, you don’t have to worry about them. Because in the motion, you are able to play not only movies or videos but also CDs, VCDs, Bluetooth music, and FM/AM radio to relax both you and your passengers. Wish you like it and have a nice day!

How to upgrade a 2008-2012 KIA CERATO (AT) gps Bluetooth car radio with dvd player Touch screen

Seicane 2008-2012 KIA CERATO (AT) gps Bluetooth car radio after installation

One of the easiest way to improve the in-car environment is to upgrade a brand new car radio with both practical functions and entertainment features. Some car owners with relevant installation experience are capable of replacing their factory radios with high-end radios but as for green hands, they have to arrange a professional to help them install car radios, which may cost much money and waste time. Whoever you are, to save your money and time, the following installation guide for a 2008-2012 KIA CERATO (AT) gps Bluetooth car radio can be taken as a reference.

Seicane 2008-2012 KIA CERATO (AT) gps Bluetooth car radio after installation

Some tips before the installation:

1.Please disconnect the power before the installation.

2.Please prepare a lever and a screwdriver before the removal and the installation.

3.Please keep all the separate parts from the car. Please take great care of the dashboard to avoid scratching it during its detachment and installation. Please keep handy any parts from the car and make use of all the original screws from the car as much as possible. so each related part of the unit can be fixed securely.

4.For your convenience, here’s the recommended tools for removal and installation from Seicane, please check for more details: http://www.seicane.com/car-dvd-dismantling-device-srd-400


2008-2012 KIA CERATO (A T) car radio installation guide

1.Remove the right air conditioner vent with a removal tool, and set it aside.

Remove the right air conditioner vent with a removal tool, and set it aside

2.Remove the left air conditioner vent in the same way as step 1, and set it aside.

Remove the left air conditioner vent in the same way as step 1, and set it aside

3.Unscrew all the screws holding the original car radio in dash with a screwdriver.

Unscrew all the screws holding the original car radio in dash with a screwdriver

4.Gently take the original car radio out of the dash.

Gently take the original car radio out of the dash

5.Disconnect all connectors at the back of the original car radio.

6.Check all the accessories for the new Seicane car radio.

Check all the accessories for the new Seicane car radio

7.Connect the harnesses to the back of the new Seicane car radio.

Connect the harnesses to the back of the new Seicane car radio

8.Connect the Seicane car radio to your original car radio ‘s plugs.

9.Turn on the new Seicane car radio to have a careful check if everything works well. If it doesn’t, please check whether all the cables are connected correctly.

10.Put the new Seicane car radio into the dash.

11.Put everything into their original place. All the installation is done.


Wish the above 2008-2012 KIA CERATO (A T) car radio installation guide can help you in some sense. If you don’t understand it totally, please seek help from your dealer. Before the installation, please check if your car radio fits well with your beloved car. If it can not work well, you’d better buy a new one. Here is a smart 2008-2012 KIA CERATO (A T) car radio from Seicane I recommend to you, you can click the link for more details.

http://www.seicane.com/oem-android-radio-gps-navigation-system-for-2008-2012-kia-cerato-at-with-bluetooth-mp3-hd-1024-600-touchscreen-dvd-player-obd2-dvr-rearview-camera-tv-3g-wifi-steering-wheel-control-usb-sd-1080p-video-mirror-link-s168045

This double din gps Bluetooth car radio is special designed for 2008-2012 KIA CERATO (AT), which remains the original functions of the steering wheel control as well as increases more practical and entertainment features. By simply pressing the GPS button, you can take advantage of accurate 3D positioning to find your way to your destination via text-to-speech guidance. Furthermore, the application of Bluetooth technology helps you have hands-free calls without keeping your hands off the steering wheel, which brings you more convenience and security. As for the entertainment functions, this car radio allows you to play Bluetooth music, CDs, DVDs, TV programs, films, etc. Just make this fantastic 2008-2012 KIA CERATO (AT) car radio along with you on your way.

The step-by-step installation guide for a 2004-2010 Nissan VERSA Bluetooth gps dvd stereo with Android5.1.1 Touch Screen

2004-2010 Nissan VERSA Bluetooth gps dvd stereo after installation

In the past you may spent money or time in arranging professionals to install car accessories for your car. But now it will save you a lot of money as well as time if you have the ability to change your original aftermarket or accessories especially a car stereo. Here is a detailed installation guide from Seicane for a 2004-2010 Nissan VERSA Bluetooth car stereo. It can be taken as reference for you if you want to try changing a new car stereo by yourself.

2004-2010 Nissan VERSA Bluetooth gps dvd stereo after installation

Here are 4 tips about the installation:

1.Please disconnect the power before the installation.

2.Please prepare a lever and a screwdriver before the removal and the installation.

3.Please keep all the separate parts from the car. Please take great care of the dashboard to avoid scratching it during its detachment and installation. Please keep handy any parts from the car and make use of all the original screws from the car as much as possible. so each related part of the unit can be fixed securely.

4.For your convenience, here’s the recommended tools for removal and installation from Seicane, please check for more details: http://www.seicane.com/car-dvd-dismantling-devicesrd-400


2004-2010 Nissan VERSA car stereo installation guide

1. Use a screwdriver to remove two screws above the Nissan Frontier radio.

Use a screwdriver to remove two screws above the Nissan Frontier radio

2. Remove the trim panel.

Please wedge a flat tip screwdriver under the trim panel and pry up on it to remove the trim panel. To protect the trim from being accidentally scratched, you can use a clean rag while prying up on the trim panel.

Remove the trim panel

3. Unscrew the four screws which are holding the factory radio in place with a screwdriver. Then gently take the factory radio off the panel.

Unscrew the four screws which are holding the factory radio in place with a screwdriver. Then gently take the factory radio off the panel

4. Disconnect the radio antenna in the back of the factory radio and unplug the electrical plugs running to the back of the radio.

Disconnect the radio antenna in the back of the factory radio and unplug the electrical plugs running to the back of the radio

5. Check all the accessories for the new Seicane head unit.

Check all the accessories for the new Seicane head unit

6. Connect the harnesses to the back of the new Seicane head unit.

Connect the harnesses to the back of the new Seicane head unit

7. Connect the Seicane head unit to your original car radio ‘s plugs.

8. Turn on the new Seicane head unit to have a careful check if everything works well. If it doesn’t, please check whether all the cables are connected correctly.

9. Put the new Seicane head unit into the dash.

10. Put everything into their original place. All the installation is done.


Now for the installation of a car stereo, whether you have a certain degree of understanding or not? If you cannot successfully install your new car stereo, it will be a better idea to ask your dealer or professionals for help. One thing you have to pay more attention to is: you ought to have an ideal car stereo for your car. If you are still looking for a suitable one, please click the link below for more details.

http://www.seicane.com/2004-2010-nissan-versa-androi-dvd-player-gps-navigation-system-bluetooth-radio-hd-1024-600-touch-screen-mirror-link-obd2-dvr-tv-3g-wifi-usb-sd-rearview-camera-1080p-video-s166226

This latest 2004-2010 Nissan VERSA car stereo comes with functions, including 3D GPS navigation system, CD/DVD player, Bluetooth technology, rearview camera, etc, from which you can get a lot convenience. When you travel around a city, a smart car stereo with these features can not only guarantee your driving safety and comfort but also can provide you with an unforgettable holiday. If you like it, do not hesitate to take it home. Good luck to you!