Mercedes-Benz E-Class W211 E200 E220 E240 E270 E280 GPS Navigation System Upgrade

Having a navigation system brings much convenience to us specially when we are in a strange city.Nowadays,most cars have been occupied with sat-navi device.There is no doubt that Mercedes-Benz E-Class W211 E200 E220 E240 E270 E280 GPS Navigation System Upgrade is more and more important.Even there is no such device in your car,connect to a device with navigation function,like smart phone,can also meet our requirement.

Mercedes-Benz E-Class W211 E200 E220 E240 E270 E280 GPS Navigation System is aimed at introducing driving lines to drivers consistently by audio or sound ways.It can direct drivers to where they want to go by using GPS datas.Driving speed and direction, and then showing in ways of signs,digital maps and voice output.Dynamic navigation system can read the traffic condition in time and figer out the best driving line to destination.

One picture about Mercedes-Benz E-Class W211 E200 E220 E240 E270 E280 GPS Navigation System:

Mercedes-Benz E-Class W211 E200 E220 E240 E270 E280 GPS Navigation System

These are all the accessories about Mercedes-Benz E-Class W211 E200 E220 E240 E270 E280 GPS Navigation System Upgrade.All these cables are useful for this device’s upgrade.You need to remove your original Mercedes-Benz E-Class W211 E200 E220 E240 E270 E280 car’s CD player.Disconnect your original car’s plug,and then install this unit to your dashboard.

Counting the line is based on the best driving time or driving line including avoid highway,crossing or bridge which take charges.After know the destination,Mercedes-Benz E-Class W211 E200 E220 E240 E270 E280 GPS Navigation System was expected to work out the recommending driving line in 30 seconds.If it is deviated from the best line,it will need to do it again.Tracking the destination means to compare the real driving lien with the counting time for drivers to decide whether they need to make a turning or not in the following road.

One video about Mercedes-Benz E-Class W211 E200 E220 E240 E270 E280 GPS Navigation System Upgrade and how to use:


During driving,navigation system will give points before turning or changing road. If there is a turning,it will point to the driving direction on this unit’s screen.Besides,the average driving time of every section is according to there we start to count. Navigation system can work out the crowding section by analysing traffic informations on the road where we are driving. More details about this Mercedes-Benz E-Class W211 E200 E220 E240 E270 E280 GPS Navigation System Upgradehttp://www.seicane.com/car-dvd-player-for-mercedes-benz-e-class-w211-with-gps-radio-tv-bluetooth-srd-8797 . When this device gets to recount the line,it will set a lower driving speed according to the degree of traffic.It will give you much helpful information when your are driving.


Upgrade Hummer H3 Sat-Navi GPS Navigation System 2006 2007 2008 2009

Maybe you not familiar with Sat-Navi GPS Navigation System.Navigation map’s function include schedual,address routing,help and close menu for choosing.Here we will introduce more details about upgrade Hummer H3 Sat-Navi GPS Navigation System 2006 2007 2008 2009.If your car is Hummer H3,and the year is from 2006 to 2009,then this 2 din device in car we introduce will give you more information.

Please look at this picture: Upgrade Hummer H3 Sat-Navi GPS Navigation System 2006 2007 2008 2009. It is an after market Hummer H3 GPS Navigation System:

Upgrade Hummer H3 Sat-Navi GPS Navigation System 2006 2007 2008 2009

From this Hummer H3 GPS Navigation System,you can directly easily find your destination or where you are.So when you look for the place,you can write down the place or input the words according to the 26 letters on the screen.You also can set the time 24 hours or 12 hours.This active GPS map can know the road that your car has driven.Besides you also can use the local service.It will show the car speed.If your speed are faster than the standard,the gps navigation system will remind you about this.

This is a video introducing the upgrade of Hummer H3 Sat-Navi GPS Navigation System from year 2006 to year 2009:

At the same time,this Gps navigation system can combine with the radio,firstly the navigation and also play radio.So you are not only using Sat-Navi,but also can play radio.It also supply some useful other functions to you.You can view pictures by using the photo browsing function.By using the 4GB SD card,this navigation system also support mp3 and mp4 playing.When you are busy,it is very easy for you to answer the phone by bluetooth hands free.Speciallly,you can read the calling record and contact from it.

At last,maybe you want to know more parameters about this  Hummer H3 Sat-Navi GPS Navigation System: http://www.seicane.com/car-dvd-player-for-hummer-h3-with-gps-radio-tv-bluetooth-srd-8724 The Chipset of Sat-Navi is SIRF STAR 3,Sumsung 400Mhz,and the Frequency is 1.575GHz,really very fast. This unit has 20 channels.The biggest fixed height is 18000m and the biggest velocity is 515m/s.Don’t be hesitate to ipgrade Hummer H3 Sat-Navi GPS Navigation System 2006 2007 2008 2009.It will give you more convinience and entertainment.

How to make BMW X1 E84 GPS Navigation System Screen bright in Italy

More and more Italy people are going shopping car GPS Navigation System online now.But the difference between Italy and other countries is that in Italy car owners have car ligths always on, for this reason BMW X1 E84 GPS Navigation System device beleave that it is “night”.And the level of  this device’s screen is low.The luminosity of this device is not bright enough.So users want to make BMW X1 E84 GPS Navigation System Screen bright in Italy.Most people know that they can adjust this device’s screen luminosity in settings.But you need to adjust it every time when this BMW X1 E84 GPS Navigation System power on.So some people will ask:

“I do not want to change settings every time, how can i solve the problem?”

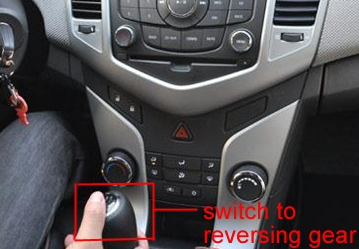
There are many ways to solve this problem.One enginenr said that please switch to reversing gear,then the light will bright.If you are not quite understand how to operate,please refer to this picture about how to switch to reversing gear:

make BMW X1 E84 GPS Navigation System Screen bright

There are other ways to solve the problem of light.

The first one: please adjust the screen brightness in the settings.

The second one: if you want the the brightness of the device always ON,please cut the “ILL” wire of this unit.Please find the sticker at the bottom of this unit,then you will find which one is “ILL” wire.That means if you don’t connect the “ILL” wire,then the screen will always on.

Some peopel maybe don’t know how to find the ILL wire.There is a sticker at the bottom of this BMW X1 E84 GPS Navigation System.Please find out this sticker.There are all the wires definition on this sticker.And there is one wire which is marked “ILL” or “ILLUMI”.

The sticker on your unit is similar to this one:

How to make BMW X1 E84 GPS Navigation System Screen bright

BMW X1 E84 GPS Navigation System’s screen is touch screen with 8 inch 800*480 digital high definition TFT LCD.The screen is bigger that your orginal car CD’s screen.So it is a good choice for you to change your BMW X1 E84 original car’s small screen to bigger BMW X1 E84 GPS Navigation System touch screen: http://www.seicane.com/car-gps-navigation-for-bmw-x1-e84-with-8-inch-digital-screen-two-way-can-bus-srd-8839. Above are several ways of making BMW X1 E84 GPS Navigation System Screen bright in Italy.Hope you can operate it according to these instructions and check if the BMW X1 E84 GPS Navigation System Screen was made bright.Or if you have any other good method to solve this problem,we are glad to hear any iders from you.


How to install 1998-2004 Mercedes-Benz CLK-W209 DVD player with Special Optic Fiber Amplifier

If you original car’s amplifier has optic fiber,and your optic fiber looks like this one in following picture,then your original car’s Optic Fiber Amplifier is very special.We will tell you how to install 1998-2004 Mercedes-Benz CLK-W209 DVD player with Special Optic Fiber Amplifier.This installation instructions not only can be used in Mercedes-Benz CLK-W209 DVD player,but also can be used in all Mercedes-Benz series cars which has such special optic fiber amplifier.

Mercedes-Benz special optic fiber amplifier

Following is about all the accessories in the package for Mercedes-Benz CLK-W209 DVD player.You can find that these is one 6 meter long cable in the package.This one 6 meter long cable is for the cars with Optic Fiber Amplifier. You need to connec t this 6 meter long cable from front head unit to your car’s rear trunk.

Mercedes-Benz CLK-W209 DVD player 6 meter long cable for special optic fiber amplifier

When you are installing this aftermarket Mercedes-Benz CLK-W209 multimedia stereo,you may find that the cables is not compatible with your car.Please don’t be worry.Because Some Mercedes-Benz CLK-w209 has optic fiber and the installation will be a little complex.We can provide you more detailed instruction with photos about how to connect our cable to your plug.You don’t need to cut your original car’s wires,just need to cut our cables.Your original optic fiber amplifier will not work after installation.This Mercedes-Benz CLK-W209 DVD player has built-in amplifier,and can support 5 speakers in your car.It also will have very good sound.

1. Please use this 6 meter long cable as a speaker long cable.

W209 DVD player 6 meter long cable connection


2. Please cut this 6 meter long cable’s plug 2 and plug 3.

3. Please connect the short power cable to this unit’s back.

4. Please connect this 6 meter long cable plug 2’s 4 pair speaker cables to the short power cable. Just joint the same color together.

Mercedes-Benz CLK-W209 DVD player with Special Optic Fiber Amplifier power cable connection


5. Please connect this 6 meter long cable plug 3’s 4 pair speaker cables to your original car’s optic fiber amplifier plug’s 4 pair speaker cables:

Mercedes-Benz CLK-W209 DVD player Special Optic Fiber Amplifier plug speaker cables connection


Then the speaker cables are all connected well.To make this unit power on, you need to connect canbus connector B2 and B3-B6.

Mercedes-Benz CLK-W209 DVD player Special Optic Fiber Amplifier plug short power cable connection

There are 3 kinds of connections:

1+2+5

1+4+5

1+3+6

Please try all these 3 kinds of connections, and see which one can make this unit power on.

At last,1998-2004 Mercedes-Benz CLK-W209 DVD player with Special Optic Fiber Amplifier installation are finished.You can find that this is a wonderful Mercedes-Benz CLK-W209 DVD player.This is a video about how to use Mercedes-Benz CLK-W209 DVD player with Special Optic Fiber Amplifier:


This specialized China Top 2 din multimedia stereo can combined with your original car with Special Optic Fiber Amplifier perfectly.No need to cut your original car’s cables, just need to remove your Mercedes-Benz CLK-W209 original CD, and install this head unit. This Mercedes-Benz CLK-W209 DVD player’s detail information: http://www.seicane.com/car-dvd-player-for-mercedes-benz-clk-w209-with-gps-radio-tv-bluetooth-srd-8802-6 It will keep your steering wheel control works as original after replacement.Fit like OEM, Keep original Style, Upgrade Perfectly.GPS is brilliant for roads.Guidance with this aftermarket sat nav, you can go anywhere.Bluetooth is also so helpful.If you have any questions about installation,please send us photos about your original car’s plugs.Maybe we can make a wiring diagram for your car.If your car has special Optic Fiber Amplifier,then we will suggestion you read this article about how to install 1998-2004 Mercedes-Benz CLK-W209 DVD player with Special Optic Fiber Amplifier.After you read this article,I think you will be clear about how to remove and how to install.You will find you are proud when you install this  Mercedes-Benz CLK-W209 DVD player with Special Optic Fiber Amplifier sucessfully.


Aftermarket Audi A4 GPS Navigation System

GPS is short for Globle Position System which is the system to locate the globle position. Aftermarket Audi A4 GPS Navigation System is a huge astronat and flight program that American government has spent 20years and 1200 billion dollars which is capable of providing information of the object on earth globly all the time so as to locate the datas of the exact location,spead and operation of the object.

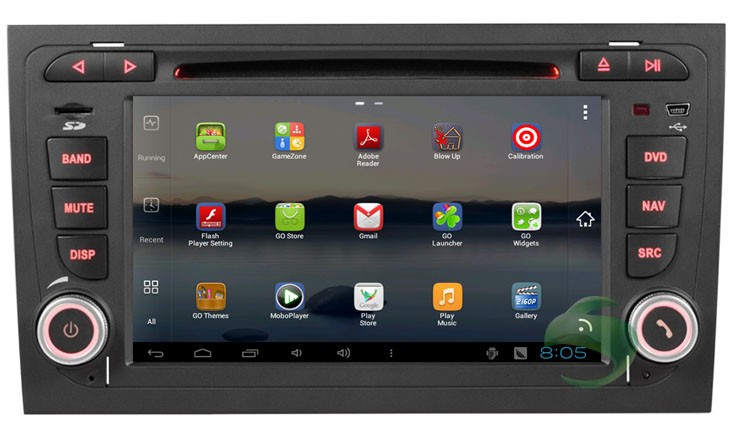
This is a photo about aftermarket Audi A4 GPS Navigation System:

Aftermarket Audi A4 GPS Navigation System

Audi A4 GPS Navigation System are consisted of 24 manmade satellites which are operationg 26560 feet high away from the earth.Every satellite is about to cycle planet every 12 hours which is divided into 6 orbital plane including 3 earth plane.Every satellite launches digital signal to earth constantly,and then the GPS user on earth figures out his location,speed and operation via receiving the information from the 4 satellites at the same time.

Maybe you don’t know that Aftermarket Audi A4 GPS Navigation System provides P and C/A location service.P offers accurancy location,expertising to serving for the military while C/A offers standard service which is for thoes non-military usage like navigation for voyage and vehicle.As for standard GPS service,the accurancy of the location is 25 meters,but if there is humen disturbance,it becomes 100 meters.

Nowadays,people come to realize the importance of its effect and the universe of its application field.Except for military,it has been wildly applied in flight,navigation,calculation and so on. As the Aftermarket Audi A4 GPS Navigation System is becoming cheaper and its function is improving.It becomes popular in the application of GPS system to against theft.When your Audi A4 is stolen,GPS can provide the car’s location constantly so as to help police to find your car very fast.

This is a video about this aftermarket Audi A4 GPS Navigation System’s all functions.Not only about the GPS Navigation fucntion,but also about many other useful functions. If you are interested in purchasing GPS Navigation System,please watch it.It is a wonderful entertainment and navigation system.

At last,we will tell you something more about this  Aftermarket Audi A4 GPS Navigation System. For more information,please visit details: http://www.seicane.com/android-7-inch-car-dvd-player-for-audi-a4-touchscreen-gps-tv-ipod-3g-wifi-sia-9102 You can find more useful information. It can still keep your steering wheel control works as original,it also can combined with your original car perfectly,and the installation is just plug and play.We also can provide this GPS Navigation System’s map upgrade.We can provide the newest map to you all the time.

Fiat Croma Sat Navi

More and more in-dash special dvd players have come to market now. Today we have a new one 1 din Sat Navi.It is Fiat Croma Sat Navi.This all-in-one machine fixed in navigator means that the machine matched GPS Sat Navi with electronic-dog.Then get perfectly compatible through adjusting.

This Fiat Croma Sat Navi has many kinds of useful functions.And it can fit Fiat Croma 2005,2006,2007,2008,2009,2010,2011,2012 year.If your car is just Fiat Croma,and the year is from 2005 to 2012,then this unit can fit your car perfectly.Let’s look at one picture of this unit:

Fiat Croma Sat Navi
Fiat Croma Sat Navi

Internet Point is often say POI(Point of interest) which is the information included by map production company.The included information is used for auto car friends to search destination,such as building and so on.This Fiat Croma Sat Navi also has the function of route planing.Route is the data planned in GPS memory storage that contained a starting-and-ending coordinate,also contained the coordinate which has some middle points.In a word,route is a refference way supplied for friends that drived for the destination.

The most important function of this unit is early warning in Sat Navi.This Fiat Croma Sat Navi has early warning function.Early warning is divided into fixed early warning and moved early warning,and there are great differences about working principle.Fixed early warning is off line data information that comes from wiped information by software,when the fixed position reaches the early warning position,the navigator will ask driving friends to drive as driving princeiple.Moving early warning is often fitted in electronic.Fiat Croma Sat Navi is fixed electronic detector inside,and it warns driving friends the presence of speed-testing photograph through the function of detecting the wave section shot by electronic nearby.

This is a video about all the functions of this Fiat Croma Sat Navi


At last,we will introduce you another important function of this Fiat Croma Sat Navi. It is double screen show.When navigator poses crossing road,merging road or rotation during the operation,GPS will show double screen pattern which contains normal route way in one position and maxible road choosing initate pattern.Now present navigation map emerged another double-screen that is divided into two.How useful of this cuntion!

Afterall,Fiat Croma Sat Navi also have many kinds of other important functions.It will bring great entertainment to you for your driving.And the useful functions are GPS,DVD,USB,SD,Radio,Bluetooth and so on.Do you like this Fiat Croma Sat Navi? If you like it,please refer to this link for more information: http://www.seicane.com/fiat-croma-head-unit-touch-screen-dvd-player-gps-navigation-system-car-stereo-with-radio-tv-bluetooth-ipod-srd-8829 If you have any questions about this unit,please contact us online.We are ready to help you online.Hope we can help you make a decision to buy it if you are still hesitating about this.Only USD$450 for fast shipping.It really worth your money.Buy it now,place order on our website directly now!

How to Mount BMW E60 E61 E63 E64 Head Unit?

Dear friends, if you are a car lover, a NAV man, or a fashion enthusiast, you need to know how to mount BMW E60 E61 E63 E64 Head Unit. Today to have a multipurpose navigation in your car is a necessary. Many people invite the professionals when they install the head unit, but most people do it by their self. Let’s have a look on the mounting step.

Installation Guide

To access the radio module to connect to the new on board monitor(4), remove these:(6)Decorative strip on instrument panel, (11)Trim on instrument panel, middle Make sure your seats and the center console are covered to avoid damage.

Use a plastic lever tool to pry at the end of the decorative trim to detach the side metal clip and gently pull the trim across. The trim is held using metal clips along the length of the trim. Remove the buttons for hazard light and door lock by pressing on the metal clips at the top and button as indicated.

Remove the buttons for hazard light and door lock by pressing on the metal clips at the top and button as indicated.

Detach the cable connector to remove the entire hazard/door lock button.

Remove the two screws at the top middle instrument panel.
Pull the panel towards you with force at these two locations. The panels are held on to metal clips at the side and are very tight.

The middle panel removed. Detach the three connectors.

Detach the ashtray trim by lifting it upwards as shown. There are held using plastic tabs at the bottom of the trim.

Now is the tricky part of removing the dark wood bottom middle trim which is also tightly held by metal clips.

Easiest way is to use a long flat screw driver and pry it outwards using an object to lever.

The red plastic tool is used to lever and not to damage the component.

Bottom middle trim removed.
Detach the connectors to the two buttons(DTC and Parking sensor)

Remove the two screws and slide out the radio unit.

Radio unit pulled out.

Back of the radio unit. Remove this wire harness by pressing the plastic piece and pull.

Attach one of these parts to the wire harness from the radio unit and to the back of the radio. Connect the Bluetooth speaker to the cable.

Next step is to remove the original on board monitor. To remove the original on board monitor, reomve the two screws using a Torx screwdriver(T10 or star)

Slide the monitor forward and pull out.

Remove the two connectors.

This connector will not be used.

This metal connector will be attached to the new unit

Next step is to run the new wire harness cable to the new monitor/screen.

It is easier to use a plastic coated hanger wire to fish the cable to the top.

To prevent damaging the new wire harness(red, blue and grey connectors end), use making tape to wrap the connectors.

Fish the cable through the back of console from the radio to the top area behind the screen.
This is a plastic coated wire.

Attach this wire harness to the back of the radio.

New wire harness connected to BMW E60  head unit.
The old wire harness should be reconnected to the new plastic receiver so that the wiring loop is completed.

There is a special manufacturer precaution to ground the new screen/monitor properly.

The two wires at the back of the screen need to be grounded.

This wire (A) should be connected to a screw to the front of the radio.

This wire(B) should be soldered to the metal connector plug to the screen.

Remove the ground wire (B). Extend the wire using a longer wire, strip the wire and wrap it round the metal connector piece as shown.

Metal connector

Extended wire

Ground wire (B) removed

Note: The manufacture recommends soldering the wire to the metal connector. However wrapping it will ground it as well.

Check for proper grounding of the ground with a multi-meter.

Ground wire(A) is connected to the screw for the radio.

Both Wire(A) and Wire (B) grounded.

Connect the metal connector to the new monitor/screen.

Connect the GPS antenna cable to the back.

Note: Locate a space and tug the GPS antenna to the back of the screen/monitor(just above the glove box). Use double sided tape to mount it. Signal strong enough even though it is hidden under the dash board.

Connect the red, blue and grey connectors from the radio.

Connect the rest of the accessories cables(Video, Ipod, TV, USB, Aux etc)

Tug the cables at the back of the screen neatly and re-install the monitor/screen.

Power up the car and the unit should initialize.

Re-install all the trims.

Read the manual for setting up the software and GPS system.

Done!

Please confirm your car style before  mounting a head unit. This is the information about how to mount BMW E60 E61 E63 E64 Head Unit. The mounting step is not very difficult, and it just takes you a few minutes. You will be a professional if you put these points in mind. Hope you will like it, click here to know the further information: http://www.seicane.com/bmw-5-series-e60-gps-navigation-with-radio-bluetooth-ipod-srd-8808

MB G Class W467 GPS Navigation System

This is a topic about MB G Class W467 GPS Navigation System.This GPS Navigation System has supplied the newest IGO8 map which contains the function of schedule,address book,track,system help,turn off function and so on.If you press the “turn off” button, the system will prompt you “turn off” or not.

By using the map,we can easily find the location we are and the place we need.When you are searching for some places, you can use the method of PINYIN input or Bihua input with the 26 letters on the screen.By the way,the map will also exhibit the distances and time (you can set up the time 24h or 12h format).

MB G Class W467 GPS Navigation System

Acoording to the track of the car,the map can exhibit iton the screen.At the same time,you can search other services around yor location.The regular operations also contain:Navigationmodel,schedule explanation, cancel the path ,track records,usually-used locations,and back off,This map can exhibit the speed of the car.If you have drove above the speed of car,if you have drove above the speed,it will give you a voice signal,It can also find some places with intelligent functions,such as metrol station,park place,restaurant,washing room and hotel.Now,this MB G Class W467 GPS Navigation System use the technologe of C-CAR map which make it possible for 3D.

The voice of navigation and radio can combine together to navigation and play the radio at the same time.It is very convinent for you to listen to the radio while in the navigation.This product support various kinds of sofware that you can read text and see the pictures in your car.It just look at that you have owned a car computer.

In order to satisfied the needs of customers,this MB G Class W467 GPS Navigation System: http://www.seicane.com/in-dash-car-dvd-gps-navigation-stereo-for-mercedes-benz-g-class-w467-with-radio-tv-bluetooth-ipod-si-9311-1 has installed the 4G SD card.You can play music or video with mp3 or mp4 formats.You can receive the call in any time because it has bluetooth,exhibit of coming call,telephone record and search of telephone records.

How to mount Alfa Romeo 147 Radio

Alfa Romeo 147 Radio installation is different from other car DVD player’s installtion.The most import thing you should know about the Alfa Romeo 147 Radio update is that Alfa Romeo 147 Radio has no CANBUS box as accessories.So it makes Alfa Romeo 147 dvd player’s insalltion a little different from others.Most cables just plug and play,but when you installed all of the cables,you will find that this Alfa Romeo 147 Radio can’t turn on.So how to mount Alfa Romeo 147 Radio correctly?

This is a picture about Alfa Romeo 147 Radio accessories:

Alfa Romeo 147 Radio

The problem user maybe have is that “It’s not working in my car!! i can’t turn on the radio and i can’t connect cable to steering commands!”.This is the most dificult problem about mouting a Alfa Romeo 147 Radio.Then how to solve it?

Please find out your original car’s ACC wire and then connect it to this unit’s red ACC wire which is on this unit’s power cable. There is a sticker on this unit’s bottom, please find out this unit’s red ACC wire according to the sticker. Then this unit will power on.

About the steering wheel control, please connect this steering wheel control plug

Alfa Romeo 147 steering wheel control plug

to your original car’s steering wheel control plug. Then study steering wheel control like following. Following is about steering wheel learning instructions:

a. Turn on device,enter into main menu,as picture 1 showed.Touch and slide to the left to enter into system menu,as picture 2 showed.

Alfa Romeo 147 radio

b. click and slide to the left,click steering icon to enter into steering wheel learning menu,as picture 3 showed,click “start” icon to start learning,as picture 4 showed.

Alfa Romeo 147 radio

c. click “volume + ” icon,and then long press the vol+ key in the wheel of the car 1 second,and then the key will be learned success,as picture 5 showed.

Alfa Romeo 147 radio

d.  Use the same way to learn other keys. After all keys from the wheel of the car finished learning,click “learning” icon to save the data,as picture 6 showed.

How to mount Alfa Romeo 147 Radio

e. Until now,all keys are finished learning,as picture 7 showed.

How to mount Alfa Romeo 147 Radio


After the steering wheel control learning finished, then your original car’s steering wheel buttons will work.

If the steering wheel control still can’t work, then it is the problem of your original car’s steering wheel control cables. Maybe the steering wheel control PIN of your original car’s steering wheel control plug is different from our steering wheel control plug. Please find out your original car’s steering wheel control cables: 2 steering wheel control wires and 1 steering wheel GND wire. Please connect these 3 wires to our 3 steering wheel control wires which is on the steering wheel control plug. You can see that these 2 green wires is steering wheel control wires, and the white wire is steering wheel GND wire. After you connect these 3 wires well, your original car’s steering wheel buttons will work 100% perfectly.

This is all about how to mount Alfa Romeo 147 Radio. For more information,please visit http://www.seicane.com/alfa-romeo-147-dvd-player-with-gps-navigation-radio-bluetooth-ipod-srd-8805  This is really a wonderful Alfa Romeo 147 Radio for you and your family.If you have any quesitons about this Radio insallation,please contact us or please chat online with us.Hope we can give you a help about mounting your Alfa Romeo 147 Radio. Hope you will think that the Alfa Romeo 147 Radio update is very easy after you read this article.These are all our experience. Hope they are useful to you.

How to update & install Rearview Camera

Some peopel don’t kow to connect and install a rearview camera for his belove car.There alwasy are some issues about back camera connection.Some have no image displayer on the screen when reverse car.Some even have no response when reverse car.There is no change in the screen.Normally,before you buy one camera,you should check if the camera’s shape is the same with your original car’s license plate light’s shape.Because the camera was placed to the place of license plate light.If the shape is not the same,then this camera can’t fit your car.

Some peopel maybe have many question about install a new camera.”The lights where the camera have to be is the top door?” “The piece is in one part without place for the camera.” “That is a whole circuit that can not be modified because the opening circuit is on it. ” Please don’t worry.The camera should be installed to the place of your original car’s license plate light.Please take the license plate light off,then connect it well and move it aside.Then install our camera to the place of your original car’s license plate light.The camera cable is about 6 meter long,it should be long enough.Please check if the cable was placed well.

This is one wiring diagram for rearview camera connection:

How to update & install Rearview Camera

You can see from the picture that there are six cables need to be connected when install a rearview camera.This blue connect to car back light cable.This blue is back testing cable connect to  back cable.This red is ACC+ connect  to car 12V power +.Connect the same color cable.Connect with back-video-in.This two black wires  are Ground cable.

If you want to get help from us. We normally reply: could you please take a photo about the shape of your license plate light and please place our camera near your license plate light,then we can check whether the shape of your license plate light is the same with the shape of our camera. When you reverse your car,the screen should jump to rearview image.If you are in radio interface,then reverse your car, if it is still in radio interface,then it is the problem of reverse detecting.That means this unit can’t detect your reverse signal.Could you please take a photo about what information does the screen display when you reverse your car? Does it display a black screen or there is something on the screen?

Note: if everything is connected, the screen will change automatically without any configuration.You don’t need to set anything else.We seicane can provide cameras for almost every kinds cars.When you buy car DVD player from us,we can provide the special rearview camera for you.For more information,please visit: http://www.seicane.com/in-dash-car-dvd-gps The rearview camera we provide can fit your car perfectly.Hope we can give you a help about how to update & install Rearview Camera.Hope you are satisfied with the rearviw camera function after you install it by yourself.