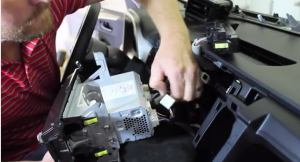
Detailed installation instruction for a 2007-2011 VW Volkswagen Tiguan head unit with 8 inch multi-touch screen Android 5.1.1 DVD Radio Bluetooth 3g WIFI

2007-2011 VW Volkswagen Tiguan head unit after installation

Have you ever installed a new car radio on your own before? If not, you may think it too hard to do it by yourself. Actually, it’s not too difficult since most of the aftermarket car stereos are just plug and play with special wiring harness. If you are a car owner of a 2007-2011 VW Volkswagen Tiguan and have the same dashboard as the picture below, you can take this detailed 2007-2011 VW Volkswagen Tiguan head unit installation instruction from Seicane for reference before and during the installation.

2007-2011 VW Volkswagen Tiguan head unit after installation

Precautions:

1.Please apply the parking brake and remove the negative cable on the vehicle battery before the removal to ensure safety.

2.A lever and a screwdriver need to be prepared before the installation.

3.For your convenience, here’s the recommended tools for removal and installation from Seicane, please check for more details: http://www.seicane.com/car-dvd-dismantling-device-srd-400


2007-2011 VW Volkswagen Tiguan head unit installation guide

1.Remove the top panel with a lever.

Remove the top panel with a lever

2.Disconnect the connector at the back of the panel.

Disconnect the connector at the back of the panel

3.Unscrew the screw with a screwdriver.

Unscrew the screw with a screwdriver

4.Remove the metal sheet on the top with your hands.

Remove the metal sheet on the top with your hands

5.Unscrew two screws circled in red shown as follows under the metal sheet.

Unscrew two screws circled in red shown as follows under the metal sheet

6.Remove the air conditioner vent with your hands.

Remove the air conditioner vent with your hands

7.Unscrew two screws under the vent with a screwdriver.

Unscrew two screws under the vent with a screwdriver

8.Remove the panel on the original car radio.

Remove the panel on the original car radio

9.Unscrew four screws holding the original car radio with a screwdriver.

Unscrew four screws holding the original car radio with a screwdriver

10.Take the original car radio out of the dash.

Take the original car radio out of the dash

11.Disconnect all the connectors at the back of the original head unit.

Disconnect all the connectors at the back of the original car radio

12.Check all the accessories for the new Seicane head unit.

Check all the accessories for the new Seicane car radio

13.Connect the harnesses to the back of the new Seicane head unit.

Connect the harnesses to the back of the new Seicane car radio

14.Connect the Seicane head unit to your original car radio ‘s plugs.

15.Turn on the new Seicane head unit to have a careful check if everything works well. If it doesn’t, please check whether all the cables are connected correctly.

16.Put the new Seicane head unit into the dash.

17.Put everything into their original place.


The above is all the installation guide for a 2007-2011 VW Volkswagen Tiguan head unit. If you find the dashboard above is different from yours, please don’t worry, the installation is similar on the whole, it won’t have much influence. If you think it too hard for you to install it, you’ d better ask a professional to help.

Here shows you an amazing 2007-2011 VW Volkswagen Tiguan head unit from Seicane. If you don’t find an ideal unit for your car, it’s your ideal choice. For more details, please click:

http://www.seicane.com/seicane-s128405-8-inch-android-dvd-radio-car-navigation-head-unit-for-2008-2013-vw-volkswagen-scirocco-with-3g-wifi-mirror-link-obd2-bluetooth

The amazing VW Volkswagen Tiguan head unit is equipped with built-in the advanced Bluetooth technology which allows you to make and receive phone calls wirelessly as well as stream music wirelessly from your smart phone to the head unit.

To upgrade your in-car entertainment, this amazing VW Volkswagen Tiguan head unit is just your best choice, which comes with a large 8 inch HD touch screen, GPS navigation system, Bluetooth connection, FM/AM Radio and everything you will ever need to transform your car into an entertainment powerhouse!

How to install a 2004-2011 Mercedes Benz CLK Class W209 head unit with Radio RDS Bluetooth 3G WiFi Mirror Link OBD2 16G Flash

Can you believe that you are able to install a new car radio even though you are not a professional? The answer is absolutely yes. With some related installation experience, you can easily achieve the installation with the help of a step-by-step installation guide. Now please look at the picture below, it’s a 2004-2011 Mercedes Benz CLK Class W209 head unit after installation from Seicane. If you also have the same or similar dashboard, then you can refer to this detailed installation instruction for 2004-2011 Mercedes Benz CLK Class W209 in particular.

2004-2011 Mercedes Benz CLK Class W209 head unit after installation

Some tips before the installation:

  1. Please disconnect the power before the installation.
  2. Please prepare a lever and a screwdriver before the removal and the installation.
  3. Please keep all the separate parts from the car. Please take great care of the dashboard to avoid scratching it during its detachment and installation. Please keep handy any parts from the car and make use of all the original screws from the car as much as possible. so each related part of the unit can be fixed securely.
  4. For your convenience, here’s the recommended tools for removal and installation from Seicane, please check for more details: http://www.seicane.com/car-dvd-dismantling-device-srd-400


2004-2011 Mercedes Benz CLK Class W209 head unit installation guide

1.The picture of the original car radio and 6-disc CD player.

The picture of the original car radio and 6-disc original car radio

2.First detach the gear shift panel.

First detach the gear shift panel

3.Use a screw driver to remove the screw marked with a red circle to release the car charger and ashtray.

Use a screw driver to remove the screw marked with a red circle to release the car charger and ashtray

4.Remove the car charger and ashtray assembly.

Remove the car charger and ashtray assembly

5.Use a screw driver to remove the screw marked with a red circle.

Use a screw driver to remove the screw marked with a red circle

6.Pry the air conditioner panel out with a plastic lever.

Pry the air conditioner panel out with a plastic lever

7.Remove the original air conditioner panel.

Remove the original air conditioner panel

8.Remove the heated seat and control panel assembly.

Remove the heated seat and control panel assembly

9.Pay attention to this buckle.

Pay attention to this buckle

10.Remove two screws.

Remove two screws
Remove two screws

11.Pull out the original car radio.

Pull out the original car radio

12.Check all the accessories for the new Seicane head unit.

Check all the accessories for the new Seicane head unit

13.Connect the harnesses to the back of the new Seicane head unit.

Connect the harnesses to the back of the new Seicane head unit

14.Connect the Seicane head unit to your original car radio ‘s plugs.

15.Install the new Seicane radio back after the wiring harness has been connected. Fasten the four screws.

Install the new Seicane radio back after the wiring harness has been connected. Fasten the four screws

16.Install the air conditioner panel, the car charger, the ashtray, the heated seat and the control panel back.

Install the air conditioner panel, the car charger, the ashtray, the heated seat and the control panel back

17.Reinstall cigarette lighter.

Reinstall cigarette lighter

18.Turn on the new Seicane head unit and have a careful check if everything works well.


Can you understand all the installation steps for the 2004-2011 Mercedes Benz CLK Class W209 head unit? If not, you’d better ask your dealer or a professional for help. If you don’t find a  fitting unit for your car, I’d like to introduce a wonderful 2004-2011 Mercedes Benz CLK Class W209 head unit from Seicane to you, please check it out:

http://www.seicane.com/seicane-s127508-pure-android-autoradio-dvd-gps-head-unit-for-2004-2011-mercedes-benz-clk-class-w209-clk270-clk320-clk350-clk500-clk550-with-radio-rds-bluetooth-3g-wifi-mirror-link-obd2-16g-flash-s127508

This double din Mercedes Benz CLK Class W209 head unit comes with a large 7 inch multi-touch screen which is ideal for watching various kinds of videos to have more fun in your car. Thanks to the dual zone, you can also enjoy your favorite music on the way while you are navigating to your destination. Coming with the A/V input and output, this unit can support a rearview camera and will automatically switch to the reversing image for you to park easily. Why not take it right now and have great fun in your car in the future?

How to upgrade a 1999-2009 VW Volkswagen Sharan car stereo with Android 5.1.1 Radio GPS Multimedia DVD Player Quad-core CPU HD 1024*600 Multi-touch Capacitive Screen

For most car owners, driving in a beloved car stereo with great pleasure is the most exciting thing to the destination. To get more fun on the way, you can easily upgrade your factory radio with a new aftermarket car radio. Here I’d like to introduce a great 1999-2009 VW Volkswagen Sharan car stereo installation guide from Seicane to you . If you have the same dashboard as the picture below, then you can read this passage carefully for reference.

1999-2009 VW Volkswagen Sharan car stereo after installation

Precautions:

  1. Please apply the parking brake and remove the negative cable on the vehicle battery before the removal to ensure safety.
  2. A lever and a screwdriver need to be prepared before the installation.
  3. For your convenience, here’s the recommended tools for removal and installation from Seicane, please check for more details: http://www.seicane.com/car-dvd-dismantling-device-srd-400

1999-2009 VW Volkswagen Sharan car stereo installation instruction

1.The original car radio.

The original car radio

2.Insert four removal keys into the holes of the original car radio.

Insert four removal keys into the holes of the original car radio

3.Gently take the original car radio out of the dashboard by pulling the removal keys as the following picture shows.

Gently take the original car radio out of the dashboard by pulling the removal keys as the following picture shows

4.Disconnect the connectors at the back of the original radio.

5.Check all the accessories for the new Seicane car stereo.

Check all the accessories for the new Seicane car radio

6.Connect the harnesses to the back of the new Seicane car stereo.

Connect the harnesses to the back of the new Seicane car radio

7.Connect the Seicane car stereo to your original car radio ‘s plugs.

8.Turn on the new Seicane stereo to have a careful check if everything works well. If it doesn’t, please check whether all the cables are connected correctly.

9.Put the new Seicane stereo into the dash.

10.Put everything into their original place.


Can you install this new 1999-2009 VW Volkswagen Sharan car stereo on your own with the help of this step-by-step installation guide? If you think it too hard for you, you’d better ask a professional for help. If you encounter any question during the whole process, you can consult your dealer. If you don’t have an ideal car stereo for your car, I’d like to recommend this intelligent 1999-2009 VW Volkswagen Sharan car stereo from Seicane to you. Here’s the link, please click:

http://www.seicane.com/seicane-s127648-1999-2009-vw-volkswagen-sharan-android-radio-gps-multimedia-car-dvd-player-with-bluetooth-mirror-link-obd2-3g-wifi-hd-1024-600-multi-touch-capacitive-screen

This amazing VW Volkswagen Sharan car stereo comes with a built-in latest GPS navigation system is desirable for you to find the best way to your destination within the least time. As long as you have a mobile phone with bluetooth feature, you can easily pair it with this unit via the bluetooth connection for hands-free calls and music streaming to ensure the safety and pleasure on a long trip.

To keep your passengers enjoyable on all trips, this multifunctional VW Volkswagen Sharan car stereo is just your best choice!

Upgrade a 2004-2012 Mercedes Benz A Class W169 head unit with Bluetooth 3G WiFi Mirror Link OBD2 HD 1024*600

Here comes a modern 2004-2012 Mercedes Benz A Class W169 head unit from Seicane after installation. If you want to enjoy a more comfortable car interior environment and a more exciting driving experience, it’s a great idea for you to install such a multifunctional stereo in your car. To install a new aftermarket car stereo, you can find a step-by-step installation guide to help. Now I’d like to share a detailed Mercedes Benz A Class W169 head unit installation guide with you. You can read it carefully if you also have the same dashboard as the picture below.

2004-2012 Mercedes Benz A Class W169 head unit after installation


Tips about the installation:

1.Please disconnect the power before the installation.

2.Please prepare a lever and a screwdriver before the removal and the installation.

3.Please keep all the separate parts from the car. Please take great care of the dashboard to avoid scratching it during its detachment and installation. Please keep handy any parts from the car and make use of all the original screws from the car as much as possible. so each related part of the unit can be fixed securely.

4.For your convenience, here’s the recommended tools for removal and installation from Seicane, please check for more details: http://www.seicane.com/car-dvd-dismantling-device-srd-400


2004-2012 Mercedes Benz A Class W169 head unit installation guide

1. Detach the outer frame of the original car radio.

1. Detach the outer frame of the original car radio.


2. Use a screw driver to remove the screws marked with red circles.

2. Use a screw driver to remove the screws marked with red circles.


3. Remove the screw on the lower right.

3. Remove the screw on the lower right.


4. Remove the screw on the lower left.

4. Remove the screw on the lower left.


5. Remove the screw on the upper left.

5. Remove the screw on the upper left.


6. Remove the screw on the upper right.

6. Remove the screw on the upper right.


7. Use a screw driver to remove the screws marked with red circles.

7. Use a screw driver to remove the screws marked with red circles.


8. Remove the original car radio.

8. Remove the original car radio.


9. Check all the accessories for the new Seicane head unit.

9. Check all the accessories for the new Seicane head unit.


10. Connect the harnesses to the back of the new Seicane head unit.

10. Connect the harnesses to the back of the new Seicane head unit.


11. Insert the plug of the car into the socket of unit.

11. Insert the plug of the car into the socket of unit.


12.Remarks

a. Plug in the radio antenna.

b. Plug in the GPS antenna.

12. Remarks a. Plug in the radio antenna. b. Plug in the GPS antenna.


13. Install the new Seicane head unit into the dashboard.

13. Install the new Seicane radio into the dashboard.


14. Fasten the new Seicane head unit with 4 screws and install the frame back.

14. Fasten the new Seicane radio with 4 screws and install the frame back.


15. Turn on the new Seicane head unit to have a comprehensive check. If everything works well, all the installation is done. If not, please check if all the cables are connected correctly.

With this detailed installation guide, can you install your new 2004-2012 Mercedes Benz A Class W169 head unit on your own? If not, you’d better ask a professional to help you. If you encounter any question during the whole process, you can consult your dealer. In addition, you need to find a suitable head unit for your car. If you don’t have one, you can refer to this advanced 2004-2012 Mercedes Benz A Class W169 head unit from Seicane, please click for more details:

http://www.seicane.com/seicane-s127682-7-inch-2004-2012-mercedes-benz-a-class-w169-a150-a160-a170-android-autoradio-navigation-car-dvd-head-unit-with-bluetooth-3g-wifi-mirror-link-obd2-hd-1024-600-multi-touch-screen-flash 

Designed with a large 7 inch multi-touch screen, you can enjoy a more intuitive interface and an easier operation with this Mercedes Benz A Class W169 head unit. As an amazing multimedia player, it can support almost all the multimedia formats like DVD/VCD/CD/MP3/MPEG4/DIVX/CD-R/WMA/JPEG, etc., so that you can keep your passengers entertained all the way on a long trip.

To keep safer and more cheerful, you can put the Bluetooth technology into good use for hands-free calls and streaming music. The GPS navigation system of high accuracy is desirable for you to get to your destination with the best way and within the least time.

To keep entertained on all your trips, this amazing Mercedes Benz A Class W169 head unit is just your best choice. Good luck to you!


How to upgrade a 2013 2014 2015 Honda CRV high version head unit with screen 3G WiFi Touch Screen AUX Bluetooth HD 1080P Video

2013 2014 2015 Honda CRV high version head unit after installation

To drive your beloved car to get to your destination, you must feel much enjoyable. To get more fun, you can easily install a new aftermarket head unit which can offer a lot of entertainment options. If you are a car owner of a 2013 2014 2015 Honda CRV high version, you must be familiar with the image below, which is an all-in-one 2013 2014 2015 Honda CRV high version head unit from Seicane. If you plan to upgrade your factory radio, then you can refer to the installation guide as follows.

2013 2014 2015 Honda CRV high version head unit after installation


Some tips before the installation:

  1. Please disconnect the power before the installation.
  2. Please prepare a lever and a screwdriver before the removal and the installation.
  3. Please keep all the separate parts from the car. Please take great care of the dashboard to avoid scratching it during its detachment and installation. Please keep handy any parts from the car and make use of all the original screws from the car as much as possible. so each related part of the unit can be fixed securely.


2013 2014 2015 Honda CRV high version head unit installation guide

1.Pry the below left control button with a screwdriver and then pry the right one.

2013 2014 2015 Honda CRV high version head unit installation step 1


2.Softly take out the panel.

2013 2014 2015 Honda CRV high version head unit installation step 2


3.Use a screwdriver remove two screws which lay in left and right sides of the top panel,and keep screws well for use again.

2013 2014 2015 Honda CRV high version head unit installation step 3


4.Prize the front of dashboard with a lever, after it was fastened remove it.

2013 2014 2015 Honda CRV high version head unit installation step 4


5.Remove this upper dashboard gently, you may still use screwdriver to help you.

2013 2014 2015 Honda CRV high version head unit installation step 5


6.Take out two screws which lay in left and right sides of downward place.

2013 2014 2015 Honda CRV high version head unit installation step 6


7.After these work,you can gently get the CD player out.

2013 2014 2015 Honda CRV high version head unit installation step 7


8.Plug all the cables which connected them.

2013 2014 2015 Honda CRV high version head unit installation step 8


9.Plug cables of the new Seicane head unit to car wires and firm the four screws to their original places.

  1. Check whether the new Seicane head unit is working without problem.


That’s all the installation guide for a 2013 2014 2015 Honda CRV high version head unit. If you have any questions, please seek help from your dealer or a professional. However, without any experience on the installation, it’s strongly suggested you have it installed by a professional. If you don’t have an ideal unit for your car, you can refer to this multifunctional 2013 2014 2015 Honda CRV high version head unit from Seicane, please click:


http://www.seicane.com/10-2-inch-2013-2014-2015-honda-crv-high-version-with-screen-android-radio-gps-navigation-system-3g-wifi-capacitive-touch-screen-tpms-dvr-obd-ii-rear-camera-aux-steering-wheel-control-usb-sd-bluetooth-hd-1080p-video-s083697


This Seicane Honda CRV high version head unit comes with the latest  GPS navigation system for you to upgrade your car radio. With the turn-by-turn direction and voice prompts, you can travel to anywhere you’d like or find a coffee shop easily. To keep safer and more relaxed during the whole journey, you can simply link with your bluetooth-enabled mobile phone to make hands-free calls and stream music.


Just find your way to your desired destination with this up-to-date Seicane Honda CRV high version head unit. Good luck!


How to upgrade a 2001-2011 NISSAN FRONTIER radio with Pure Android 4.4.4 AUX DVD player touch screen GPS navigation

You may think it a bit troublesome to remove and install a new car stereo in your car, therefore, you keep your factory radio with its single function for a long time. As a matter of fact, it’s quite easy to install a new stereo in your car. it can be done within about half an hour. The picture below is a top 2001-2011 NISSAN FRONTIER radio after installation from Seicane, if you have a similar or exactly same dashboard, you can take the step-by-step NISSAN FRONTIER radio installation guide as a reference.

2001-2011 NISSAN FRONTIER radio after installation


Precautions:

  1. Please apply the parking brake before the installation.
  2. For your safety, please disconnect the negative cable on the vehicle battery.
  3. Please prepare a lever and a screwdriver for the installation.


2001-2011 NISSAN FRONTIER radio installation guide

Step 1:

Use a screwdriver to remove two screws above the Nissan Frontier radio.

2001-2011 NISSAN FRONTIER radio installation step 1


Step 2:  Remove the trim panel.

Please wedge a flat tip screwdriver under the trim panel and pry up on it to remove the trim panel. To protect the trim from being accidentally scratched, you can use a clean rag while prying up on the trim panel.

2001-2011 NISSAN FRONTIER radio installation step 2


Step 3: Unscrew the four screws which are holding the factory radio in place with a screwdriver. Then gently take the factory radio off the panel.

2001-2011 NISSAN FRONTIER radio installation step 3


Step 4: Disconnect the radio antenna in the back of the factory radio and unplug the electrical plugs running to the back of the radio.

2001-2011 NISSAN FRONTIER radio installation step 4


Step 5: Connect the antenna in the back of the new Seicane radio and plug the electrical plugs running to the back of the radio. If you have any question on how to connect the antenna to new radio, please take the user manual as a reference or turn to the dealer for a wiring diagram.


Step 6: Turn on the new Seicane radio to have a careful check if it works well with your car. If it doesn’t, please check whether all the cables are connected correctly.


Step 7: After the test, please put the new Seicane radio into the dash.


Step 8: Install all the screws and the trim panel into their original place.


Wish the above installation guide can be helpful for you. If you find the dashboard in the picture above is different from yours, you can rest assured because it won’t have much impact on the installation which is similar on the whole. If you have any questions, please don’t hesitate to ask your dealer or a professional for help.


Besides, you need to make sure you have a right radio for your car so that it can work well after installation. If you don’t have one, you can take the following 2001-2011 NISSAN FRONTIER radio from Seicane as a reference, which is equipped with high configurations and great capabilities, please click:


http://www.seicane.com/seicane-s127005-quad-core-pure-android-4-4-4-universal-bluetooth-dvd-in-dash-car-navigation-system-with-3g-wifi-am-fm-radio-mirror-link-obd2-16g-flash-backup-camera-hd-1024-600-multi-touch-capacitive-screen-aux


With the software upgraded and the firmware improved, this NISSAN FRONTIER radio is the best replacement for you to replace your factory radio. A wide range of entertainment formats are supported to provide you with tons of fun and enjoyment, such as DVD/VCD/CD/MP3/MPEG4/DIVX/CD-R/WMA/JPEG, etc.


The functionality of Bluetooth allows for hands-free calls and streaming music is also included. Utilize the GPS function, you’ll get the most accurate direction to arrive at your destination.

Go and enjoy your best journey with this amazing NISSAN FRONTIER radio all the time from now on! Good luck to you!


How to replace a 2001-2011 VW Volkswagen MK5 car stereo with Car stereo RDS 3G WiFi Quad-core CPU DVD player

No matter you are keeping up with trend or want to pursue a comfortable life in your car, it’ s a great idea for you to upgrade your factory car stereo with a new aftermarket car stereo which can be compatible with a lot of up-to-date features. Look at the picture below, it’s an intelligent 2001-2011 VW Volkswagen MK5 car stereo from Seicane. If you have the same dashboard, you can read this passenger carefully to help with the installation of your new stereo.

2001-2011 VW Volkswagen MK5 car stereo after installation


Some tips before the installation:

  1. Please disconnect the power before the installation.
  2. Please prepare a lever and a screwdriver before the removal and the installation.
  3. Please keep all the separate parts from the car. Please take great care of the dashboard to avoid scratching it during its detachment and installation. Please keep handy any parts from the car and make use of all the original screws from the car as much as possible. so each related part of the unit can be fixed securely.


2001-2011 VW Volkswagen MK5 car stereo installation guide

  1. The original CD player.

    2001-2011 VW Volkswagen MK5 car stereo installation step 1
    2001-2011 VW Volkswagen MK5 car stereo installation step 1


  1. Insert two removal keys into the small port of two sides of the CD player.

    2001-2011 VW Volkswagen MK5 car stereo installation step 2
    2001-2011 VW Volkswagen MK5 car stereo installation step 2


  1. Gently remove the original CD player out of the dashboard.

    2001-2011 VW Volkswagen MK5 car stereo installation step 3
    2001-2011 VW Volkswagen MK5 car stereo installation step 3


  1. Press the removal key on the side of the CD player and release the key. Then do the same on the other side.

    2001-2011 VW Volkswagen MK5 car stereo installation step 4
    2001-2011 VW Volkswagen MK5 car stereo installation step 4


  1. Disconnect the harness at the back of the CD player.
    2001-2011 VW Volkswagen MK5 car stereo installation step 5-1
    2001-2011 VW Volkswagen MK5 car stereo installation step 5-1

    2001-2011 VW Volkswagen MK5 car stereo installation step 5-2
    2001-2011 VW Volkswagen MK5 car stereo installation step 5-2
  2. Connect the harnesses to the back of the new Seicane car stereo.
  3. Connect cables of the new Seicane car stereo as the user manual shows.
  4. Turn on the new Seicane car stereo to have a careful check if everything works well. If it doesn’t, please check whether all the cables are connected correctly.

9.Put the new Seicane car stereo into the dash.

  1. Put everything into their original place.


That’ s the step-by-step installation guide for a 2001-2011 VW Volkswagen MK5 car stereo. If you have any questions, you can ask your dealer or a professional for help. Make sure you are clear about every step before you install it. If you don’t have enough confidence to do it on your own, you can go to a car stereo upgrade center to install it.


Before the installation, it’s also crucial for you to make sure you have a suitable car stereo for your car. If you are still looking for one, I’d like to recommend this amazing Seicane VW Volkswagen MK5 car stereo to you, here’s the link, please click:


http://www.seicane.com/seicane-s127648-android-4-4-4-in-dash-gps-dvd-bluetooth-system-for-2001-2011-vw-volkswagen-mk5-with-radio-rds-3g-wifi-mirror-link-obd2-quad-core-cpu-16g-flash-hd-1080p-video-steering-wheel-control-mp3


What makes this VW Volkswagen MK5 car stereo special is its powerful RK3188 1.6 GHz Cortex A9 Quad-core CPU which greatly smoothes the operation. The large 7 inch multi-touch screen with 1024*600 pixel resolution also creates a visually radiant display to watch the videos. You can utilize the precise GPS navigation system and the Bluetooth technology which allows you to have hands-free calls and stream audio to reach your destination safely and pleasantly.


Wish you like this great VW Volkswagen MK5 car stereo and have a wonderful time with it on all trips from now on!

Specific installation steps for 2009 Hyundai I20 navigation dvd with bluetooth 3G WIFI

In modern society car stereos are upgrading with a very fast speed to satisfy people’s higher and higher demands for it.Thus designers for Hyundai I20 try to manufacture more technical car stereos to have a good market.

At the same time,many owners of Hyundai I20 are willing to install a new head unit into their cars.But the question is to knwo the specific installation steps for 2009 Hyundai I20 navigation dvd with bluetooth 3G WIFI when you plan to do it yourself.

Before we talk about the details,let’s have a look at a picture first,which is head unit after installation,aftermarket GPS dvd navigation system of 2009 Hyundai I20.

Head unit after installation,aftermarket GPS dvd navigation system of 2009 Hyundai I20

You may have seen this unit before but don’t know whether it’s suitable for your car,actually there is an easy way to make a judgement.That is to see if original radio and new one’s trim panels are same.And this is the specialized Hyundai I20 navigation dvd that you needn’t to bother which one to choose.

Precautions before installation:

1.Please remember to finish your parking series before your installation

2.Please remember to disconnect the negative battery cable before starting stereo removal

3.Check out your factory radio unit include some related objects to car audio,and see whether everything is ok before your installation

After you have taken these notes in mind,next will comes to main part of this article.

2009 Hyundai I20 original audio system removal and navigation dvd installation:

1.Pry the lower part dashboard and increase one on right direction step by step with the help of levers,then continue to right side until you can fasten the dashboard

Use a lever to pry the lower part of dashboard


increase one on its right side step by step


continue by right side


2.Gently take out right-side dashboard,be careful and slow because the dashboard for it is tighter than usual one

Gently take out right-side dashboard


3.After you have totally removed dashboard from the unit,you can easily remove the remaining part

remove the remaining part of the unit


4.This is  the inside appearance of  dashboard after removal

inside appearance of  dashboard after removal
inside appearance of dashboard after removal


4.Disconnect all cables behind the radio

Disconnect all cables behind the radio


5.Make out these four screws,each side has two ones

Make out these four screws


6.Gently take factory CD player out

Gently take factory CD player out


The removal process has been finished,the next step comes to installation work for Hyundai I20  aftermarket radio:

7.Remove the trim panel off the unit gently after you have removed screws on it,and then install new radio to right space

8.Firm screws and screw them beside the cd radio to fix it,make dashboard back to your car

If you are going to start your installation work after you know right steps,then you can ask a friend beside you to give you a hand,such as passing you a tool or make sure your safety during this process.Please do not do self-installation,service or maintain when you have no experience on it,it can be very dangerous.

Most of you should know little about usage of new unit,then you can get more information from related websites,for example: http://www.seicane.com/2009-hyundai-i20-autoradio-gps-sound-system-dvd-cd-player-bluetooth-music-tv-tuner-wifi-3g-aux-pop-reverse-camera-usb-sd-ipod-iphone-dvr-hd-1080p-video-c030 .

This new head unit for 2009 Hyundai I20 has increased some new functions,which brings us more convenience and entertainments.For example,the GPS navigation system can show 3D and google map on the screen when you entered a destination on it,then detailed map will be shown on the screen,it also has voice navigation,you will never get lost with this function.


2006-2012 Toyota Rav4 stereo radio with bluetooth music touch screen installation

Before starting this article,here is an image for you:head unit after installation,stereo radio with gps navigation system of 2006-2012 Toyota Rav4.

head unit after installation,stereo radio with gps navigation system of 2006-2012 Toyota Rav4

You can have a careful look at its trim panel if you are someone who wants to upgrade the stereo of your Toyota Rav4.You should firstly make sure that this unit is suitable for your car and then you can go on think about the question of 2006-2012 Toyota Rav4 stereo radio with bluetooth music touch screen installation.

Some people ask dealers of the market to help them install the head unit,however there’s no need to do so for the installation can actually be one thing that can be accomplished by yourself.Of course,it’s under the condition that you have learned clearly about specific steps to mount a new stereo and act them according to right instructions.

Precautions before installation:

1.Have a check for your car head unit to see whether all factory equipment are well

2.Please remember to unplug negative power cable before you start any work,you really need to ensure it before installation

3.Please mind that you should be gentle during the following installation to avoid some damage to the unit and place things that are removed in a safe and visible place

Before we get to know detailed mount procedure for Toyota Rav4 radio,I think we can have a view at next video first:

2006-2012 Toyota Rav4 original radio removal:

1. Use an automotive tool to take the upper dashboard trim panel out,set the panel aside which was removed

Use an automotive tool to take the upper dashboard trim panel out


2.Pry the air conditioning vents gently  away from the dashboard,which are on the left and right-hand sides of the factory touch careen unit

gently prize the air conditioning vent away from the dashboard which is on the right-hand side of the factory unit


gently prize the air conditioning vent away from the dashboard which is on the right-hand side of the factory unit


3.Lever the clock display gently and remove lamp panel away from the dashboard and set it to the side

Lever the clock display gently and remove lamp panel away from the dashboard and set it to the side


4.Take the four retaining screws out which attaches factory unit to the dashboard

Take the four retaining screws out which attaches factory unit to the dashboard


5.Gently pull the touch screen unit  off  from trim panel and lean it forward to gain access to the wiring harnesses on the reverse side

Gently pull the touch screen unit  off  from trim panel and lean it forward to gain access to the wiring harnesses on the reverse side
Gently pull the touch screen unit off from trim panel and lean it forward to gain access to the wiring harnesses on the reverse side


6.Disconnect the individual harnesses to remove original cd radio

Disconnect the individual harnesses to remove original cd radio


7.Totally removed stereo

Totally removed stereo


2006-2012 Toyota Rav4 new radio installation:

8.After this,connect new radio’s cables to right wires of the car

9.Let the screws and trim panels back to their places and turn on your new radio to have a test for it

Whole installation guide for Toyota Rav4 gps radio has all been introduced in above part,if you still account other issues during this process,you can visit some websites which can help you solve them,for example:http://www.seicane.com/2006-2012-toyota-rav4-radio-dvd-audio-3d-gps-system-tv-tuner-wifi-3g-bluetooth-mp3-ipod-steering-wheel-control-dvr-aux-hd-1080p-pop-backup-camera-c018,or reflect them to someone who is more professional in this aspect.

Precautions after installation:

1.Please don’t pull the CD card of GPS out in case of data corruption

2.To avoid antenna problems please don’t shorten or lengthen the GPS antenna

3.Please try to protect touch screen well,do not use other things except touch screen pen for prolonged usage


How to install 2012 2013 Mercedes Benz A Class B Class DVD sat nav head unit

In order to ensure the safety and usage of the product,please commissioned by professional technicians for installation.In addition,to avoid damage and accident,please do not disassemble the host privately.Before installation,you can start the engine to check the dashboard function display and button operation whether is normal;the car inside and outside surface whether have the squandering phenomenon.Then the installer will reflect to customers if have any problems.One car DVD player will bring you too much entertainment and convenience.But the installation is different from each other.Today I will tell you how to install 2012 2013 Mercedes Benz A Class B Class DVD sat nav head unit.When installing,the wire arrangement must be reasonable.Normally,the space for installation is limited.It is recommended to reduce the unnecessary wirings to make the Android 4.4 car DVD easy to install and access.The cables and wires to the car radio head unit must be routed properly to avoid touching any moving parts,such as steering wheel column acceleration pedal and brake pedal.all the cables must be bonded properly to against any loose during driving.If you need to install the reverse camera,you must enter into the setting menu to choose reverse power on.There are detailed steps to this Mercedes Benz car DVD player removal.

1.The Mercedes A180 appearance
2.The dashboard

Android 4.4 2012 2013 Mercedes Benz A Class W176 B Class navigation installation guide

3.Combined sleeve,plastic crow plate,3m electrical adhesive,3m adhesive,cotton and screwdriver
4.Use a knife to pull out the air-conditioning window card slot

Android 4.4 2012 2013 Mercedes Benz A Class W176 B Class navigation installation guide

5.Use a knife to pull out the air-conditioning window card slot

6.The effect after removed

Android 4.4 2012 2013 Mercedes Benz A Class W176 B Class navigation installation guide

7.Loosen the fixing two screws on the original car audio host
8.Pry the original CD machine

Android 4.4 2012 2013 Mercedes Benz A Class W176 B Class navigation installation guide

9.Pull out the right side’s connection cables

10.Pluu out the connection cable and take out the CD machine

Android 4.4 2012 2013 Mercedes Benz A Class W176 B Class navigation installation guide

11.Loosen the 2 screws on the top of original display screen

12.After loose,pull it out

Android 4.4 2012 2013 Mercedes Benz A Class W176 B Class navigation installation guide

13.Take out all connection cables

14.The effect

Android 4.4 2012 2013 Mercedes Benz A Class W176 B Class navigation installation guide

15.Pry the original screen rear seat support plastic frame
16.The effect

Android 4.4 2012 2013 Mercedes Benz A Class W176 B Class navigation installation guide

17.Remove the fixing screws

18.Remove the original display screen below the bracket

Android 4.4 2012 2013 Mercedes Benz A Class W176 B Class navigation installation guide

19.The effect

20.Pry the side’s panel

Android 4.4 2012 2013 Mercedes Benz A Class W176 B Class navigation installation guide

21.The effect
22.Remove the fixing screws

Android 4.4 2012 2013 Mercedes Benz A Class W176 B Class navigation installation guide

23.Remove the screws on the storage box

24.Remove the screws on the storage box

Android 4.4 2012 2013 Mercedes Benz A Class W176 B Class navigation installation guide

25.The effect

26.Take out the connection cables

Android 4.4 2012 2013 Mercedes Benz A Class W176 B Class navigation installation guide

27.Take out the connection cables

28.The effect

Android 4.4 2012 2013 Mercedes Benz A Class W176 B Class navigation installation guide

29.Fix our car DVD player

30.The equipped bracket

Android 4.4 2012 2013 Mercedes Benz A Class W176 B Class navigation installation guide

31.Lock the fixing screws

32.Insert our equiped cables

Android 4.4 2012 2013 Mercedes Benz A Class W176 B Class navigation installation guide

33.Fix our car DVD player

34.Insert the right side’s objection

Android 4.4 2012 2013 Mercedes Benz A Class W176 B Class navigation installation guide

35.The effect

36.Insert the left side’s objection

Android 4.4 2012 2013 Mercedes Benz A Class W176 B Class navigation installation guide

37.The effect

38.Connect all the cables

Android 4.4 2012 2013 Mercedes Benz A Class W176 B Class navigation installation guide

39.Connect all the cables

40.Install the dashboard

Android 4.4 2012 2013 Mercedes Benz A Class W176 B Class navigation installation guide

41.The effect after installed

Android 4.4 2012 2013 Mercedes Benz A Class W176 B Class navigation installation guide

When finished all of these steps,you can check out all installation and make sure whether it has reversed or not.Testing navigation card and navigation antenna to make sure whether it has been connected correctly or not.It should be able to search and locate GPS. Then you can check the radio signal and whether the radio antenna works or not.You car DVD will work normally if the installation is completed in right ways.Confirming Bluetooth function and linking to Bluetooth to make sure it works or not.Usually,Mercedes Benz car nav machine is a little complicated comparing with other car models.So having professional staff do it is a wise choice.You will obtain a great journey after installing our Android 4.4 car DVD player!