The installation and removal tutorial guide for 2004 2005 2006-2010 Toyota Sienna car Stereo
With the cars popularity and the flexible roads construction, the latest car head unit with positioning, navigation and entertainment functions meets the needs of drivers and becomes the basic equipment option for a car environment upgrade.Unsurprisingly many owners are not clear about the installation and removal. That’s the motivation why i could like to write this article. If your have no idea how to exchange the car radio but your car matches 2004 2005 2006-2010 Toyota Sienna Car GPS Navigation system. Please go over this stepped article,you probably will figure our how to deal with it.
Some tips before the installation:
1.Please disconnect the power before the installation.
2.Please prepare a lever and a screwdriver before the removal and the installation.
3.Please keep all the separate parts from the car well. Please take great care of the dashboard to avoid scratching it during its detachment and installation.
4.For your convenience, here’s the recommended tools for removal and installation from Seicane, please check for more details: http://www.seicane.com/car-dvd-dismantling-device-srd-400
The installation and removal tutorial guide for 2004 2005 2006-2010 Toyota Sienna car Stereo
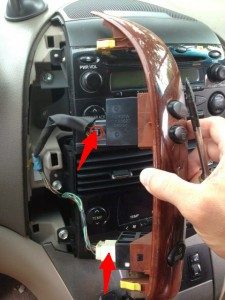
Step 1. Unplug the vertical panels on left and right as marked with removal tool.
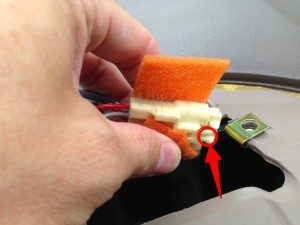
Step 2.Disconnect the wiring behind the both left and right panels.
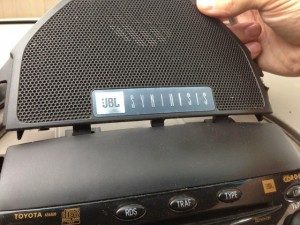
Step 3.Remove the center channel speaker grill panel above the stereo.
Step 4.Then disconnect the speaker wiring harness.
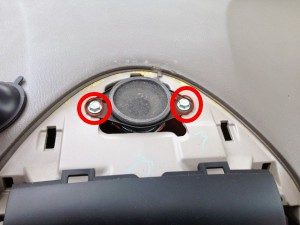
Step 5.Remove the four 10-mm hex head nuts as marked(Left side as 5-1,Right side as 5-2)


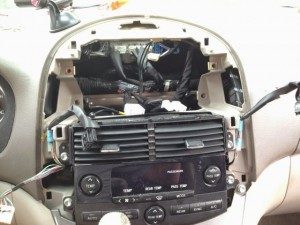
Step 6.Disconnect the wiring back and gradually pull the stereo straight out.
Step 7.If necessary, transfer the bracket from each side of the old stereo to the replacement.
If your replacement stereo did not come with mounting brackets then you will need to remove the ones from the old one and place them on the new. There are four 10-mm headed hex screws on each of the two brackets.
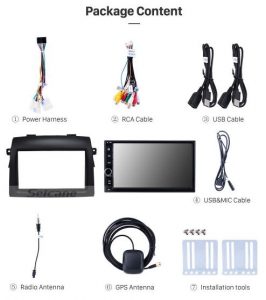
Step 8.Check all the accessories for the new Seicane car radio.
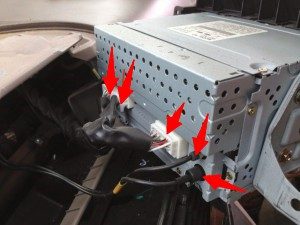
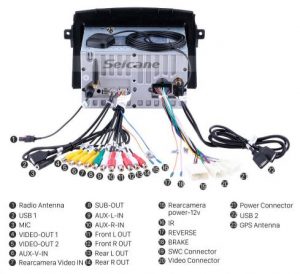
Step 9. Connect the harnesses to the back of the new Seicane car radio.
Step 10. Connect the Seicane car radio to your original car radio ‘s plugs.
Step 11. Turn on the new Seicane car radio to have a careful check if everything works well.
Step 12.Put the new Seicane car radio into the dash.
Step 13. Put everything into their original place. All the installation is done.
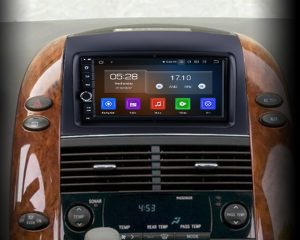
Now you may be able to install a new radio for you car under the guidance of this detailed installation guide especially for a 2004 2005 2006-2010 Toyota Sienna car Radio. If not, you can ask a professional for help instead.Also in case you’re not sure what car radio fits yours. I’d like to recommend this advanced 2004-2010 Toyota Sienna car radio from Seicane to you. Here’s the link, please go ahead and check it for details:
This great 2004 2005 2006-2010 Toyota Sienna car DVD Player comes with the latest Android Radio, RAM 2GB \ ROM 32GB \ Quad core , Support Carplay,RDS, SWC, XM radio APP etc. It has an attractive interface for you to improve your in-car environment, you can change the wallpaper and car logo according to your own preference.The car stereo is equipped with worldwide real-time navigation function of high accuracy. With current location, speed, mileage, landmark building display, 3D street view, destination search and turn-by-turn voice directions, it will be your perfect road companion. Perfectly enjoy the new car stereo.




Does this simple installation work with sienna’s that have the jbl system, rear dvd player, and steering wheel controls? My 05 sienna has lost all audio so i need to do some replacements. Mine has the jbl system, steering wheel controls (volume, seek, etc.), and dvd player that hangs from the ceiling. What else would i need for all components to work properly?
It would be a safer entrusting the job to a professional who is versed in the field and knows how intricate what he’s handling than resort to a DIY installation which might affect or damage other components. Thanks for the steps!
“Dear,
so sorry for the inconvenience.
In order to give you a fast solution,we suggest you asked our after sales staff for help.
The email is Sales1@seicane.
Have a good day!”