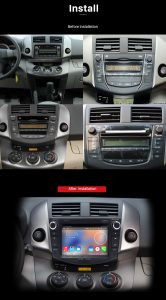
When driving out, you must want to get to a lot of locations without getting lost and have great entertainment at the same time. In that case, it is necessary for you to install a powerful car radio which is integrated with GPS navigation function and entertainment features. If you are tired of your factory radio and want to replace it, then a detailed removal and installation guide can be helpful for you. The following instruction is about a 2006-2012 TOYOTA RAV4 car radio from Seicane. If you happen yo have the same dashboard, you can take it as a reference.

Precautions for this installation:
1.Before you start up any work, park your car well and unplug the negative power cable to avoid any danger.
2.Please make sure that all fastened wires are isolated with electrical tape.
3.Please make sure the ignition is off to avoid short circuit.
4.For your convenience, here’s the recommended tools for removal and installation from Seicane, please check for more details: http://www.seicane.com/car-dvd-dismantling-device-srd-400
2006-2012 TOYOTA RAV4 car radio installation instruction
1. The original car radio.

2. Remove the panel by using plastic removal tool.

3. Unplug the hazard warning lights.

4. Remove the left panel and unplug the switch.

5. Unplug the switch.

6. Remove four screws.

a. Position for screws.

7. Pull out the factory radio.

8. The back of the original car radio.

9. Remove 8 screws from original car radio.


10. Remove 2 screws at the top of the new radio.


11. Install 8 screws to new car radio.

12. Plug into factory plugs.

13. All plugs after connection.


14. Check all the accessories for the new Seicane car radio.
15. Connect the harnesses to the back of the new Seicane car radio.
16. Connect the Seicane car radio to your original car radio ‘s plugs.
17. Turn on the new Seicane radio to have a careful check if everything works well. If it doesn’t, please check whether all the cables are connected correctly.
18. If the new Seicane car radio works well, put it into the dash.
19. Put everything into their original place, and all the installation is done.
After reading the above installation guide, perhaps now you have a general understanding of the installation on a 2006-2012 TOYOTA RAV4 car radio. If there are any doubts, you are welcome to ask for a wiring diagram from your dealer or seek for professional suggestion from a professional. However, if you don’t know which kind of car stereos can work well in your car, I’d like to recommend a fabulous 2006-2012 TOYOTA RAV4 car radio from Seicane to you. For more information, please click:
Loaded with the stable Android 5.1.1 operation system and a high quality RK3188 1.6 GHz Cortex A9 Quad-core processor, this unit’s capabilities and performance can be enhanced to provide you with the best services.
Coming with a 7 inch multi-touch screen with 1024*600 pixels, this unit enables you to enjoy the best display effect when you are watching videos, TV programs and movies. Besides, it can provide you with the perfect view of the road ahead.
What’s more, numerous features are compatible with this unit, including 3D GPS navigation, FM/AM radio tuner, Bluetooth hands-free calls, Bluetooth music, CD/DVD player, steering wheel control, USB&SD connection, etc. As long as you take full advantage of these features, you will definitely embrace a brand new driving experience.
Wish you like this unit and good luck to you!

