It is common that many people prefer to install a car stereo in there car now as it can bring much entertainment and convenience, which benefit their driving life in a degree. However, it is rare for those people to know how to set up car radio exactly in their car, especially for owners of Mercedes-C-Class. Thus, it is essential to get the informative steps of installation from online or offline. And there is a recommended step-by-step guide of 2015-2019 Mercedes-Benz C-Class Stereo Navigation System with Bluetooth Carplay. And follow the steps below, you will learn what you need in the process.

Before installation, you should pay attention to some important tips. First of all, you can disconnect the power and prepare some tools such as lever when you start the removal. Secondly, you should keep all the separate parts from the car and take great care of the dashboard to avoid scratching it during its detachment and installation.
Last but not least, you should keep handy any parts from the car and make use of all the original screws from the car as much as possible so that each related part of the unit can be fixed securely.
Installation Instruction of Mercedes-Benz 2015-2019 C-Class Stereo
Step 1: Pry the top cover of car speaker and take off the 2 screws

Step 2: Pull out car original screen and disconnect wire looms

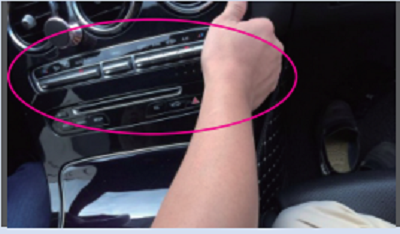
Step3: Press two buttons, then pry the silver trim

Step 4: Take the trim away and take off marked 2 screws

Step 5: Pull out the car control panel and take out control panel.

Step 6: Pull out car head unit and unplug the wire

Step 7:Put the wire go through the hole as revealed

Step 8: Connect car wires and specific new wire

Step9: Plug the new wire to the head unit instead,then Put the head unit back and fix 2 screws

Step10: Well-place AUX connector as the picture shows and Put AUX connector to trans-connector (AUX trans USB)

Step 11: .Plug the trans-connector(AUX trans USB) to car USB port

Step 12: Put the console panel back and fix the 2 screws

Step 13: Replace the silver trim and Connect LVDS wires well.

Step 14: Pull the wire go through the new bracket then fix the bracket

Step 15: Fix 2 screw shown in the picture

Step 16: Connect the wires to the screen, then fix the screen and 2 screws

Step 17: Put speaker cover back

Now that your basic work have been finished and you are ready to check whether the head unit can be used as a new one and try all its functions. The process maybe a little difficult for the people who have never had experience before. But this guide will show you the main idea of installation and give you useful information as you want. If you still have some questions here, it is recommended to ask for your car dealer for help or consult a professional technician who can offer you help in this way. And here I want to share a link of Mercedes-Benz 2015-2019 C-Class Stereo from Seicane. You can know more details from it including its functions and installation details.
If you want to keep your Mercedes-Benz enjoying the top-level entertainment on the way, this product can be a proper choice for the most owners and lovers as its functions can be covered in a wide range including wireless carplay, split screen, backup camera, high-quality navigation system and even wifi&Bluetooth etc.
With the 10.25 inch round corner designed, road top car touch screen, looks more beautiful. In addition, the high resolution and IPS high-definition picture quality will provide you a clearer and more beautiful image. You can also enjoy faster running with 8-core CPU 4 GB RAM 64GB ROM for downloading more favorite apps to obtain richer car experience.
All in all, it is definitely a perfect choice for those who would like to enjoy themselves during the driving. So what are you waiting for now? Click the page and get this surprise from now on!

