If you are going to upgrade your stereo of Toyota Yaris,then you can have a view at next image,it is new unit after upgrade,audio stereo GPS of 2013 2014 Toyota Yaris,which support TV Tuner Bluetooth Music 3G Wifi Rearview Camera.

In recent life most of the factory car stereos can hardly meet drivers’ needs,so the producers need to make improvements on the head unit include its appearance and features.
Before you can install it you need to remove original one first,you can ask a skilled person to do it,or you can also achieve it by yourself,facts shows it’s possible.So how to upgrade 2013 2014 Toyota Yaris stereo to 2 din radio dvd gps nav system?
Yes,a lot of car drivers have achieved this goal,but it doesn’t mean you can do it as you want.And before you begin any work,I advise you to do some preparations for this activity.
At first,you should find the right Toyota Yaris stereo for your car,next you need to know detailed instructions about the installation and know the unit as much as possible.Maybe you can visit some related websites,for example:http://www.seicane.com/oem-radio-navigation-system-for-2013-2014-toyota-yaris-with-dvd-cd-player-tv-tuner-bluetooth-music-3g-wifi-rearview-camera-c317.
There are also some notes for you to notice,you should do according to them,or it may cause damage to car or even people.For absolute security,you’d better let someone else who are professional to do.
Precautions before installation:
1.Please park your car in a safe place to make it smooth and before you turn off all car series,you can have a check to make sure everything is ok
2.Please remember to unplug negative power cable to avoid any danger during next process
3.Ensure that all fastened wires are isolated with electrical tape
2013 2014 Toyota Yaris radio removal and installation:
2013 2014 Toyota Yaris original stereo removal and new stereo installation:
1. Pry trim panel of the radio

2.Make four mounting screws out

3.Gently take out the CD player

4.Get these four screws out

5.Take out your hot new stereo unit

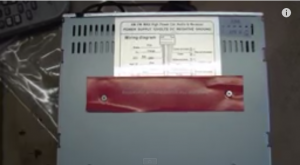
6.Have a check for QA’s seals

7.Get all transport screws out

8.Make your accessories inserted in

9.Get trim panels removed to install reversing cam

10.Have a test for that camera prior to drilling

11. Fix the screws that were removed from the original CD player to new unit

12.Install car other parts to their primary place

This stereo’s procedure may be a little more complex than other ones on connecting cables,but I believe that most of you have obtained it well with above 12 detailed steps and intuitive images.But you also need to know more specific things about this new unit to make better use of this new functional stereo.
Please be gentle and soft to your audio system when you are doing something with panels or other parts to avoid unnecessary destroy to your beloved car.The same to the time when you are removing original cd stereo and do cables disconnection.
Connecting cables is a very significant work during whole process.If you are not sure,you’d better ask other people to do this connection,in all words,take it serious when doing every operation.

how much does this radio cost ?
“Dear,
This is Seicane.com.
Thanks for interested in our product.
Could you please send us the photo of your car’s dashboard to [email protected]?
And could you please tell us the model and year of your car?
Then we can check if our unit fit your car and tell you the price ,hope you could cooperate with us.
Looking forward to hearing from you soon.
Thank you & Best regards!
“