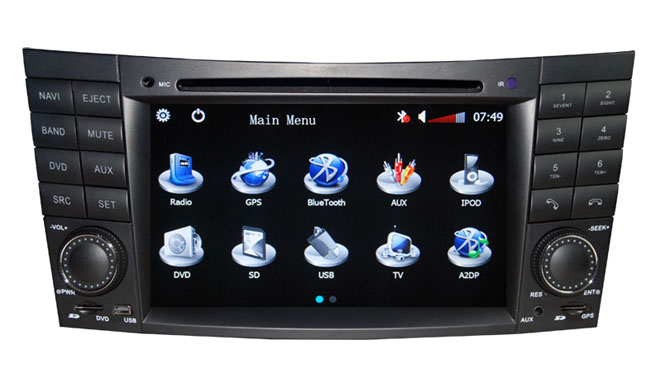
Dear friends, if you are a car lover, a NAV man, or a fashion enthusiast, you need to know how to mount BMW E60 E61 E63 E64 Head Unit. Today to have a multipurpose navigation in your car is a necessary. Many people invite the professionals when they install the head unit, but most people do it by their self. Let’s have a look on the mounting step.
Installation Guide
To access the radio module to connect to the new on board monitor(4), remove these:(6)Decorative strip on instrument panel, (11)Trim on instrument panel, middle Make sure your seats and the center console are covered to avoid damage.
Use a plastic lever tool to pry at the end of the decorative trim to detach the side metal clip and gently pull the trim across. The trim is held using metal clips along the length of the trim. Remove the buttons for hazard light and door lock by pressing on the metal clips at the top and button as indicated.
Remove the buttons for hazard light and door lock by pressing on the metal clips at the top and button as indicated.
Detach the cable connector to remove the entire hazard/door lock button.
Remove the two screws at the top middle instrument panel.
Pull the panel towards you with force at these two locations. The panels are held on to metal clips at the side and are very tight.
The middle panel removed. Detach the three connectors.
Detach the ashtray trim by lifting it upwards as shown. There are held using plastic tabs at the bottom of the trim.
Now is the tricky part of removing the dark wood bottom middle trim which is also tightly held by metal clips.
Easiest way is to use a long flat screw driver and pry it outwards using an object to lever.
The red plastic tool is used to lever and not to damage the component.

Bottom middle trim removed.
Detach the connectors to the two buttons(DTC and Parking sensor)
Remove the two screws and slide out the radio unit.
Radio unit pulled out.
Back of the radio unit. Remove this wire harness by pressing the plastic piece and pull.
Attach one of these parts to the wire harness from the radio unit and to the back of the radio. Connect the Bluetooth speaker to the cable.
Next step is to remove the original on board monitor. To remove the original on board monitor, reomve the two screws using a Torx screwdriver(T10 or star)
Slide the monitor forward and pull out.
Remove the two connectors.
This connector will not be used.
This metal connector will be attached to the new unit

Next step is to run the new wire harness cable to the new monitor/screen.
It is easier to use a plastic coated hanger wire to fish the cable to the top.
To prevent damaging the new wire harness(red, blue and grey connectors end), use making tape to wrap the connectors.
Fish the cable through the back of console from the radio to the top area behind the screen.
This is a plastic coated wire.
Attach this wire harness to the back of the radio.
New wire harness connected to BMW E60 head unit.
The old wire harness should be reconnected to the new plastic receiver so that the wiring loop is completed.
There is a special manufacturer precaution to ground the new screen/monitor properly.
The two wires at the back of the screen need to be grounded.
This wire (A) should be connected to a screw to the front of the radio.
This wire(B) should be soldered to the metal connector plug to the screen.
Remove the ground wire (B). Extend the wire using a longer wire, strip the wire and wrap it round the metal connector piece as shown.
Metal connector
Extended wire
Ground wire (B) removed
Note: The manufacture recommends soldering the wire to the metal connector. However wrapping it will ground it as well.
Check for proper grounding of the ground with a multi-meter.
Ground wire(A) is connected to the screw for the radio.
Both Wire(A) and Wire (B) grounded.
Connect the metal connector to the new monitor/screen.
Connect the GPS antenna cable to the back.
Note: Locate a space and tug the GPS antenna to the back of the screen/monitor(just above the glove box). Use double sided tape to mount it. Signal strong enough even though it is hidden under the dash board.
Connect the red, blue and grey connectors from the radio.
Connect the rest of the accessories cables(Video, Ipod, TV, USB, Aux etc)
Tug the cables at the back of the screen neatly and re-install the monitor/screen.
Power up the car and the unit should initialize.
Re-install all the trims.
Read the manual for setting up the software and GPS system.
Done!
Please confirm your car style before mounting a head unit. This is the information about how to mount BMW E60 E61 E63 E64 Head Unit. The mounting step is not very difficult, and it just takes you a few minutes. You will be a professional if you put these points in mind. Hope you will like it, click here to know the further information: http://www.seicane.com/bmw-5-series-e60-gps-navigation-with-radio-bluetooth-ipod-srd-8808


Recent Comments