Upgrade a 2004-2012 Mercedes Benz A Class W169 head unit with Bluetooth 3G WiFi Mirror Link OBD2 HD 1024*600

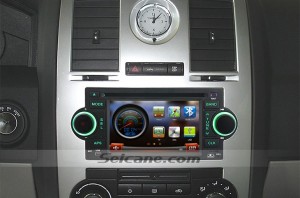
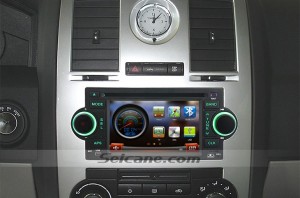
Here comes a modern 2004-2012 Mercedes Benz A Class W169 head unit from Seicane after installation. If you want to enjoy a more comfortable car interior environment and a more exciting driving experience, it’s a great idea for you to install such a multifunctional stereo in your car. To install a new aftermarket car stereo, you can find a step-by-step installation guide to help. Now I’d like to share a detailed Mercedes Benz A Class W169 head unit installation guide with you. You can read it carefully if you also have the same dashboard as the picture below.

2004-2012 Mercedes Benz A Class W169 head unit after installation


Tips about the installation:

1.Please disconnect the power before the installation.

2.Please prepare a lever and a screwdriver before the removal and the installation.

3.Please keep all the separate parts from the car. Please take great care of the dashboard to avoid scratching it during its detachment and installation. Please keep handy any parts from the car and make use of all the original screws from the car as much as possible. so each related part of the unit can be fixed securely.

4.For your convenience, here’s the recommended tools for removal and installation from Seicane, please check for more details: http://www.seicane.com/car-dvd-dismantling-device-srd-400


2004-2012 Mercedes Benz A Class W169 head unit installation guide

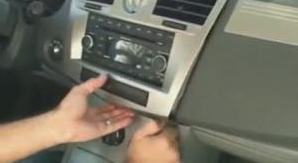
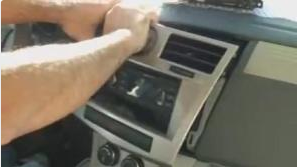
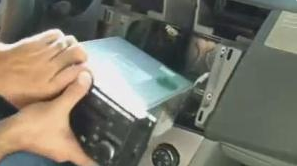
1. Detach the outer frame of the original car radio.

1. Detach the outer frame of the original car radio.


2. Use a screw driver to remove the screws marked with red circles.

2. Use a screw driver to remove the screws marked with red circles.


3. Remove the screw on the lower right.

3. Remove the screw on the lower right.


4. Remove the screw on the lower left.

4. Remove the screw on the lower left.


5. Remove the screw on the upper left.

5. Remove the screw on the upper left.


6. Remove the screw on the upper right.

6. Remove the screw on the upper right.


7. Use a screw driver to remove the screws marked with red circles.

7. Use a screw driver to remove the screws marked with red circles.


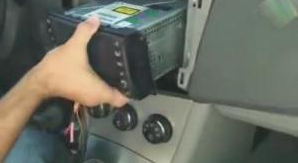
8. Remove the original car radio.

8. Remove the original car radio.


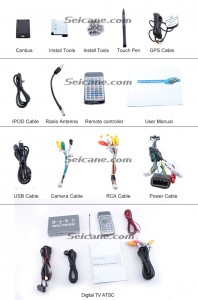
9. Check all the accessories for the new Seicane head unit.

9. Check all the accessories for the new Seicane head unit.


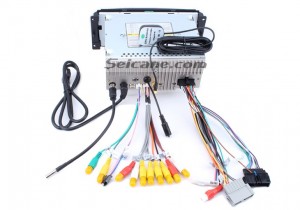
10. Connect the harnesses to the back of the new Seicane head unit.

10. Connect the harnesses to the back of the new Seicane head unit.


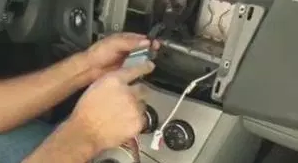
11. Insert the plug of the car into the socket of unit.

11. Insert the plug of the car into the socket of unit.


12.Remarks

a. Plug in the radio antenna.

b. Plug in the GPS antenna.

12. Remarks a. Plug in the radio antenna. b. Plug in the GPS antenna.


13. Install the new Seicane head unit into the dashboard.

13. Install the new Seicane radio into the dashboard.


14. Fasten the new Seicane head unit with 4 screws and install the frame back.

14. Fasten the new Seicane radio with 4 screws and install the frame back.


15. Turn on the new Seicane head unit to have a comprehensive check. If everything works well, all the installation is done. If not, please check if all the cables are connected correctly.

With this detailed installation guide, can you install your new 2004-2012 Mercedes Benz A Class W169 head unit on your own? If not, you’d better ask a professional to help you. If you encounter any question during the whole process, you can consult your dealer. In addition, you need to find a suitable head unit for your car. If you don’t have one, you can refer to this advanced 2004-2012 Mercedes Benz A Class W169 head unit from Seicane, please click for more details:

http://www.seicane.com/seicane-s127682-7-inch-2004-2012-mercedes-benz-a-class-w169-a150-a160-a170-android-autoradio-navigation-car-dvd-head-unit-with-bluetooth-3g-wifi-mirror-link-obd2-hd-1024-600-multi-touch-screen-flash 

Designed with a large 7 inch multi-touch screen, you can enjoy a more intuitive interface and an easier operation with this Mercedes Benz A Class W169 head unit. As an amazing multimedia player, it can support almost all the multimedia formats like DVD/VCD/CD/MP3/MPEG4/DIVX/CD-R/WMA/JPEG, etc., so that you can keep your passengers entertained all the way on a long trip.

To keep safer and more cheerful, you can put the Bluetooth technology into good use for hands-free calls and streaming music. The GPS navigation system of high accuracy is desirable for you to get to your destination with the best way and within the least time.

To keep entertained on all your trips, this amazing Mercedes Benz A Class W169 head unit is just your best choice. Good luck to you!


How to easily upgrade a 1996-2003 BMW X5 E53 head unit with 8-core CPU DVD Radio RDS Bluetooth Mirror Link OBD2 3G WiFi

BMW is one of the most well-know car brands all over the world.Unfortunately it seems like the auto companies launch new car models every year. Little hard for ordinary people to follow it to upgrade their cars.Luckily we can easily update the car radio which is loaded with advanced GPS navigation system and a great multimedia player so that we also can get much convenience and enjoyments. Here I’d like to share a step-by-step 1996-2003 BMW X5 E53 GPS Navigation installation guide from Seicane if you gonna level-up your factory radio. If you don’t have any experience on the installation, you’d better ask a professional for help. Or incorrect installation guide may cause some unexpected damage to both your car and your new unit. Let’s get started.

Tips before the installation:

1.Please disconnect the power before the installation.

2.Please prepare a lever and a screwdriver before the removal and the installation.

3.Please keep all the separate parts from the car and take care of the dashboard to avoid scratching it during its detachment and installation.

4.For your convenience, link below is the recommended tools for removal and installation from Seicane, please check for details:  http://www.seicane.com/car-dvd-dismantling-device-srd-400

1996-2003 BMW X5 E53 car stereo installation guide

  1. Use a plastic trim tool to remove trim strip.

  1. Remove screws marked by red arrows.

  1. Take out original DVD player

  1. Unplug the connectors behind the unit.

  1. Connect the power cables as the picture shows.

  1. Remove screws in the spare tire in the trunk.

  1. Take out the spare tire.

  1. Remove four screws marked with red arrows.

  1. Remove screws in triangle crutch.

  1. Take out triangle crutch.

  1. Connect original plug of the car with power plug of DVD GPS.

  1. Check all the accessories for the new Seicane head unit.

  1. Connect the harnesses to the back of the new Seicane head unitrefer to instructions.

  1. Connect the Seicane head unit to your original car radio ‘s plugs.
  2. Turn on the new Seicane head unit to have a careful check if everything works well.
  3. Put the new Seicane head unit into the dash and install the four screws.
  4. Install the trim panel into its original place.


Absolutely you done it if you can smoothly install your new car radio without doubt by following this article for 1996-2003 BMW X5 E53 DVD Player. First of all, you need to confirm that your new unit can be suitable for your car in advance. If you don’t have one, I’d like to recommend an ideal 1996-2003 BMW X5 E53 head unit from Seicane to you. Here’s the link please click:

https://www.seicane.com/barato-tudo-em-um-android-2000-2007-bmw-x5-e53-3-0i-3-0d-4-4i-4-6is-4-8is-radio-substituic-o-com-sat-nav-sistema-hd-touch-tela-cd-dvd-player-3g-wifi-bluetooth-musica-obd2-mirror-link-aux-volante-controle-mp3-mp4-s6902g

Above link related head unit for 1996-2003 WBMW X5 E53 car radio comes with the latest Android Radio, RAM 4GB \ ROM 64GB \ CPU 8-core \ Build-in Carplay \ 2.5D IPS Screen, Support RDS, SWC, XM radio APP etc. The car stereo is equipped with worldwide real-time navigation function of high accuracy. With current location, speed, mileage, landmark building display, 3D street view, destination search and turn-by-turn voice directions, it will be your perfect road companion. With dual zone function, the music from radio/AV/TV etc can be played behind the scene under GPS mode and it will switch to the GPS voice automatically.Have a safe driving all the time.

How to replace a 2002 2003 Dodge RAM VAN (Fullsize) radio with simple 9 steps

Do you know how to remove your factory radio and to install a new one? If not, you can find a step-by-step installation guide specially for your car if you are going to upgrade your factory radio to a new one. Here I’ d like to share the step-by-step installation instruction from Seicane about a  2002 2003 Dodge RAM VAN (Fullsize) radio with you. Wish it can be helpful for you If you plan to install a new radio in your car.

2002 2003 Dodge RAM VAN (Fullsize) radio after installation


Precautions for this installation:

1.Before you start up any work, park your car well and unplug the negative power cable to avoid any danger.

2.Please make sure that all fastened wires are isolated with electrical tape.

3.Please make sure the ignition is off to avoid short circuit.

4.For your convenience, here’s the recommended tools for removal and installation from Seicane, please check for more details: http://www.seicane.com/car-dvd-dismantling-device-srd-400


2002 2003 Dodge RAM VAN (Fullsize) radio installation guide


1.Loosen the trim panel with a lever.

1.Loosen the trim panel with a lever


2.Take the panel off the dash and disconnect the wires from the car.

2-1.Take the panel off the dash and disconnect the wires from the car.
2-2.Take the panel off the dash and disconnect the wires from the car.


3.Remove the four screws which are holding the original radio with a screwdriver.

3.Remove the four screws which are holding the unit with a screwdriver.


4.Take out the original radio and disconnect the wire harness at the back of the original radio.

4-1.Take out the unit and disconnect the wire harness at the back of the unit.
4-2.Take out the unit and disconnect the wire harness at the back of the unit.


5.Check all the accessories for the new Seicane radio.

5.Check all the accessories for the new Seicane car radio.


6.Connect the Seicane stereo to your original car radio ‘s plugs.

6-1. Connect the Seicane car stereo to your original car radio 's plugs.
6-1. Connect the Seicane car stereo to your original car radio ‘s plugs.
6-2. Connect the Seicane car stereo to your original car radio 's plugs.
6-2. Connect the Seicane car stereo to your original car radio ‘s plugs.
6-3. Connect the Seicane car stereo to your original car radio 's plugs.
6-3. Connect the Seicane car stereo to your original car radio ‘s plugs.


7.Put the new Seicane radio into the dash.

7.Put the new Seicane stereo into the dash.


8.Turn on the new radio and have a test if the new Seicane radio is working without problem..

9.Put trim panel back on your new Seicane radio after the normal test.


Wish the above installation guide for a 2002 2003 Dodge RAM VAN (Fullsize) radio can do some help for you. If you encounter any question during the whole process of the installation, you can turn to your dealer for help. Besides, to check if you find a suitable radio for your car, or if you don’t find a fitting radio, you can refer to this amazing 2002 2003 Dodge RAM VAN (Fullsize) radio from Seicane, please click:


http://www.seicane.com/cheap-2002-2003-2004-2008-dodge-ram-pickup-van-autoradio-gps-navigation-system-hd-touch-screen-tv-tuner-am-fm-radio-bluetooth-music-mp3-ipod-usb-sd-aux-dual-zone-t6015


This intelligent Dodge RAM VAN (Fullsize) radio is based on a strong 1GHz Cortex A9 MStar 785 CPU to facilitate the operation. It comes with a wide range of useful and up-to-date features for you to get the convenience and enjoyment in your vehicle, like the worldwide real-time GPS navigation system, bluetooth hands-free calls, bluetooth music, DVD and CD player, Ipod, FM/AM radio, TV, USB and SD card connection, etc. Wish you like it and have a wonderful time on all trips!


Professional 9 steps to install a 2002 2003-2007 Dodge Dakota P/U radio with Bluetooth Music IPOD MP3 AUX Backup Camera Dual Zone

2002 2003-2007 Dodge Dakota P U radio after installation

To remove an old factory radio and install a new one is just a job which takes about half an hour. It’ s not too difficult especially when you find the detailed installation instruction specially for your car. If you are a car owner of 2002 2003-2007 Dodge Dakota P/U and are looking for the removal and installation guide for your car, then this article about the 2002 2003-2007 Dodge Dakota P/U radio installation instruction from Seicane is worth your careful reading.

2002 2003-2007 Dodge Dakota P U radio after installation


Tips about the installation:


1.Please disconnect the power before the installation.

2.Please prepare a lever and a screwdriver before the removal and the installation.

3.Please keep all the separate parts from the car. Please take great care of the dashboard to avoid scratching it during its detachment and installation. Please keep handy any parts from the car and make use of all the original screws from the car as much as possible. so each related part of the unit can be fixed securely.

  1. For your convenience, here’s the recommended tools for removal and installation from Seicane, please check for more details: http://www.seicane.com/car-dvd-dismantling-device-srd-400

2002 2003-2007 Dodge Dakota P/U radio installation guide


1.Loosen the trim panel with a lever.

1.Loosen the trim panel with a lever


2.Take the panel off the dash and disconnect the wires from the car.

2-1.Take the panel off the dash and disconnect the wires from the car.
2-2.Take the panel off the dash and disconnect the wires from the car.


3.Remove the four screws which are holding the original radio with a screwdriver.

3.Remove the four screws which are holding the unit with a screwdriver.


4.Take out the original radio and disconnect the wire harness at the back of the original radio.

4-1.Take out the unit and disconnect the wire harness at the back of the unit.
4-2.Take out the unit and disconnect the wire harness at the back of the unit.


5.Check all the accessories for the new Seicane radio.

5.Check all the accessories for the new Seicane car radio.


6.Connect the Seicane radio to your original car radio ‘s plugs.

6-1. Connect the Seicane car stereo to your original car radio 's plugs.
6-1. Connect the Seicane car stereo to your original car radio ‘s plugs.
6-2. Connect the Seicane car stereo to your original car radio 's plugs.
6-2. Connect the Seicane car stereo to your original car radio ‘s plugs.
6-3. Connect the Seicane car stereo to your original car radio 's plugs.
6-3. Connect the Seicane car stereo to your original car radio ‘s plugs.


7.Put the new Seicane radio into the dash.

7.Put the new Seicane stereo into the dash.


8.Turn on the new radio and have a test if the new Seicane radio is working without problem..

9.Put trim panel back on your new Seicane radio after the normal test.


Can you understand all the steps above for the 2002 2003-2007 Dodge Dakota P/U radio installation? If not, it’s suggested you consult your dealer. Please make clear every step before the installation. You can also have your new radio installed by a professional.

Besides, a fitting car radio is needed for a successful upgrade. If you don’t have one, you can refer to this amazing 2002 2003-2007 Dodge Dakota P/U radio from Seicane, which is an ideal car radio with many features for you to upgrade your factory radio. For more details, please click:


http://www.seicane.com/top-2002-2007-dodge-dakota-p-u-durango-touch-screen-gps-radio-stereo-cd-dvd-player-bluetooth-music-ipod-iphone-mp3-aux-backup-camera-dual-zone-t6015


This modern 2002 2003-2007 Dodge Dakota P/U radio is based on WinCE 6.0 operation system, and comes with a 1GHz Cortex A9 MStar 785 CPU for you to improve the performance. The latest GPS navigation system is built for you to get access to the worldwide real-time traffic information to reach your destination smoothly and punctually. Besides, you can also utilize the bluetooth feature for hands-free calls and audio streaming to keep safe and relaxed on the way.


To relax on all your trips, this top 2002 2003-2007 Dodge Dakota P/U radio can be your perfect road companion. Just take it and go right now!

How to upgrade a 2007 2008 Chrysler Aspen(W NAV) head unit with TV Tuner Bluetooth IPod Iphone AUX USB SD Dual Zone

2007 2008 Chrysler Aspen(W NAV) head unit after installation

Travelling in your own car with your families is quite exciting, isn’t it? To have a more pleasant experience, you can easily add more fun by upgrading your factory radio with an aftermarket multifunctional…..car stereo which can be compatible with a host of entertainment in a car. And you can read carefully this step-by-step 2007 2008 Chrysler Aspen(W NAV) head unit installation instruction from Seicane to guide you to install it in your car.

2007 2008 Chrysler Aspen(W NAV) head unit after installation


Tips about the installation:


1.Please disconnect the power before the installation.

2.Please prepare a lever and a screwdriver before the removal and the installation.

3.Please keep all the separate parts from the car. Please take great care of the dashboard to avoid scratching it during its detachment and installation. Please keep handy any parts from the car and make use of all the original screws from the car as much as possible. so each related part of the unit can be fixed securely.

4.For your convenience, here’s the recommended tools for removal and installation from Seicane, please check for more details: http://www.seicane.com/car-dvd-dismantling-device-srd-400


2007 2008 Chrysler Aspen(W NAV) head unit installation guide


1.Loosen the trim panel with a lever.

1.Loosen the trim panel with a lever


2.Take the panel off the dash and disconnect the wires from the car.

2-1.Take the panel off the dash and disconnect the wires from the car.
2-2.Take the panel off the dash and disconnect the wires from the car.


3.Remove the four screws which are holding the unit with a screwdriver.

3.Remove the four screws which are holding the unit with a screwdriver.


4.Take out the unit and disconnect the wire harness at the back of the unit.

4-1.Take out the unit and disconnect the wire harness at the back of the unit.
4-2.Take out the unit and disconnect the wire harness at the back of the unit.


5.Check all the accessories for the new Seicane unit.

5.Check all the accessories for the new Seicane car radio.


6.Connect the Seicane unit to your original car radio ‘s plugs.

6-1. Connect the Seicane car stereo to your original car radio 's plugs.
6-1. Connect the Seicane car stereo to your original car radio ‘s plugs.
6-2. Connect the Seicane car stereo to your original car radio 's plugs.
6-2. Connect the Seicane car stereo to your original car radio ‘s plugs.


7.Put the new Seicane unit into the dash.

7.Put the new Seicane stereo into the dash.


8.Turn on the new unit and have a test if the new Seicane unit is working without problem..

9.Put trim panel back on your new Seicane unit after the normal test.


Wish you can get some help from the above installation guide for a 2007 2008 Chrysler Aspen(W NAV) head unit. If you find your dashboard is different from that shown in the guide pictures, please don’t worry, you can still refer to it for your installation. If there is any problem, you can turn to your dealer for help.


Besides, it’s necessary for you to check the compatibility between the your new unit and your car. But if you don’t have a suitable unit for your car, you can refer to this intelligent 2007 2008 Chrysler Aspen(W NAV) head unit from Seicane, please click for more details:


http://www.seicane.com/2-din-2002-2007-2008-chrysler-aspen-concorde-pacifica-dvd-gps-sat-nav-am-fm-radio-tv-tuner-bluetooth-ipod-iphone-aux-steering-wheel-control-usb-sd-dual-zone-t6015


This up-to-date aftermarket Chrysler Aspen(W NAV) head unit is an ideal replacement for you to upgrade your factory radio to better capabilities. With the built-in wifi, you can freely get access to the online data in your car as long as you can connect with a wifi hotspot. If you want to keep safer and happier on your journey, you can simply link with your enabled cell phone for hands-free calling and music streaming. Just navigate to your destination on time with the help of the most accurate spoken guidance provided by this great unit! Good luck to you!

A step-by-step installation guide for a 2002 2003 2004 Chrysler 300M radio with USB SD AUX Rearview Camera IPOD MP3 Dual Zone

2002 2003 2004 Chrysler 300M radio after installation

Nowadays, to upgrade something you want in your car won’t cost you a bank. Therefore, more and more car owners would like to improve their driving experience by replacing their factory radio which is actually the main entertainment center in a car. To help you install your new head unit, I’d like to share a detailed 2002 2003 2004 Chrysler 300M radio installation guide with you. If you find your dashboard is the same as the picture below, then you can take the following instruction as a reference.

2002 2003 2004 Chrysler 300M radio after installation


Tips about the installation:


1.Please disconnect the power before the installation.

2.Please prepare a lever and a screwdriver before the removal and the installation.

3.Please keep all the separate parts from the car. Please take great care of the dashboard to avoid scratching it during its detachment and installation. Please keep handy any parts from the car and make use of all the original screws from the car as much as possible. so each related part of the unit can be fixed securely.

4.For your convenience, here’s the recommended tools for removal and installation from Seicane, please check for more details: http://www.seicane.com/car-dvd-dismantling-device-srd-400


2002 2003 2004 Chrysler 300M radio installation guide


1.Remove the trim piece above cup holder with a lever.

1.Remove the trim piece above cup holder with a lever.


2.Remove 2 screws behind the trim piece.

2.Remove 2 screws behind the trim piece.


3.Gently pry around the side of trim panel with the lever and then remove the trim panel.

3.Gently pry around the side of trim panel with the lever and then remove the trim panel.


4.Remove 4 screws which holds the factory radio in place.

4.Remove 4 screws which holds the factory radio in place.


5.Take out the factory radio.

5.Take out the factory radio.


6.Disconnect the smaller harness on the behind of the factory radio.

6.Disconnect the smaller harness on the behind of the factory radio.
6-1.Disconnect the smaller harness on the behind of the factory radio.
6-2. Check all the accessories for the new Seicane car radio.


7.Connect the Seicane car radio to your original car radio ‘s plugs.

7. Connect the Seicane car radio to your original car radio 's plugs.
7. Connect the Seicane car radio to your original car radio ‘s plugs.


8.Connect the smaller harness at the back of the new radio.

9.Put the new Seicane radio back into the dash.

10.Install four screws and trim panel.

11.Install 2 screws behind the trim piece and the trim piece.

12.Turn on the new radio and have a comprehensive test.

13.Tidy up everything in your car, and all the installation is done.


Now can you install your new 2002 2003 2004 Chrysler 300M radio under the guidance of this instruction? If not, you can go to a car radio upgrade center to install it or ask a professional for help. If there is any question, you can also consult your dealer.


A suitable car radio plays an important role on the upgrade. If you don’t find a fitting radio for your car, I’d like to recommend a wonderful 2002 2003 2004 Chrysler 300M radio from Seicane to you, please click for more details:


http://www.seicane.com/2001-2002-2003-2004-2007-chrysler-300m-pt-cruiser-sebring-concorde-grand-voyager-town-country-autoradio-navigation-stereo-cd-dvd-player-bluetooth-music-tv-usb-sd-aux-rearview-camera-ipod-mp3-dual-zone-t6096


This Chrysler 300M radio is equipped with the advanced WinCE 6.0 operation system and a powerful Cortex A9 MStar 785 1GHz CPU for you to upgrade your factory radio. This modern radio comes with a number of useful features and entertainment options for you to upgrade your factory radio, which include 3D gps navigation system, bluetooth technology, DVD and CD player, FM/AM radio, wifi, TV, USB port and an SD card slot, etc. The functions of your steering wheel control will still be retained after installation. Just go with it and have a wonderful time!


The step-by-step installation instruction for a 2004 2005 Dodge 2500 Pickup Truck radio with GPS AUX MP3 TV Tuner IPOD HD Touch Screen

2004 2005 Dodge 2500 Pickup Truck radio after installation

Are you desired to pleasantly drive to a lot of locations? If you say yes, then an amazing car radio can easily make that happen. You just need to remove your factory radio, and install a new car radio in your car, and a brand new experience is just in your rearch. Here comes a detailed 2004 2005 Dodge 2500 Pickup Truck radio installation guide from Seicane for you to help with the installation.

2004 2005 Dodge 2500 Pickup Truck radio after installation


Some tips before the installation:

  1. Please disconnect the power before the installation.
  2. Please prepare a lever and a screwdriver before the removal and the installation.
  3. Please keep all the separate parts from the car. Please take great care of the dashboard to avoid scratching it during its detachment and installation. Please keep handy any parts from the car and make use of all the original screws from the car as much as possible. so each related part of the unit can be fixed securely.


2004 2005 Dodge 2500 Pickup Truck radio installation guide

1.Remove the trim piece above cup holder with a lever.

1.Remove the trim piece above cup holder with a lever.


2.Remove 2 screws behind the trim piece.

2.Remove 2 screws behind the trim piece.


3.Gently pry around the side of trim panel with the lever and then remove the trim panel.

3.Gently pry around the side of trim panel with the lever and then remove the trim panel.


4.Remove 4 screws which holds the factory radio in place.

4.Remove 4 screws which holds the factory radio in place.


5.Take out the factory radio.

5.Take out the factory radio.


6.Disconnect the smaller harness on the behind of the factory radio.

6.Disconnect the smaller harness on the behind of the factory radio.


7.Connect the cables of the new Seicane radio according to the guidance of the user manual.

7.Connect the cables of the new Seicane car stereo according to the guidance of the user manual.


8.Connect the smaller harness at the back of the new radio.

9.Put the new Seicane radio back into the dash.

10.Install four screws and trim panel.

11.Install 2 screws behind the trim piece and the trim piece.

12.Turn on the new radio and have a comprehensive test.


Can you understand all the steps and install your new radio under the help of this detailed instruction for a 2004 2005 Dodge 2500 Pickup Truck radio? If not, then you can go to a car radio upgrade center or ask a professional to help you install it. If there is any question during the whole process, please don’t hesitate to ask your dealer for help.


This Dodge 2500 Pickup Truck radio comes with a digital 800*400 multi-touch screen to simplify the operation and provide an intuitive interface for you to upgrade your factory radio. You can play DVDs, CDs, VCDs, bluetooth music, FM/AM radio to relax both you and your passengers. Besides, other flexible entertainment options can be available via the USB and SD card connection.


You won’t get lost in any unfamiliar location when you take this excellent GPS navigation system with you. To make your driving safer, you just need to simply pair with your compatible mobile phone to dial and receive phone calls with your hands on the steering wheel.


Just take this intelligent Dodge 2500 Pickup Truck radio on all your journey, the maximum enjoyment will always be with you.

How to easily upgrade a 2002-2008 Dodge RAM Pickup radio with DVD Player Touch Screen DVR TV USB SD 1080P Video

One of the coolest ways to relax in a car is to enjoy your most favorite music while you are navigating to your desired destination under the guidance of the most accurate direction at the same time. If your factory radio can’ t meet your needs any more, it’s wise of you to replace it with a new aftermarket car stereo which can support a wide range of features. Here I’d like to show you a step-by-step 2002-2008 Dodge RAM Pickup radio installation guide from Seicane with you. Wish it can be helpful for you.

2002-2008 Dodge RAM Pickup radio after installation

Precautions for this installation:

1.Before you start up any work, park your car well and unplug the negative power cable to avoid any danger.

2.Please make sure that all fastened wires are isolated with electrical tape.

3.Please make sure the ignition is off to avoid short circuit.


2002-2008 Dodge RAM Pickup radio installation guide   

1.Loosen the trim panel with a lever.

1.Loosen the trim panel with a lever

2.Take the panel off the dash and disconnect the wires from the car.

2-1.Take the panel off the dash and disconnect the wires from the car.
2-2.Take the panel off the dash and disconnect the wires from the car.

3.Remove the four screws which are holding the unit with a screwdriver.

3.Remove the four screws which are holding the unit with a screwdriver.

4.Take out the unit and disconnect the wire harness at the back of the unit.

4-1.Take out the unit and disconnect the wire harness at the back of the unit.
4-2.Take out the unit and disconnect the wire harness at the back of the unit.

5.Connect the new wiring harness adaptor to the car, then, to the unit.

5-1.Connect the new wiring harness adaptor to the car, then, to the unit.
5-2.Connect the new wiring harness adaptor to the car, then, to the unit.

6.Connect the wire as the user manual shows and put the new unit into the dash.

6.Connect the wire as the user manual shows and put the new unit into the dash.

7.Turn on the new unit and have a test if the new Seicane radio is working without problem..

8.Put trim panel back on your new Seicane radio after the normal test.

Wish you can get some help from the above installation guide for the 2002-2008 Dodge RAM Pickup radio. If there is any question during the process of the installation, you can consult your dealer or a professional for help. If you don’t have enough experience to install a new radio, you’d better have it installed by professionals.

Besides, only a suitable radio can be well installed in your car. If you don’t have one, I’ d like to recommend this excellent 2002-2008 Dodge RAM Pickup radio from Seicane to you, please click:

This modern Dodge RAM Pickup radio features a wide range of practical functions and multimedia options for you to replace your factory radio for higher performance as well as a different driving experience. The 3D GPS function, bluetooth hands-free calls, bluetooth music, DVD player, FM/AM radio, Ipod, wifi, USB and SD connection, etc. are all provided for you to get the convenience in your car. Besides, you can also connect with a backup camera to make your parking easier.

Simply install a new 2002-2007 Chrysler 300-M 300C 300 Limited/Touring radio with 8 steps

2002-2007 Chrysler 300-M 300C 300 Limited Touring radio after installation

At present, cars are becoming more and more easily available for people. Therefore, car owners would like to have a better driving experience on the way. One of the most frequently used ways is to upgrade the factory radio. If you find your factory radio can’ t meet all your needs, it’s wise of you to replace it. And I’ d like to introduce a detailed 2002-2007 Chrysler 300-M 300C 300 Limited/Touring radio installation instruction from Seicane to help with your installation.

2002-2007 Chrysler 300-M 300C 300 Limited Touring radio after installation


Before and during installation, you should notice:

1.Before connecting, please make sure the ignition is off to avoid short circuit.

2.Ensure connect the yellow and red power cable at last.

3.Ensure that all loose wires are isolated with electrical tape

4.Ensure don’t tangle the wire when tighten the moving parts(Such as seat rails).

5.Ensure that all ground is connected to the same place.

6.Using the improper fuse may cause damage of fire, so when replace the fuse, please consult the professional.


2002-2007 Chrysler 300-M 300C 300 Limited/Touring radio installation guide


1.Loosen the trim panel with a lever.

1.Loosen the trim panel with a lever


2.Take the panel off the dash and disconnect the wires from the car.

2-1.Take the panel off the dash and disconnect the wires from the car.
2-2.Take the panel off the dash and disconnect the wires from the car.


3.Remove the four screws which are holding the unit with a screwdriver.

3.Remove the four screws which are holding the unit with a screwdriver.


4.Take out the unit and disconnect the wire harness at the back of the unit.

4-1.Take out the unit and disconnect the wire harness at the back of the unit.
4-2.Take out the unit and disconnect the wire harness at the back of the unit.


5.Connect the new wiring harness adaptor to the car, then, to the unit.

5-1.Connect the new wiring harness adaptor to the car, then, to the unit.
5-2.Connect the new wiring harness adaptor to the car, then, to the unit.


6.Connect the wire as the user manual shows and put the new unit into the dash.

6.Connect the wire as the user manual shows and put the new unit into the dash.


7.Turn on the new unit and have a test if the new Seicane radio is working without problem..

8.Put trim panel back on your new Seicane radio after the normal test.


That’s all the steps about how to remove an old radio and install a new Chrysler 300-M 300C 300 Limited/Touring radio in your car. If you have any questions, please feel free to contact your dealer or ask a professional for help. On the other hand, to ensure you have a successful radio upgrade, it’s essential for you to make sure your new car radio can be compatible with your car, if you have no idea about this, you can refer to this intelligent Chrysler 300-M 300C 300 Limited/Touring radio from Seicane, please click for more details:


http://www.seicane.com/seicane-s09206-android-gps-radio-car-stereo-for-2002-2007-chrysler-300-m-300c-300-limited-touring-with-dvd-player-gps-navigation-system-mirror-link-touch-screen-rearview-camera-tv-video-wifi-canbus-obd2-bluetooth-usb-sd-steering-wheel-control


Enjoy your favorite music videos and movies with this amazing Chrysler 300-M 300C 300 Limited/Touring radio in you car on all trips. There are a number of practical and amusing features for you to get the convenience and enjoyment in your car, which includes the 3D GPS navigation system, bluetooth hands-free calls, bluetooth streaming audio, DVD player, FM/AM radio, wifi, USB, SD, etc. Wish you like it and have a wonderful time all the way!

A detailed Installation guide for 2010 2011 VW Volkswagen Passat(MK7) car Radio with TV Tuner DVR USB SD 1080P Video DVD Player Bluetooth 3G WIFI

Nowadays for car owners,not only the comfortable and safe driving experience is quite important but also to have a thing with many features to offer lots of fun and convenience such as a new car stereo. The following is the step-by-step installation and removal guide of 2010 2011 VW Volkswagen Passat(MK7) car Radio from Seicane.

2010 2011 VW Volkswagen Passat(MK7) car stereo after installation

2010 2011 VW Volkswagen Passat(MK7) car stereo after installation

Please note:

1.Before any work, park your car well and unplug the negative power cable to avoid any danger.

2.Please make sure that all fastened wires are isolated with electrical tape.

3.Please make sure the ignition is off to avoid short circuit.


  • 2010 2011 VW Volkswagen Passat(MK7) car Radioinstallation guide

Step1: Remove the trim panel.

Please pry around the trim panel with a lever and loosen the trim panel with one hand while prying.When the trim panel is loosened, please remove the trim panel off the dashboard and gently place it aside for further removal.


Step2: Remove the four screws on the radio.

Please unscrew the four screws at four corners.Then keep them well for the installation of a new head unit.

Step 2. Remove the four screws on the radio.

Step3: Take the factory radio out of the dash.

After the four screws are unscrewed, you can easily pull the factory radio out of the dash.

Step 3. Take the factory radio out of the dash.

Step4: Disconnect the wiring harness.

Please disconnect the wiring harness at the back of the factory radio before you put it aside.

Step 4. Disconnect the wiring harness.


Step 5: Connect the new Seicane stereo to the original wiring harness as the user manual or the wiring diagram shows.


Step 6: Turn on the new Seicane stereo to have a check if everything works well. Or please check whether all the cables are connected correctly.

Step 7: Put the new Seicane stereo into the dash and install the four screws.


Step 8: Install the trim panel into its original place.


  • According to the guide reference above , you may have a general idea about how to install a new aftermarket 2010 2011 VW Volkswagen Passat(MK7) car DVD player. You can ask the dealer or a professional for help if any questions. Meanwhile, it’s vital for you to confirm that your new Car GPS Navigation can fit your car. Also you can check the link below for more details about this modern 2010 2011 VW Volkswagen Passat(MK7) car Radio from Seicane.

https://www.seicane.com/android-dvd-radio-car-navigation-head-unit-for-2008-2013-vw-volkswagen-skoda-seat-with-3g-wifi-mirror-link-obd2-bluetooth

This high-end VW Volkswagen Passat(MK7) car Radio comes with come with the latest Android Radio, RAM 4GB \ ROM 64GB \ CPU 8-core \ Built-in Carplay \ 2.5D IPS Screen, Support RDS, SWC, XM radio APP ,etc. You can be on safe and delightful trips if simply sync with the smart phone,so that you are able to make and receive hands-free calls and stream music. Go ahead to take it right now and have a wonderful time from now on!