
The steady technology development makes it possible for people to enjoy the latest and the most advanced features with a certain amount of money. Nowadays, to have an ideal in-car environment and enjoy more convenience, more and more car owners choose to replace their factory radio with new multifunctional car radios. This article will introduce a 2006 2007 2008 2009 2010 2011 2012 Toyota Rav4 car radio installation instruction from Seicane. If you own the same car model, you can refer to this instruction carefully to help with your installation in the future.
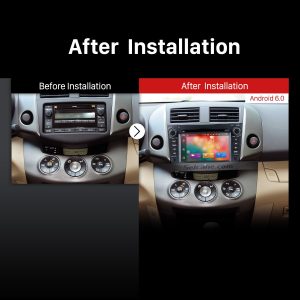
Before and during installation, you should notice:
1. Before connecting, please make sure the ignition is off to avoid short circuit.
2. Ensure connect the yellow and red power cable at last.
3. Ensure that all loose wires are isolated with electrical tape
4. Ensure don’t tangle the wire when tighten the moving parts(Such as seat rails).
5. Ensure that all ground is connected to the same place.
6. Using the improper fuse may cause damage of fire, so when replace the fuse, please consult the professional.
7. For your convenience, here’s the recommended tools for removal and installation from Seicane, please check for more details: http://www.seicane.com/car-dvd-dismantling-devicesrd-400
2009 2010 2011 2012 Toyota Rav4 car radio installation instruction
1. The original car radio.

2. Remove the panel by using plastic removal tool.

3. Unplug the hazard warning lights.
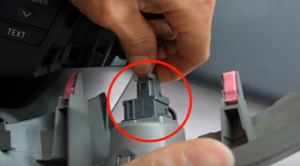
4. Remove the left panel and unplug the switch.

5. Unplug the switch.

6. Remove four screws.


7. Pull out the factory radio.

8. The back of the original car radio.

9. Remove 8 screws from original car radio.
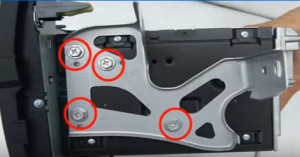

10. Remove 2 screws at the top of the new radio.


11. Install 8 screws to new car radio.

12. Plug into factory plugs.
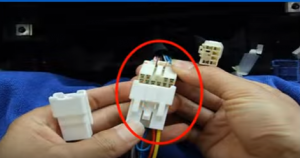
13. All plugs after connection.


14. Check all the accessories for the new Seicane car radio.

15. Connect the harnesses to the back of the new Seicane car radio.
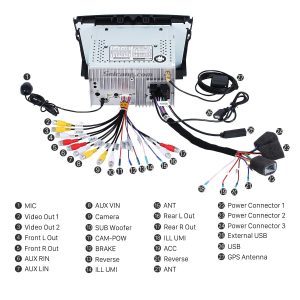
16. Connect the Seicane car radio to your original car radio ‘s plugs.
17. Turn on the new Seicane radio to have a careful check if everything works well. If it doesn’t, please check whether all the cables are connected correctly.
18. If the new Seicane car radio works well, put it into the dash.
19. Put everything into their original place, and all the installation is done.
Wish the above installation instruction can be helpful for you. If you have any doubts, just don’t hesitate to consult your dealer, communicate with someone experienced or turn to a professional for help. If you still think the installation process is too complicated for you to finish by yourself, you can also straightly go to a car radio upgrade center and ask a technician to help you install the new car radio. Moreover, if you are still looking for a suitable car radio but don’t know what kind of car radios can fit your car well, you might as well check out the following link which is a 2006 2007 2008 2009 2010 2011 2012 Toyota Rav4 car radio from Seicane.
Based on the stable Android 6.0 operation system, a powerful 8-core 1.5 GHz RK-PX5 A53 processor and 32 GB INand Flash as well as 2GB RAM, this car radio can provide its users with higher capacities and better performance.
When you are traveling around an unfamiliar place, even you have no good sense of directions, you can turn on the GPS function to find the right way to reach your destinations. Thanks to the high-accuracy 3D GPS navigation system, you are able to accurately arrive at your destinations by getting access to a lot of features, including landmark building display, 3D street view, destination search, turn-by-turn voice directions, etc. And thanks to dual zone function, you can freely enjoy your favorite music from radio/AV/DVD/TV etc under GPS mode.
If you like this car radio, just add it to your shopping cart. Good luck to you!

Recent Comments