One of good ways to improve driving experience is having a touch screen car radio system in your vehicle. That’s why I got my 2013 Buick Regal factory stereo upgraded. This Seicane Teals screen for 2013 Buick Regal makes my drive wonderful.

What are the benefits of using touch screen radio?
Compared to the old standard stereo, the big screen radio head unit brings various fantastic features and functions.
It’s equipped with 9.7″ HD touch screen, Android 10 system as well quality 8-core CPU, easy to operate and fast to response. With the 1024*768 resolution, you have a perfect viewing experience.
Provides high-speed WIFI/4G network, allowing you to easily get access to internet for online music listening, online videos watching, online games playing, e-mail checking etc., as long as you reach a WIFI hotspot or connect it to a 4G module.
There is built-in Carplay/Android Auto function. After connecting your phone to the radio via Carplay/Android Auto, the radio acts as the phone screen, you are able to use the phone map, phone book, phone music and more on the radio screen. This is the safest way to play phone when driving.
The unit can support rear view camera. When you reverse and park the car, the radio display will automatically switch to the parking images, you can check the rear situation clearly, avoiding any collision.
What’s more, with the large screen radio, you can use accurate navigation even offline.
How can we install the big screen radio to the car?
Following is a guide of installing a Tesla screen radio to 2013 Buick Regal.
– Toolbox: Plastic pry tools, screwdrivers, pliers, cable ties, tapes etc.
– Safety Tip: Cut off the car power before starting.
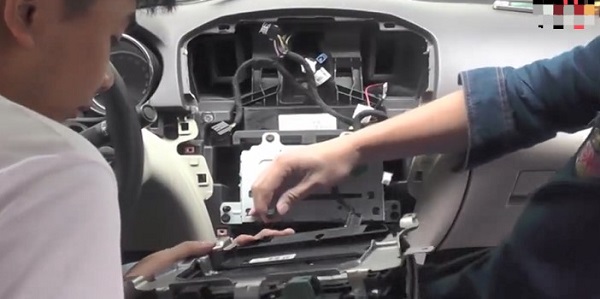
1, Firstly, use the plastic pry tool to remove the screen & A/C outlet structure, disconnect its plugs to the car.


2, Pry to remove the decorative frames on the left and right.


3, As well remove this small decorative piece.

4, Next, remove four screws that fixed the button panel. Take down the panel and unplug the connectors.


5, There are also four screws that fixed the main unit, remove them. Pull out the unit and unplug its connectors.


6, Remove the original A/C outlet.

7, And remove this button device.

8, As well as remove the original A/C control device of the button panel.

9, Now, install the A/C outlet, button and control device to the new Seicane radio head unit.

10, Correspondingly connect the Seicane radio to the car via the new cables.

11, Install the new radio to the dashboard, then turn on your car to test it. If it works well, install back all the car parts. If there is issue, you may need to check again the wiring condition. Ask the seller for assistance if you can’t handle the issues.


Recent Comments