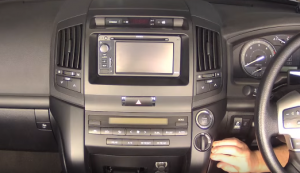
There is no denying that an ideal car radio can plays a very significant role in a car as a center practical and entertainment unit. If you are tired of your factory radio’s simple functions, you can find a related car radio installation guide to help you deal with the installation. Here I would like to share a 2007 2008 2009 2010 2011 2012 2013 Toyota Land Cruiser 200 car radio installation guide from Seicane with you. If you have the same or similar dashboard, you can read the following guide carefully. Wish you can get some help from it.

Some tips before the installation:
1.Please disconnect the power before the installation.
2.Please prepare a lever and a screwdriver before the removal and the installation.
3.Please keep all the separate parts from the car. Please take great care of the dashboard to avoid scratching it during its detachment and installation. Please keep handy any parts from the car and make use of all the original screws from the car as much as possible. so each related part of the unit can be fixed securely.
4.For your convenience, here’s the recommended tools for removal and installation from Seicane, please check for more details: http://www.seicane.com/car-dvd-dismantling-device-srd-400
2007 2008 2009 2010 2011 2012 2013 Toyota Land Cruiser 200 car radio installation steps
1. Remove the padded covers from the two sides of the lower section at the center of the dash.


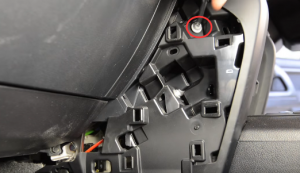
2. Next remove the silver Philips-head screw at the top and unclip the plastic retainer at the bottom of each side cover.

3. Remove the side covers by pulling them towards the rear of the vehicle and slightly outwards.


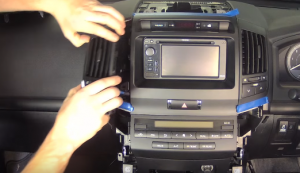
4. Carefully remove the top cover by using a plastic flat removal tool.
5. Remove the air conditioning vents, and then disconnect the temperature control wires.

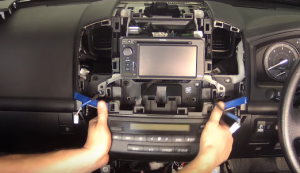
6. Remove the radio fascia and disconnect the wires at the back of it.

7. Pull out the lower segment containing the ashtray and power outlets.
8. Remove the air conditioning control and display section and its wiring connector.


9. Remove screws that fix the radio on the dashboard.
10. Disconnect the connectors at the back of the radio.
11. Check all the accessories for the new Seicane car radio.
12. Connect the harnesses to the back of the new Seicane car radio.
13. Connect the Seicane car radio to your original radio’s plugs.
14. Turn on the new Seicane car radio to have a careful check if everything works well. If it doesn’t, please check whether all the cables are connected correctly.
15. Put the new Seicane car radio into the dash.
16. Put everything into their original place.
Wish you can learn some skills from the above installation instruction. If there are any difficulties you met and don’t know how to overcome, you can seek help from your dealer, someone experienced or a professional. If you still think it hard for you to finish the whole installation process, you can directly arrange a professional technician to help you install the new car radio.
However, if you are still searching for an ideal car radio for your car, you can check out the following link which is a remarkable 2007 2008 2009 2010 2011 2012 2013 Toyota Land Cruiser 200 car radio from Seicane.
This car radio is running on the most stable Android 6.0 operation system, a powerful 8-core 1.5 GHz RK-PX5 A53 processor and 32GB Inland flash as well as 2GB RAM. It comes with a wide range of practical and entertainment features to meet with your different requirements, mainly including 3D GPS navigation system, FM/ AM radio tuner, Bluetooth hands-free calls, Bluetooth streaming music, DVD player, steering wheel control, USB connection, etc. Making full use of these upgraded and new features allows you to enjoy a lot of convenience and enjoyment.
Apart from these main features, you can also add some optional features to this unit, like as car DVR, OBD2, DAB, backup camera, TPMS, etc. For instance, you can add a backup camera to this unit for automatically switching to the parking image while reversing, which is good for your driving safety.
Wish you enjoy your wonderful trip accompanied with this unit and good luck to you!

Recent Comments