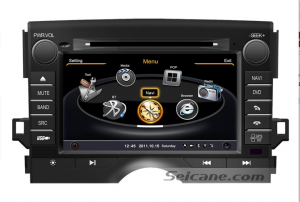
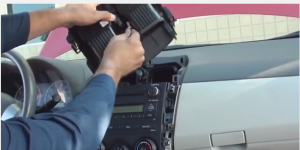
Are you familiar with this image:navigation dvd car stereo of 2010 Toyota Raze?

Some of you may have seen this stereo when you are shopping in the car market,you want to take one home but you have no idea how to install it in your 2010 Toyota Raze.Or in other words,you don’t know how to remove original radio first.Doesn’t matter,today I will show you 10 steps on how to install 2010 Toyota Raze navigation system with radio IPod 3-zone POP.
It’s very easy to confirm information of cars like mode,size, years and so on,but if it’s about the detailed steps to mount a car audio system?Maybe very few people knows.
Before you upgrade your car’s stereo audio,you should ensure that the instructions for it are exactly right.And the general process can be like this:
1.Choose one unit that can be installed in your car.
2.Trying to collect precise installation guide from the Internet,TV,magazine or other media routes.
3.Chatting with workers who serves in this market and tell them what your doubt is about is one of ways that is normally used.And you may visit this website to get what you want by scanning and talking with them:http:http://www.seicane.com/8-inch-2010-toyota-raze-autoradio-gps-head-unit-3g-wifi-cd-dvd-player-dvr-bluetooth-music-tv-tuner-aux-steering-wheel-control-ipod-iphone-backup-camera-mp3-pop-c084.
If you hope to make your Toyota Raze cd player removal and dvd player installation more precise and safer, here are some advices about the installation and usage of the unit:
Precautions about the installation:
Please use your finger or touch screen pen to gently operate unit, do not use other objects include your fingers, if not it will cause damage to the screen;
Don’t do self-service,maintenance or install the unit please when you have no experience or knowledge about it,in case of the power is on.
2010 Toyota Raze factory stereo removal:
1.Before you start installation, remove negative terminal of battery
2.Unclip side panels from lower center console(beside shifter) with a panel removal tool

3.Use remove the plastic piece that’s contains the shifter override with a small flat blade screwdriver

4.Insert key into override move in gear and get out shift benzal piece

4.Remove 2 screws as the picture show

5.Take the below small dashboard out

6.Use a panel removal tool to unclip side panels from radio

7.Take out air vent and pull out hazard switch


8.This is 10mm hex head screws from stereo

9.Unclip connectors of the stereo and remove

2010 Toyota Raze aftermarket navigation installation:
10.Make connections on all the cables correctly and install the dvd navigation head unit in your car
Connecting all cables of Toyota Raze navigation installation is a work that you should be more careful because it is more complex than other steps itself and there are much fine wires.If you are not very sure about it,I suggest you to do it according to corresponding instructions,check it once again after you have finished it.Or you can ask someone to help you,who is professional at it and can make your work more perfect.
And I wrote another article which is about Toyota Verso radio
,hope you can get something that benefits you from it.

Recent Comments