Top Remove and Upgrade tutorial for a 2004 2005 2006 2007-2010 Toyota Sienna GPS Navigation Bluetooth WIFI Car Stereo

2004 2005 2006 2007 -2010 Toyota Sienna Car Stereo after installation

There is no doubt that a car radio can play a very significant part in driving experience. If you are not so satisfied with your outdated factory radio due to its simple functions, it is suggested that you should upgrade your factory radio by installing a new aftermarket car stereo. To achieve the whole installation process, you need a detailed installation instruction to guide you. Here I would like to share an easy-to-understand installation instruction on a 2004 2005 2006 2007-2010 Toyota Sienna car stereo from Seicane with you. Wish you can get some help from this instruction.

2004 2005 2006 2007 -2010 Toyota Sienna Car Stereo after installation

Some tips before the installation:

1. Please disconnect the power before the installation.

2. Please prepare a lever and a screwdriver before the removal and the installation.

3. Please keep all the separate parts from the car. Please take great care of the dashboard to avoid scratching it during its detachment and installation. Please keep handy any parts from the car and make use of all the original screws from the car as much as possible. so each related part of the unit can be fixed securely.

4. For your convenience, here’s the recommended tools for removal and installation from Seicane, please check for more details: http://www.seicane.com/car-dvd-dismantling-device-srd-400


2004 2005 2006 2007-2010 Toyota Sienna car stereo installation instruction

1. The original car radio for 2004-2010 Toyota Sienna.

The original car radio for 2004-2010 Toyota Sienna

2. Use a flat-head screwdriver or a flat pry tool to pry up the vertical panels of the right and left side of the original car radio and climate control system.

Use a flat-head screwdriver or a flat pry tool to pry up the vertical panels of the right and left side of the original car radio and climate control system

3. Disconnect the wiring from the side panels. There are two wiring connectors on the left panel and only one connector on the right panel. Please carefully press the tab to release the connectors.

Disconnect the wiring from the side panels. There are two wiring connectors on the left panel and only one connector on the right panel. Please carefully press the tab to release the connectors
3-1
3-1

4. Remove the center channel speaker grill panel above the car radio. Please use a pry tool or a flat head screwdriver to pry up the top (center channel speaker) panel above the car radio and then remove it.

Remove the center channel speaker grill panel above the car radio. Please use a pry tool or a flat head screwdriver to pry up the top (center channel speaker) panel above the car radio and then remove it
4-1
4-1

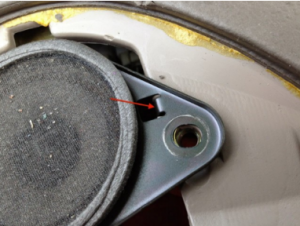
5. Remove the center speaker. There are two 10mm hex head nuts securing the center speaker, so you need to use a 10-mm Hollow-Shank nut screwdriver to remove these two bolts.

Remove the center speaker. There are two 10mm hex head nuts securing the center speaker, so you need to use a 10-mm Hollow-Shank nut screwdriver to remove these two bolts

6. Disconnect the speaker wiring harness. Please press the tab down so as to release the wiring connector, and then set the speaker and bolts aside.

Disconnect the speaker wiring harness. Please press the tab down so as to release the wiring connector, and then set the speaker and bolts aside

7. Remove the 4 10mm hex head nuts from the car radio. There are 4 bolts holding the car radio in the dash (2 on each side). Please use a screwdriver to remove these four bolts.

Remove the 4 10mm hex head nuts from the car radio. There are 4 bolts holding the car radio in the dash (2 on each side). Please use a screwdriver to remove these four bolts
7-1
7-1

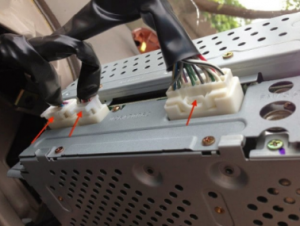
8. Gently pull the original car radio out of the dash and then disconnect the wiring from the original car radio. Then put the original car radio aside.

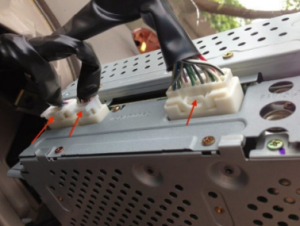
Gently pull the original car radio out of the dash and then disconnect the wiring from the original car radio. Then put the original car radio aside
8-1
8-1

9. If necessary, please remove the left and right radio mounting brackets to install on the new Seicane car radio.

If necessary, please remove the left and right radio mounting brackets to install on the new Seicane car radio

10. Check all the accessories for the new Seicane car radio.

Check all the accessories for the new Seicane car radio

11. Connect the harnesses to the back of the new Seicane car radio.

Connect the harnesses to the back of the new Seicane car radio

12. Connect the Seicane car radio to your original car radio’s plugs.

Connect the Seicane car radio to your original car radio's plugs
Connect the Seicane car radio to your original car radio’s plugs

13. Gently place the new Seicane car radio into the opening of the dash and test it.

14. Re-seat the stereo in the dash and reinstall the 4 bolts.

15. Carefully reconnect the center speaker and reinstall the 2 bolts.

Carefully reconnect the center speaker and reinstall the 2 bolts

16. Carefully reinstall top center channel speaker grill panel.

Carefully reinstall top center channel speaker grill panel

17. Reconnect all the electrical connectors and then reinstall the left and right side panels.


Don’t worry if you encounter any problems before or during the installation. To deal with these problems, you can try to seek help from your dealer, someone experienced or turn to a professional for help. If you still think it hard for you to remove your factory radio and install the new car radio, you can directly go to a car radio upgrade center and arrange a professional technician to help you install the new car radio. Anyway, it is essential for you to select an ideal car radio before installation, if you have no ideas, here I would like to recommend a remarkable 2004 2005 2006 2007-2010 Toyota Sienna car stereo from Seicane to you. Wish you will like it. For more details, please click:

https://www.seicane.com/android-gps-navigation-system-for-2004-2010-toyota-sienna-with-dvd-player-backup-camera-hd-touch-screen-3g-wifi-steering-wheel-control-bluetooth-s063812y

With this remarkable car radio installed in your car, your driving experience will absolutely be taken up a notch. This car radio is loaded with the most advanced Android 8.0 operations system and a powerful eight-core CPU processor, which will enables you to have a much smoother, faster and easier operation experience.

Under the guidance of the turn-by-turn directions and voice prompts provided by the worldwide real-time GPS navigation system, this unit enables you to easily locate where you are and help you find the right way to get to any locations you would like to go to. And this unit also comes with dual zone function, which enables you to listen to your favorite music while navigating.

Additionally, you are able to dial, receive, reject and mute Bluetooth hands-free phone calls as well as listen to Bluetooth streaming music from your phone music playlist as long as you connect your Bluetooth-enabled mobile phone to this unit.

Wish you like this car radio. Good luck!

How to Easily Upgrade a 2004 2005 2006 2007 2008-2010 Toyota Sienna Car Radio with Bluetooth GPS DVD Player Function

2004 2005 2006 2007 2008-2010 Toyota Sienna Car Radio after installation

Do you have a 2004 2005 2006 2007 2008-2010 Toyota Sienna? And would you like to create a more convenient and relaxing in-car environment as well as embrace a brand new driving experience? If your answer is “yes”, then you can think about replacing your factory radio with a new aftermarket car radio. The following is a 2004 2005 2006 2007 2008-2010 Toyota Sienna car radio installation instruction from Seicane, which can be taken as your reference.

2004 2005 2006 2007 2008-2010 Toyota Sienna Car Radio after installation

Before and during installation, you should notice:

1. Before connecting, please make sure the ignition is off to avoid short circuit.

2. Ensure connect the yellow and red power cable at last.

3. Ensure that all loose wires are isolated with electrical tape

4. Ensure don’t tangle the wire when tighten the moving parts(Such as seat rails).

5. Ensure that all ground is connected to the same place.

6. Using the improper fuse may cause damage of fire, so when replace the fuse, please consult the professional.

7. For your convenience, here’s the recommended tools for removal and installation from Seicane, please check for more details: http://www.seicane.com/car-dvd-dismantling-device-srd-400

2004 2005 2006 2007 2008-2010 Toyota Sienna car radio installation instruction

1. The original car radio for 2004-2010 Toyota Sienna.

The original car radio for 2004-2010 Toyota Sienna

2. Use a flat-head screwdriver or a flat pry tool to pry up the vertical panels of the right and left side of the original car radio and climate control system.

Use a flat-head screwdriver or a flat pry tool to pry up the vertical panels of the right and left side of the original car radio and climate control system

3. Disconnect the wiring from the side panels. There are two wiring connectors on the left panel and only one connector on the right panel. Please carefully press the tab to release the connectors.

Disconnect the wiring from the side panels. There are two wiring connectors on the left panel and only one connector on the right panel. Please carefully press the tab to release the connectors
3-1
3-1

4. Remove the center channel speaker grill panel above the car radio. Please use a pry tool or a flat head screwdriver to pry up the top (center channel speaker) panel above the car radio and then remove it.

Remove the center channel speaker grill panel above the car radio. Please use a pry tool or a flat head screwdriver to pry up the top (center channel speaker) panel above the car radio and then remove it
4-1
4-1

5. Remove the center speaker. There are two 10mm hex head nuts securing the center speaker, so you need to use a 10-mm Hollow-Shank nut screwdriver to remove these two bolts.

Remove the center speaker. There are two 10mm hex head nuts securing the center speaker, so you need to use a 10-mm Hollow-Shank nut screwdriver to remove these two bolts

6. Disconnect the speaker wiring harness. Please press the tab down so as to release the wiring connector, and then set the speaker and bolts aside.

Disconnect the speaker wiring harness. Please press the tab down so as to release the wiring connector, and then set the speaker and bolts aside

7. Remove the 4 10mm hex head nuts from the car radio. There are 4 bolts holding the car radio in the dash (2 on each side). Please use a screwdriver to remove these four bolts.

Remove the 4 10mm hex head nuts from the car radio. There are 4 bolts holding the car radio in the dash (2 on each side). Please use a screwdriver to remove these four bolts
7-1
7-1

8. Gently pull the original car radio out of the dash and then disconnect the wiring from the original car radio. Then put the original car radio aside.

Gently pull the original car radio out of the dash and then disconnect the wiring from the original car radio. Then put the original car radio aside
8-1
8-1

9. If necessary, please remove the left and right radio mounting brackets to install on the new Seicane car radio.

If necessary, please remove the left and right radio mounting brackets to install on the new Seicane car radio

10. Check all the accessories for the new Seicane car radio.

Check all the accessories for the new Seicane car radio

11. Connect the harnesses to the back of the new Seicane car radio.

Connect the harnesses to the back of the new Seicane car radio

12. Connect the Seicane car radio to your original car radio’s plugs.

Connect the Seicane car radio to your original car radio's plugs
Connect the Seicane car radio to your original car radio’s plugs

13. Gently place the new Seicane car radio into the opening of the dash and test it.

14. Re-seat the stereo in the dash and reinstall the 4 bolts.

15. Carefully reconnect the center speaker and reinstall the 2 bolts.

Carefully reconnect the center speaker and reinstall the 2 bolts

16. Carefully reinstall top center channel speaker grill panel.

Carefully reinstall top center channel speaker grill panel

17. Reconnect all the electrical connectors and then reinstall the left and right side panels.


Wish you can succeed in the whole upgrade process of this unit. If you have any doubts, you can consult your dealer for seeking advice or turn to a professional for help. Anyway, first of all, please select an ideal car radio for your beloved car. If you don’t have any ideas, I’d like to recommend a great 2004 2005 2006 2007 2008-2010 Toyota Sienna car radio from Seicane to you. For more details, please click:

https://www.seicane.com/oem-android-2004-2010-toyota-sienna-radio-dvd-gps-navigation-system-with-bluetooth-hd-touchscreen-mirror-link-4g-wifi-aux-dvr-1080p-dab-tpms-backup-camera-s166205

This great car radio, featured with the intelligent Android 7.1 operation system and a high-quality quad-core CPU processor, enables you to enjoy its fast response, smooth operation and high performance.

Thanks to the turn-by-turn directions and voice prompts provided by the 3D GPS navigation system, you can easily know your current locations and navigate to your desired destinations. And with dual zone function, this unit enables you to listen to your favorite music while navigating. And the music can automatically switch to GPS voice.

Additionally, this unit also comes with some entertainment features to add a lot of fun to your driving.

Wish you like this unit and good luck to you.