Look at the picture shown below, it’s the 1998-2004 Mercedes Benz CLK Class C209 bluetooth dvd gps radio after installation from Seicane. If you are the car owner of the Mercedes Benz CLK Class, this passage is worth for you to read it. I’d like to share a detailed installation guide for it and wish you can learn something from that.

Some tips before the installation:
1.Please disconnect the power before the installation.
2.Please prepare a lever and a screwdriver before the removal and the installation.
3.Please keep all the separate parts from the car. Please take great care of the dashboard to avoid scratching it during its detachment and installation. Please keep handy any parts from the car and make use of all the original screws from the car as much as possible. so each related part of the unit can be fixed securely.
4.For your convenience, here’s the recommended tools for removal and installation from Seicane, please check for more details: http://www.seicane.com/car-dvd-dismantling-device-srd-400
1998-2004 Mercedes Benz CLK Class C209 bluetooth dvd gps radio installation guide
1. First detach the gear shift panel.

2. Remove the car charger and ashtray.

3. Use a screw driver to remove the screws under the A/C.

4. Pry the air conditioner panel out with a plastic lever.

5. Remove the original air conditioner panel.

6. Remove the heated seat and control panel assembly.

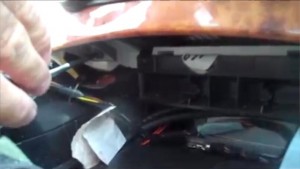
7. Remove the screws holding the radio.

8. Pull out the original car radio.

9. Disconnect the original harness.

10. Check all the accessories for the new Seicane car radio.

11. Connect the harnesses to the back of the new Seicane car radio.

12. Connect the Seicane car radio to your original car radio ‘s plugs.
13. Turn on the new Seicane radio to have a careful check if everything works well. If it doesn’t, please check whether all the cables are connected correctly.
If you can’t understand the steps above, you can turn to the dealer to ask for help. Or arrange the professional to install it. Before the installation, the most important thing is find the suitable car stereo for your car. If you are still looking for one, I’d like to recommend the newest 1998-2004 Mercedes Benz CLK Class C209 bluetooth dvd gps radio from Seicane to you as reference.
Featured with 3D high precision GPS and advanced Audio streaming via A2DP Bluetooth system, this multifunctional head unit enables you to enjoy the accurate guidance as well as play music from a mobile phone and make phone calls in the car easily. This amazing 1998-2004 Mercedes Benz CLK Class C209 bluetooth dvd gps radio is right choice for you and your car!
